Derelict Depot

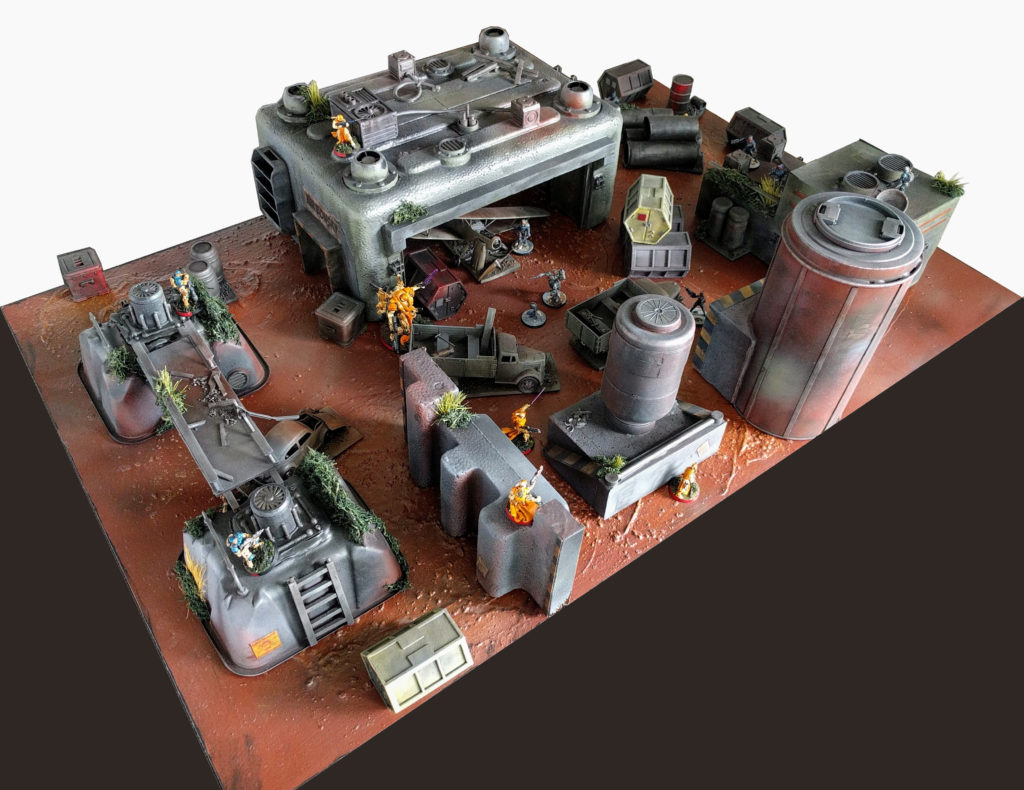
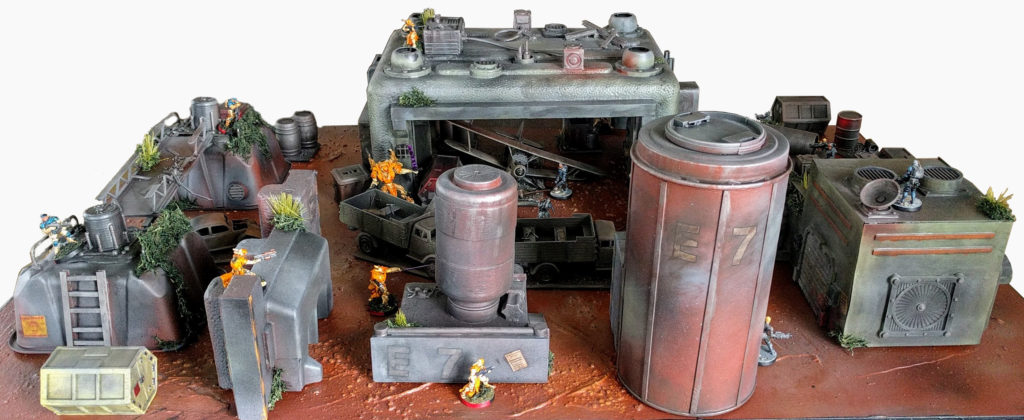
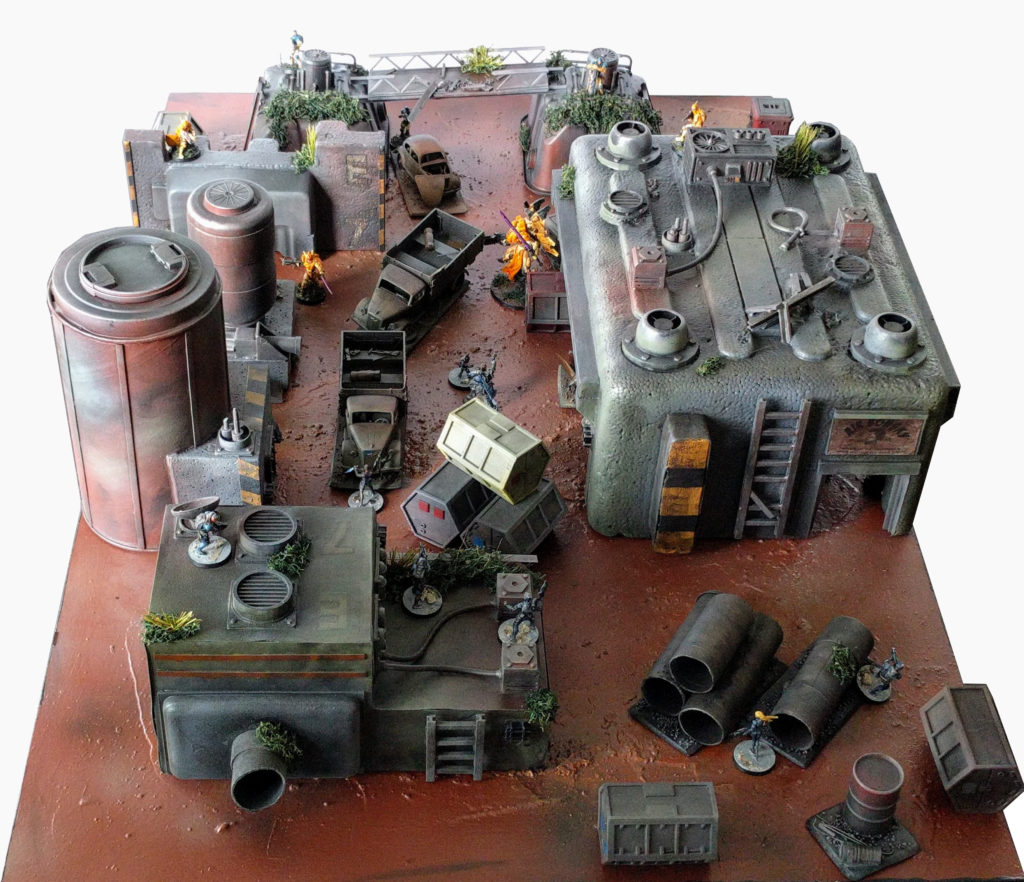
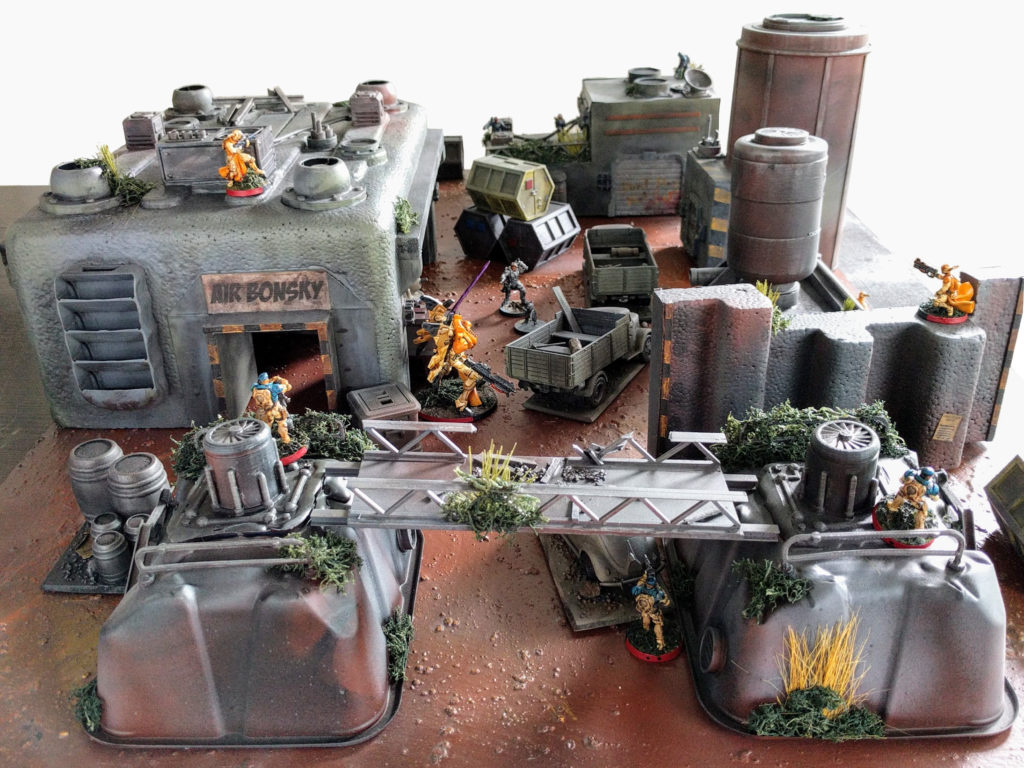
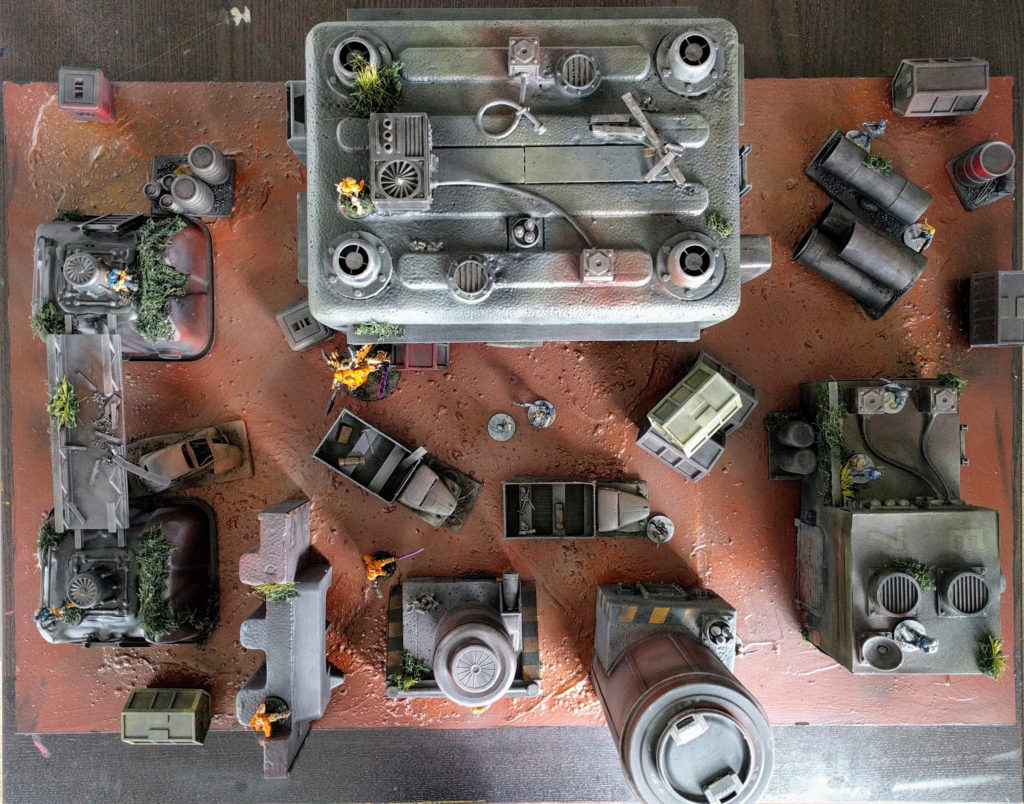
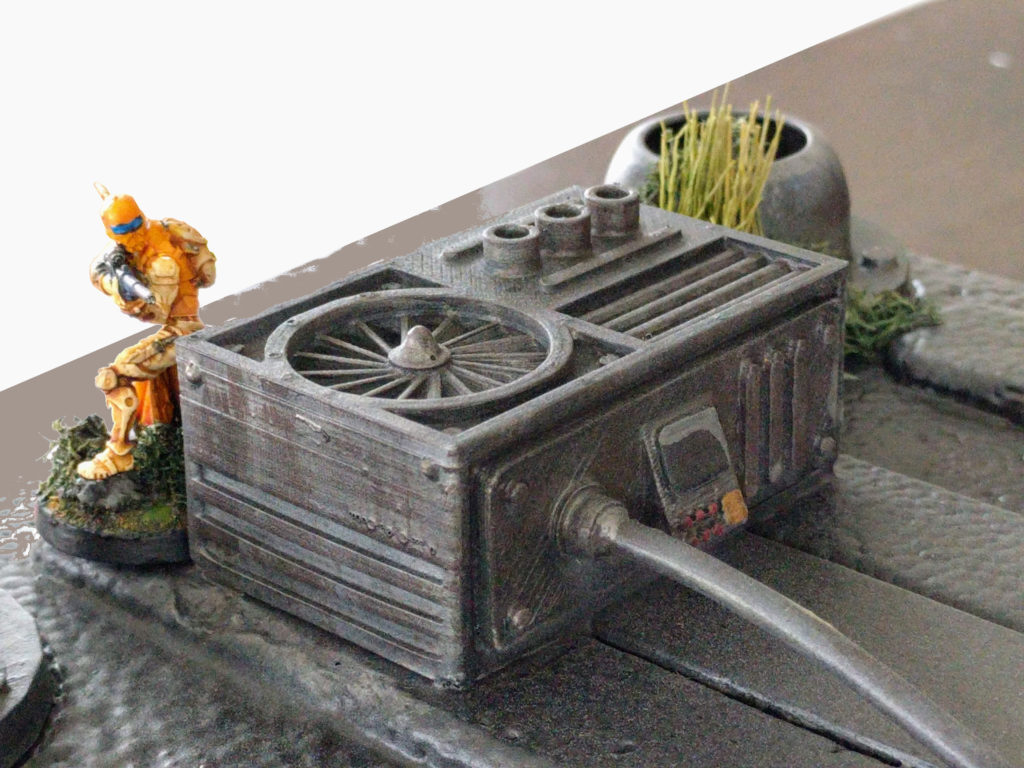
Battle breaks out amid the newly completed Derelict Depot!

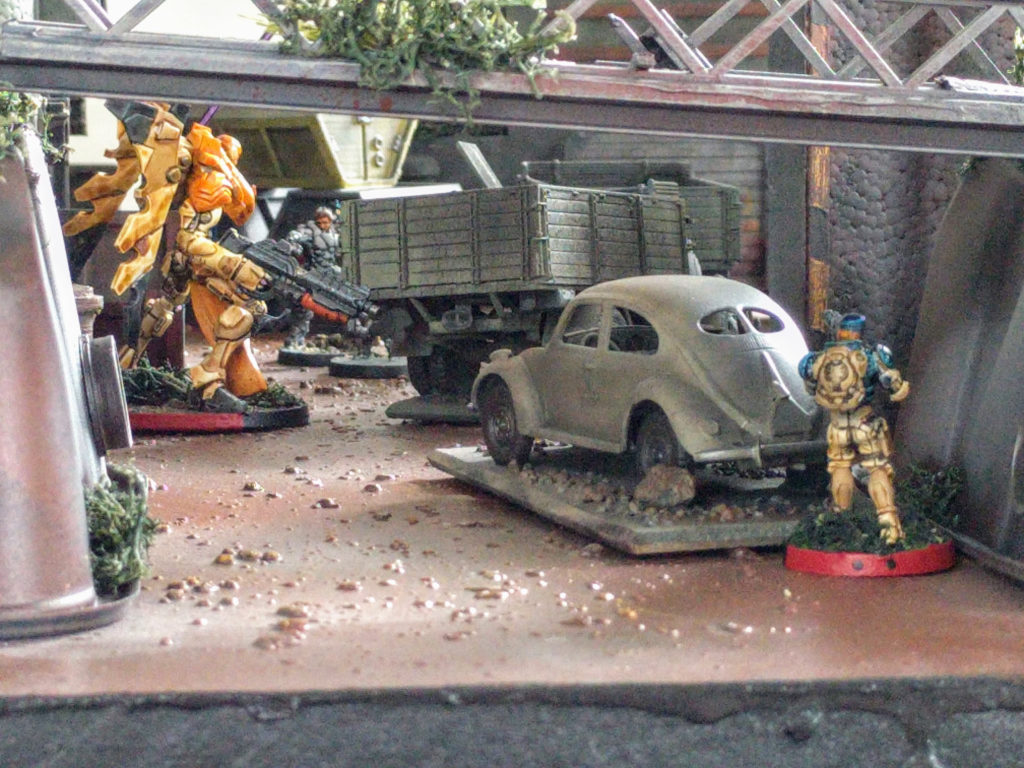
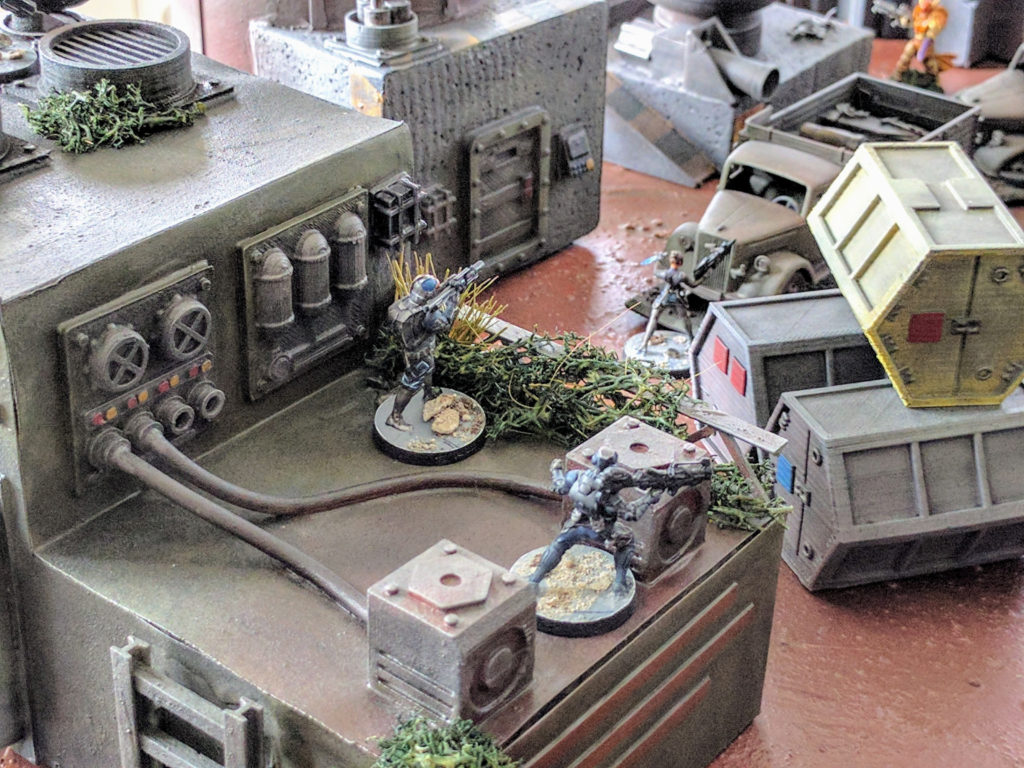
Advancing through the wreckage.

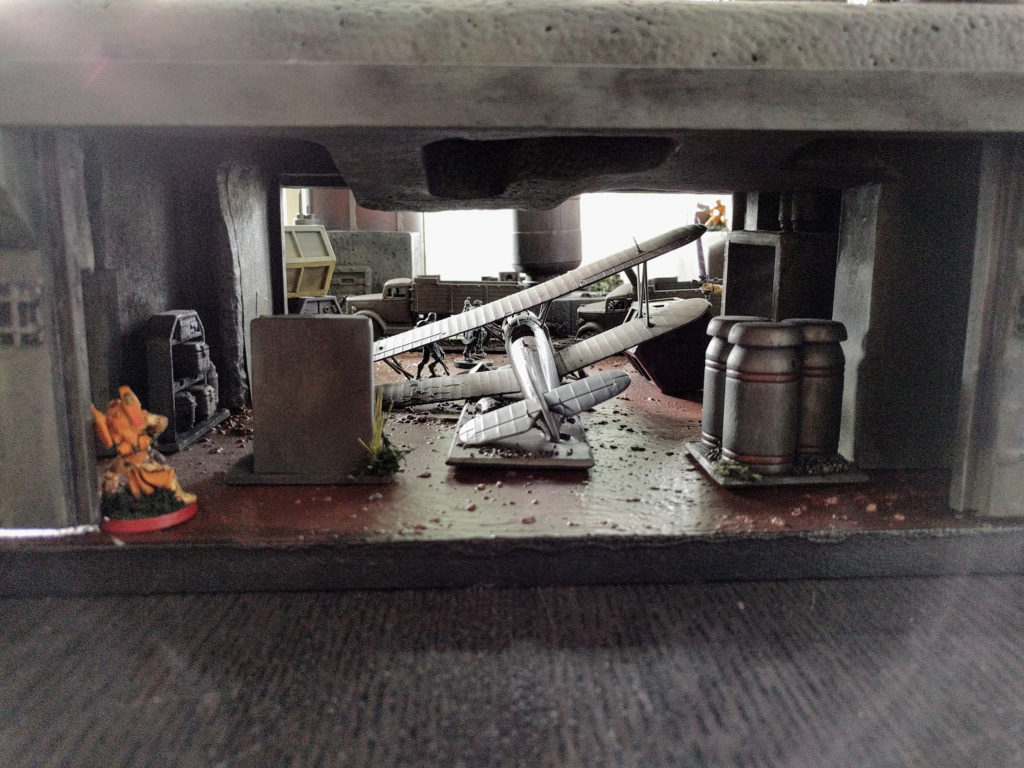
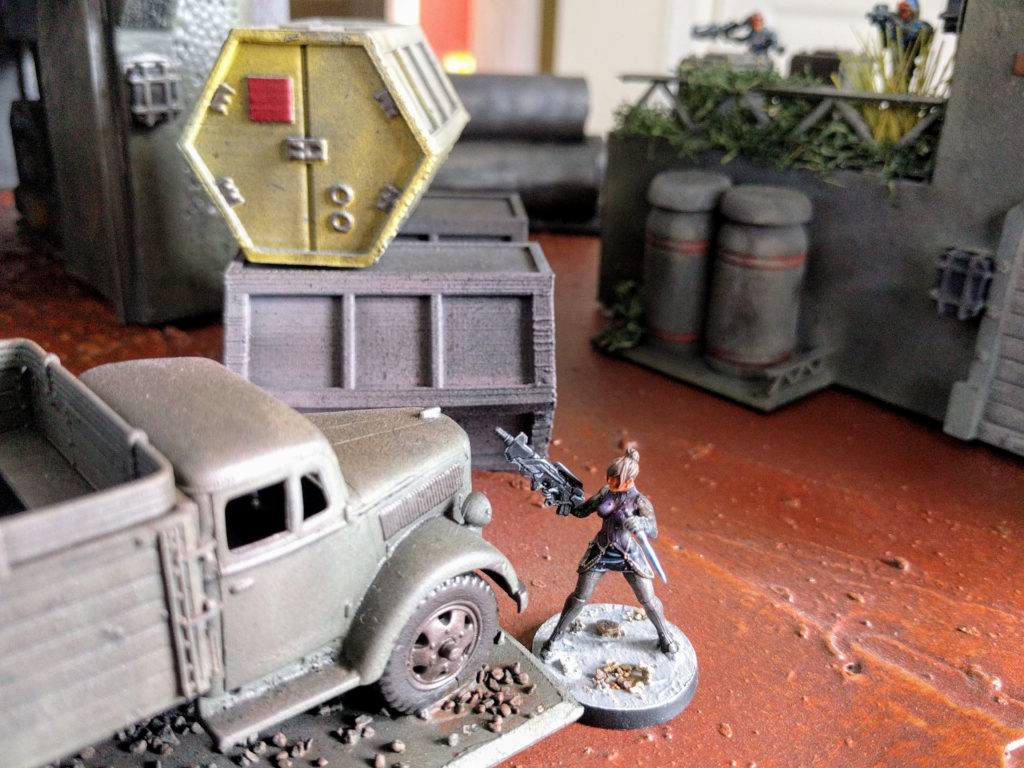
Looking out from the abandoned garage.

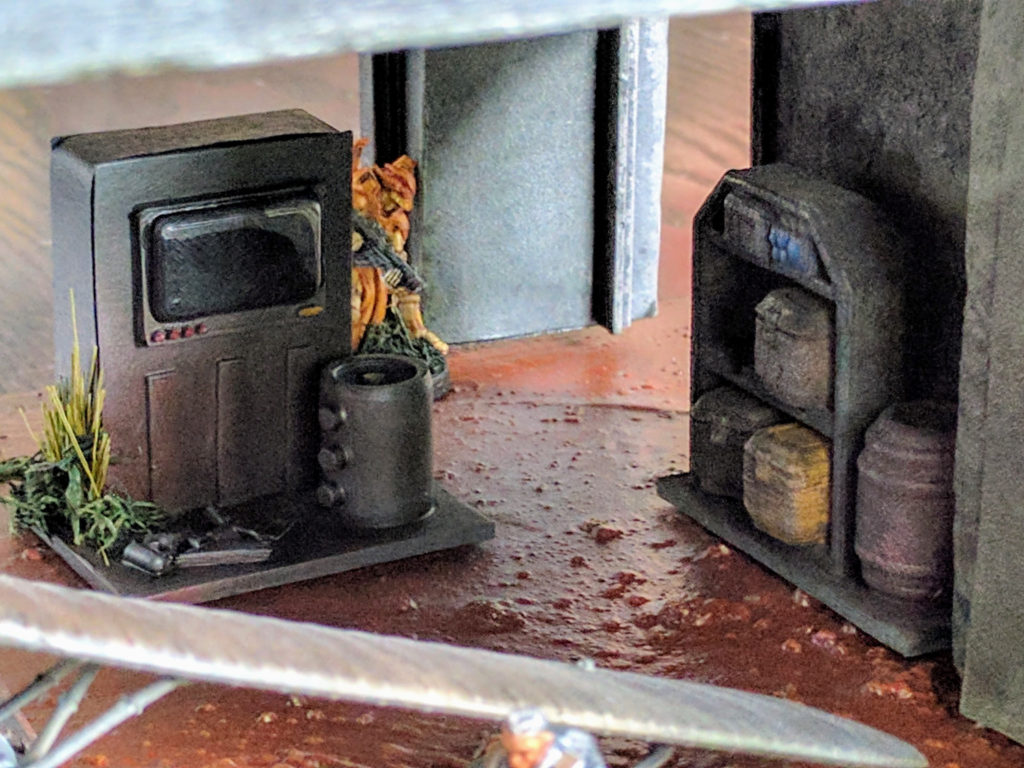
Lurking in the shadows.

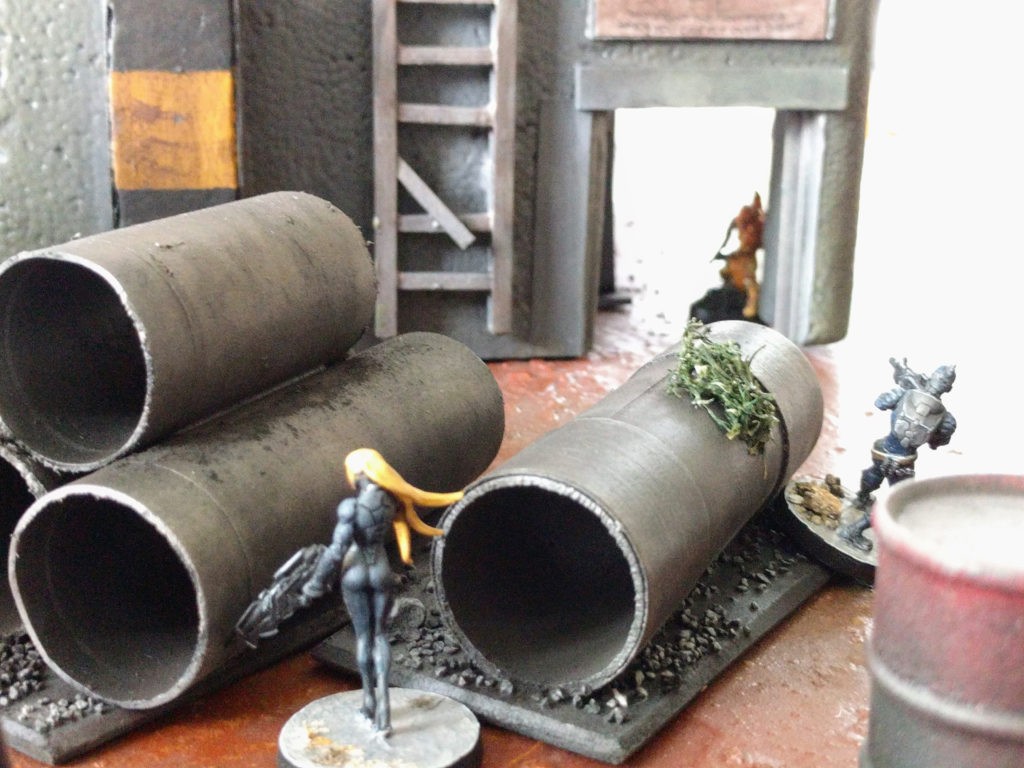
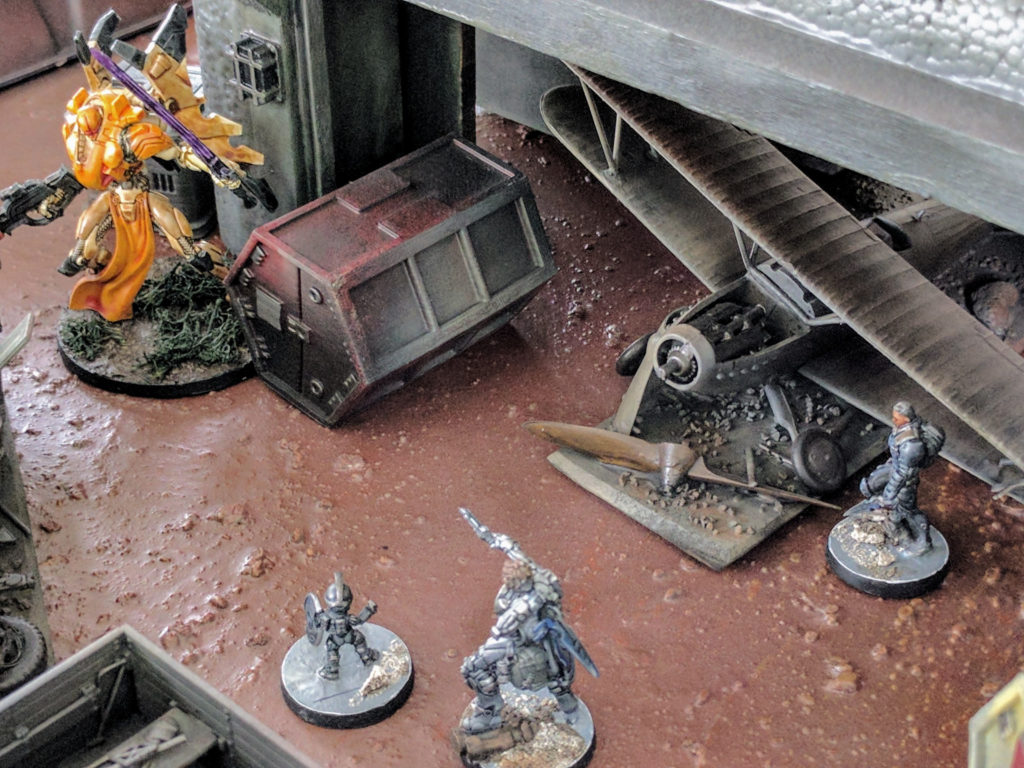
Moving through the scrapyard.

Garrisoning the mechanical building.

Scouting for trouble.

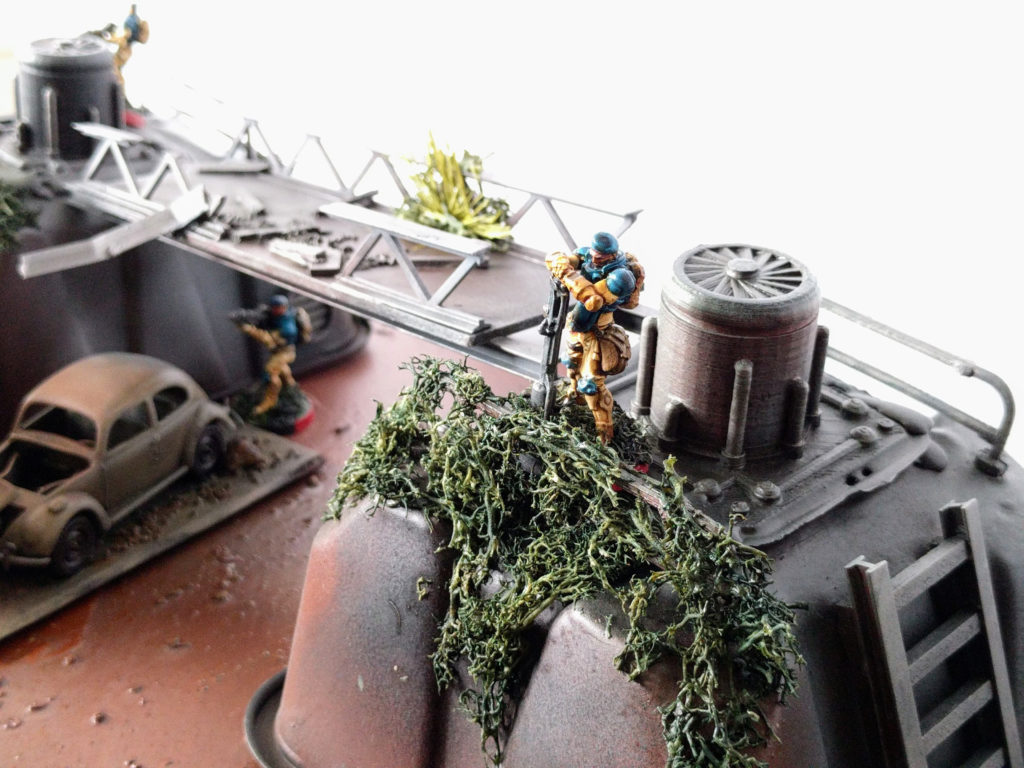
Overlooking the battle.

Showdown at the depot nexus!

Derelict Depot

The Derelict Depot is a board I put together for RECON+, essentially half-size games of Infinity, but it should work for a variety of skirmish games. It’s a mix of scratchbuilding, scale models, and 3D printing. More details on its creation are here:

I designed all of the 3D printed parts. Many of them are already available as free downloads in my Thingiverse collection.

The armies fighting it out here are my Military Orders and Aleph painted by Tim D.

The first step: Putting down some initial ideas.

3D printed and scratchbuilt elements.

Construction complete!

Base coating.

Painting details.

The final board!

Narrative

The story of this terrain is something like:

Early in the colonization of Ariadna, Depot E-7 was a supply outpost used by militias fighting the antipodes on the fringe of the settled area. As the border expanded outward and it was no longer militarily useful, a bold, risk-taking entrepreneur began using it as a base for an air courier service. Given the harsh conditions, limited technology, and few resources available to the colonists, its equipment was all based on very old and simple technology easy to construct and maintain. The service provided an important link ferrying supplies, messages, and people over the dangerous ground between the new, far flung settlements popping up as the colony grew rapidly. Later though the depot was overrun as its region collapsed in one of the periodic waves of antipode fighting. Although abandoned since then, it has recently come to be occasionally used as a waypoint or temporary base by various special forces teams operating on Ariadna.

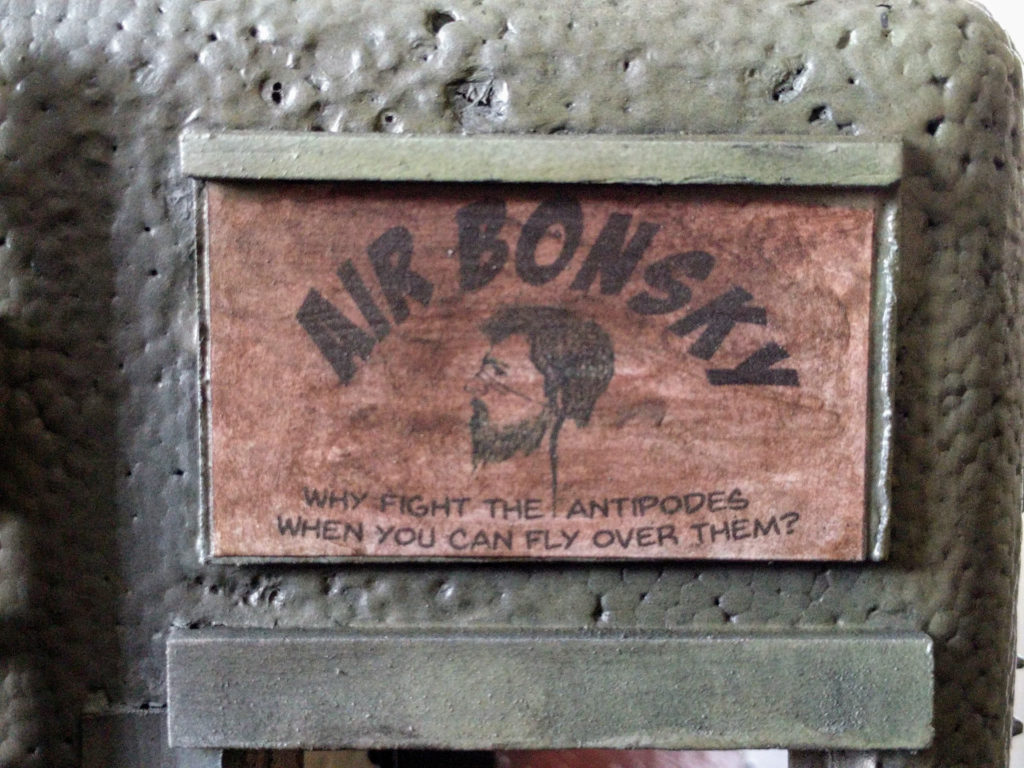
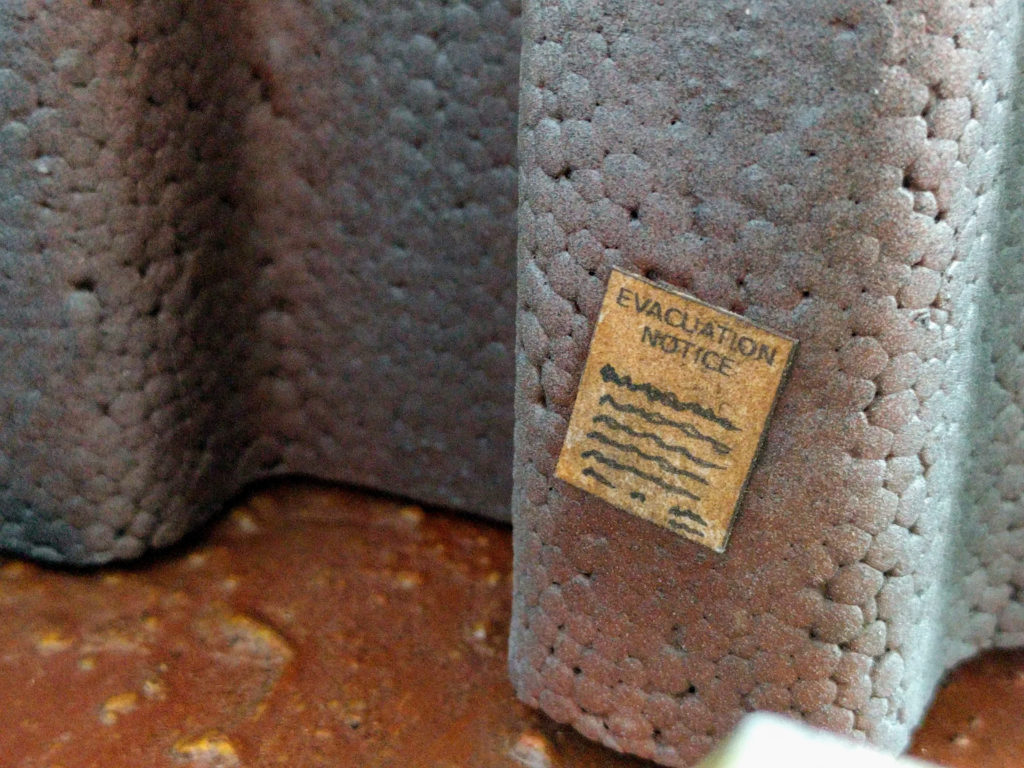
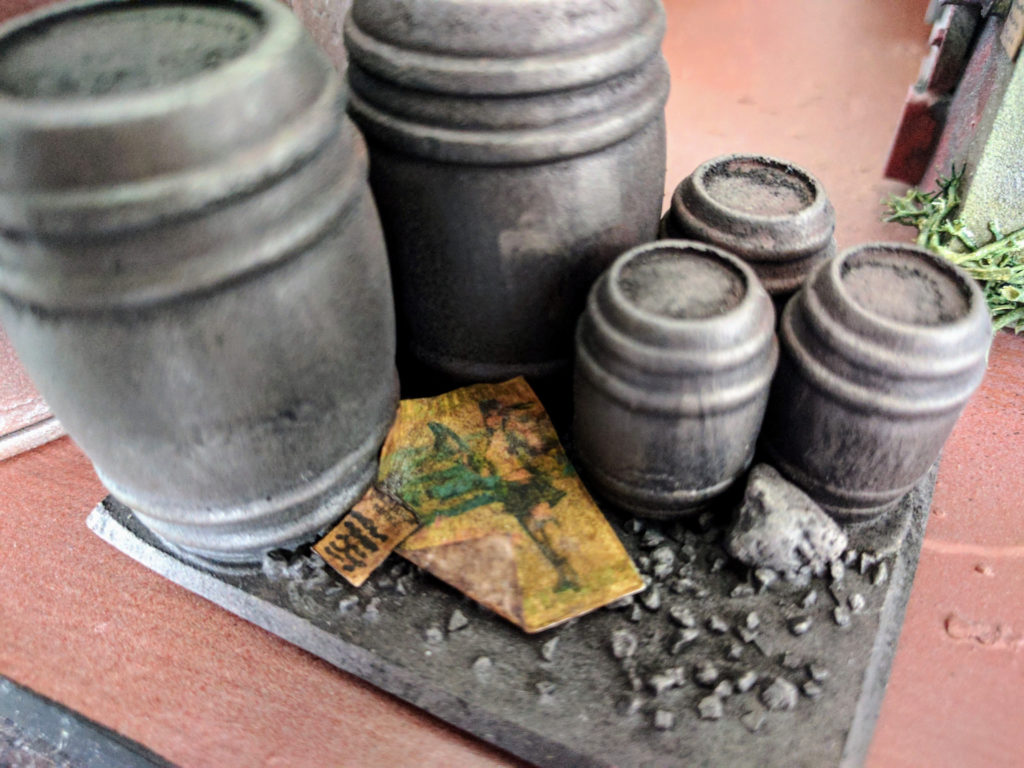
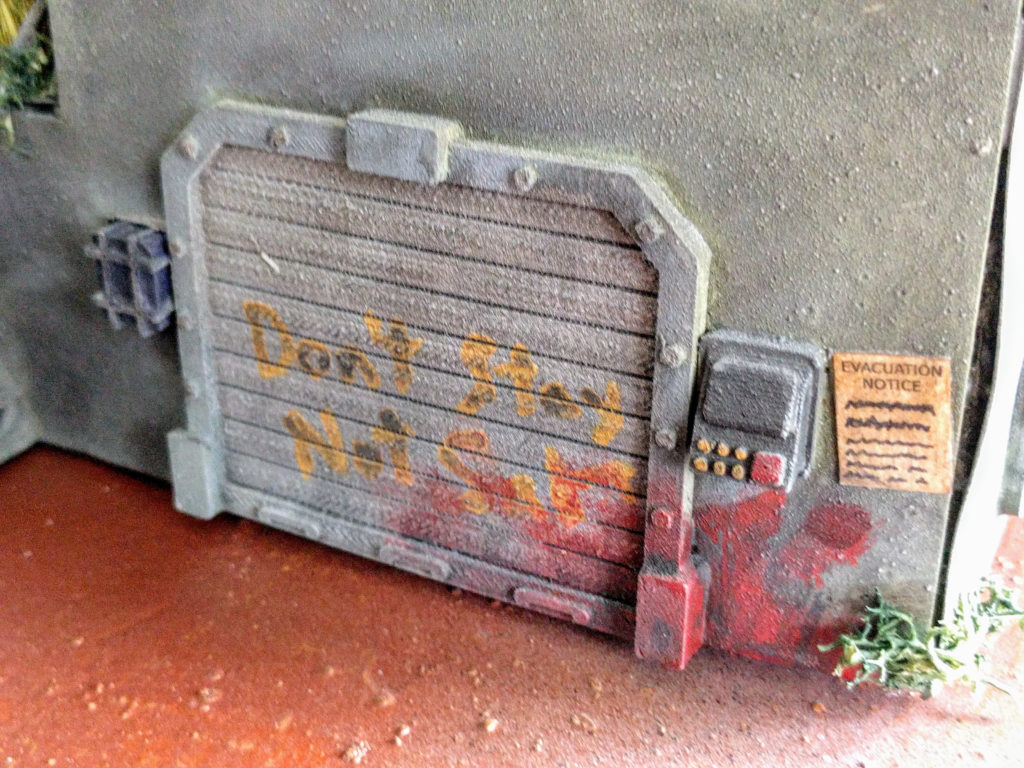
The board is of course designed overall to feel abandoned and disused, but particulars of that story are captured in details here and there: Signage declares the garage to be the home of the “Air Bonsky” courier service (Bonsky being our local lead Infinity TO); militia recruitment and “EVACUATION NOTICE” posters are scattered about on some of the walls and littered on the floor; blood spatters mark where the last defender was caught when the base was overrun; a walkway has been twisted and burnt by high explosives in more recent fighting. It’s not much of a story, but it was just enough to generate some unique, cohesive imagined micro-vignettes and details to add flavor.

Air Bonsky: Why fight the antipodes when you can fly over them?

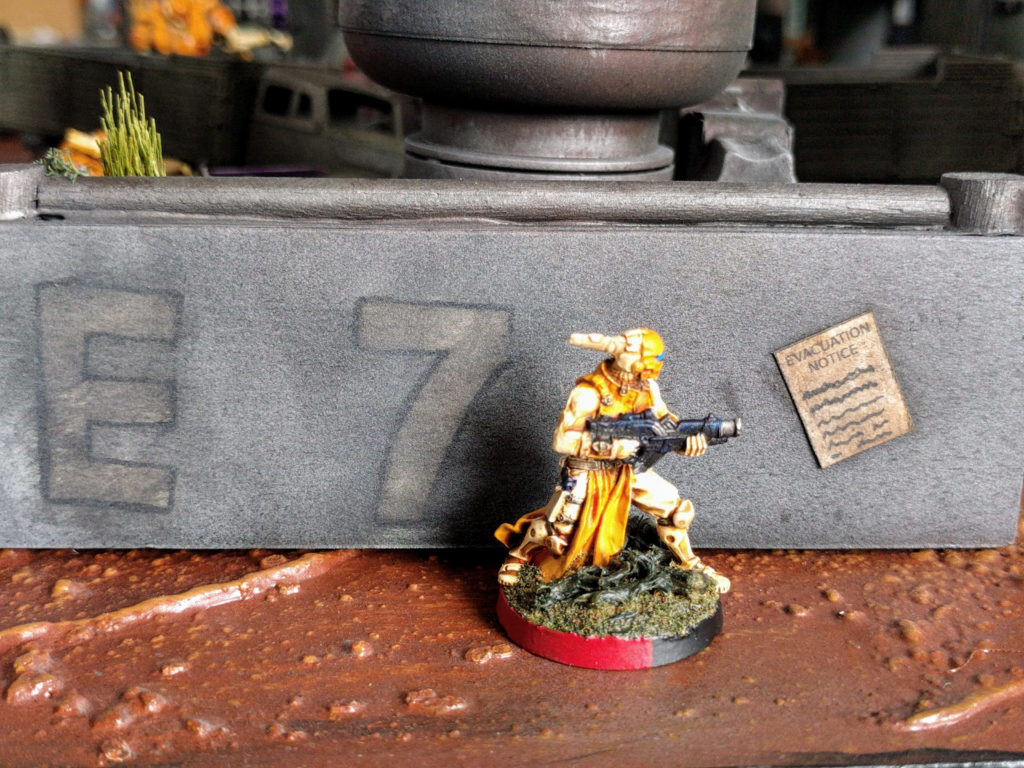
Evacuation notice poster on a wall.

Littered recruitment poster and evac notice handbill blown into a corner.

A warning not finished in time.

Play

This board is definitely designed with just a bit of priority toward aesthetics and narrative versus gameplay. In a few places it can be a touch awkward to place figures because of details, many of the shapes are slightly odd so models often don’t perfectly snug up into cover, and so on. But it’s very playable, and has interesting features.

As one example, none of the buildings have the ubiquitous low walls found on almost all Infinity MDF terrain. In places where railings make real-world sense and cover would be useful for gameplay, the metalwork is more realistically thin and open, but overgrown in thick vegetation to physically obscure models and leave no doubt they’re intended to be cover. In other places, a variety of mechanical boxes, large vent outlets, and other details scattered about provide partial cover instead of walls and screens. This approach creates some interesting dynamics. For example, the top of the garage can be a great vantage point for controlling ground below. But it’s essentially not possible to move around on it without either breaking cover between features or going prone out of sight and foregoing your own shooting, quite different from moving along a rooftop railing or edge. At the same time, it’s not possible to get cover from all angles, so no sniper can rest easy if there’s a chance the enemy can flank them—which they might very well do by running through the garage directly underneath them!

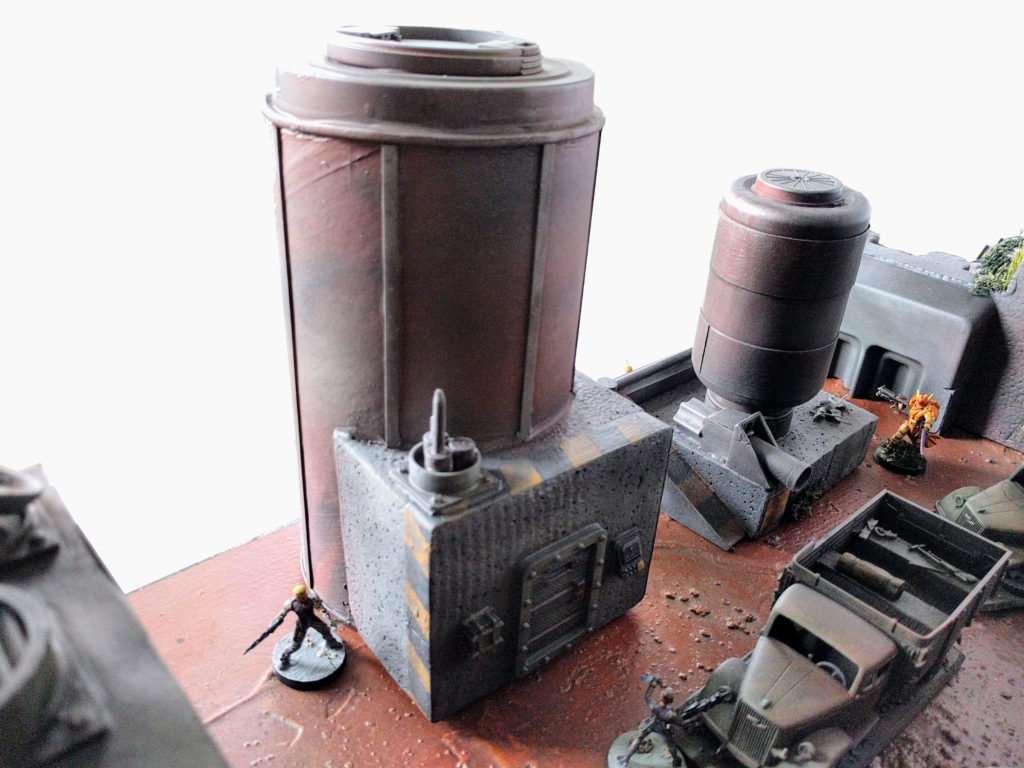
Similarly, the tallest point, the silo, has a piece on top such that models can generally only be placed solidly at the very center. A small lip prevents models from fitting at the edge. So a sniper can be placed there for a commanding view, but if they go prone they won’t be able to shoot anything, and if they stand up they won’t get cover.

The board as shown here is very dense, which impacts some armies negatively, but that just means there’s plenty of pieces to be used or not used in different games, generating a lot of variety in potential setups.

Face-on view.

Mechanical building side.

Fuel reservoirs side.

Top view.

Sniper hiding behind a rooftop mechanical box.

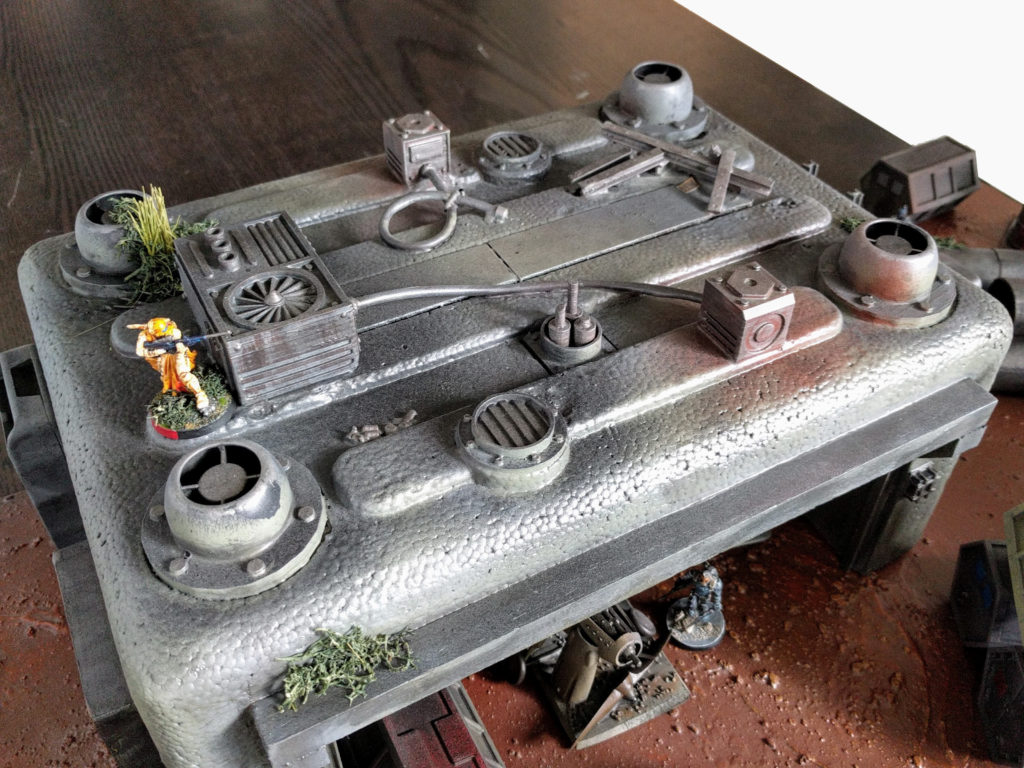
Roof of the garage.

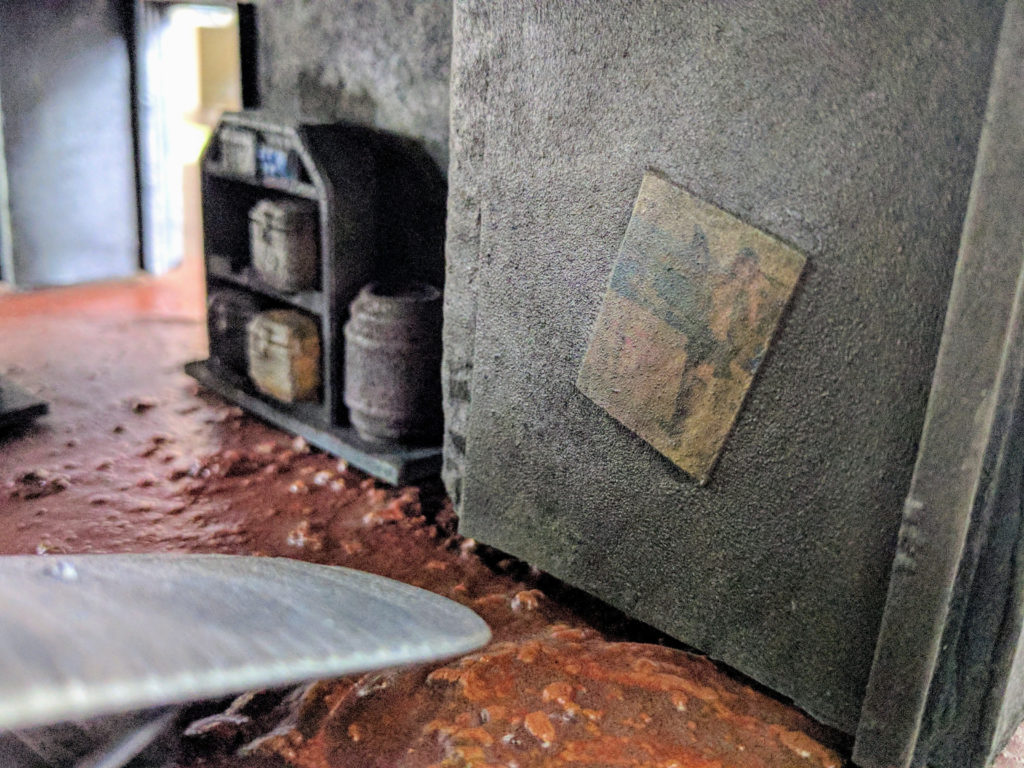
Poster inside the garage.

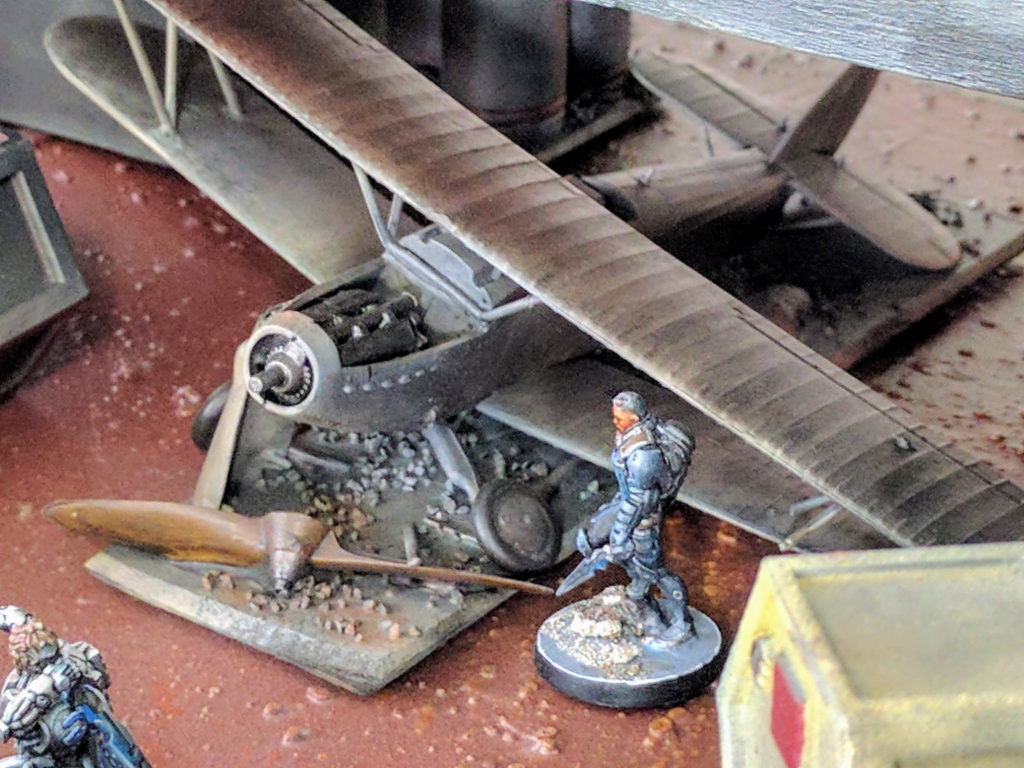
One of Bonsky’s relic aircraft.

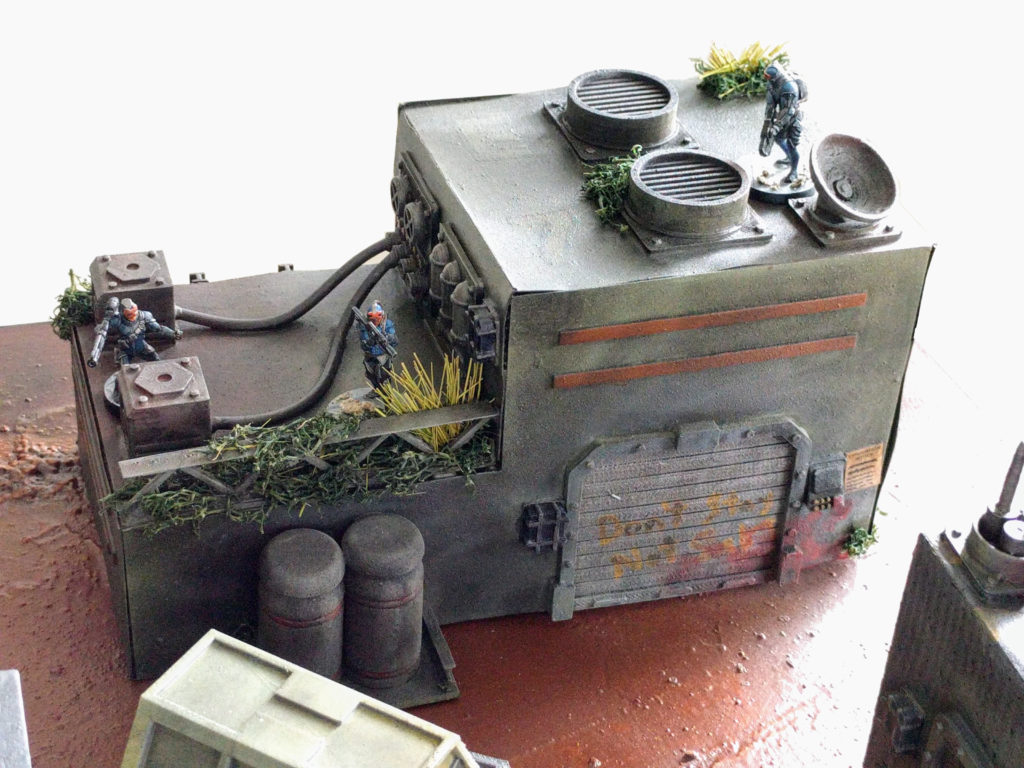
The mechanical building.

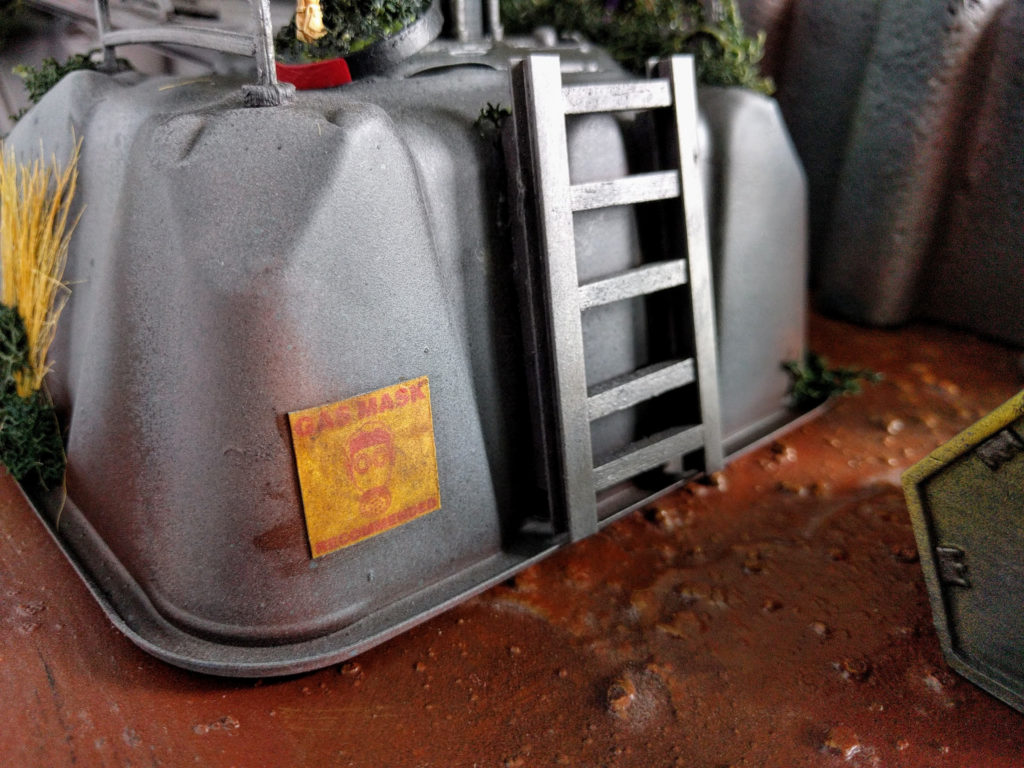
Gas mask warning and ladder on a fuel reservoir.

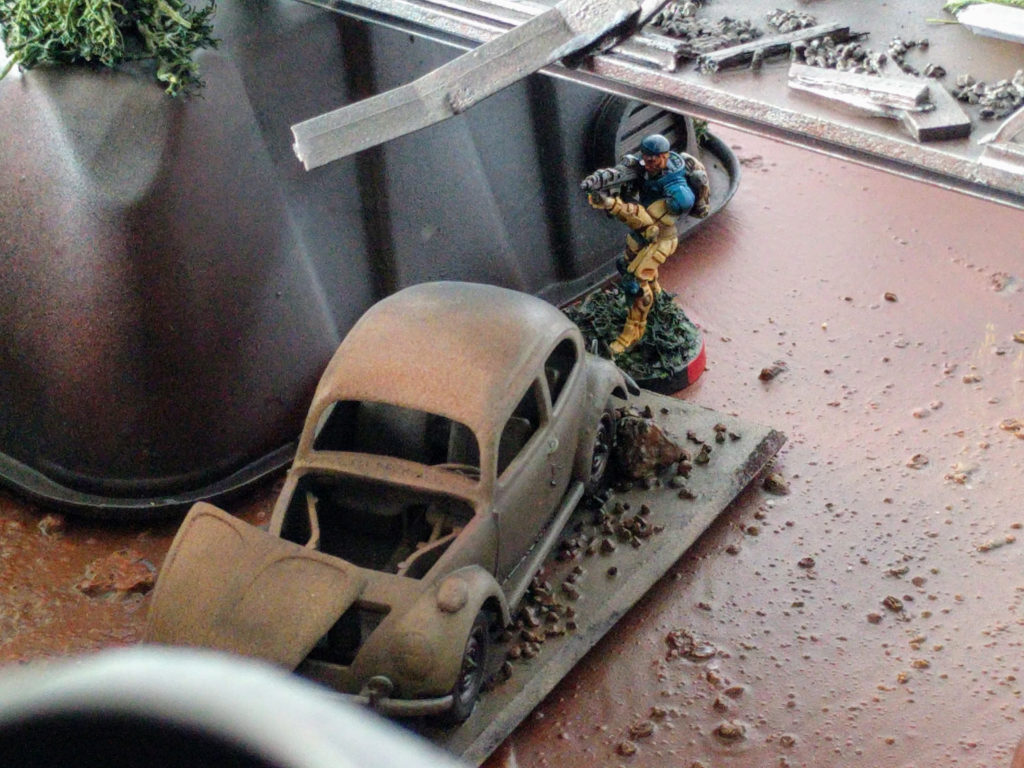
Burnt out low-tech car.

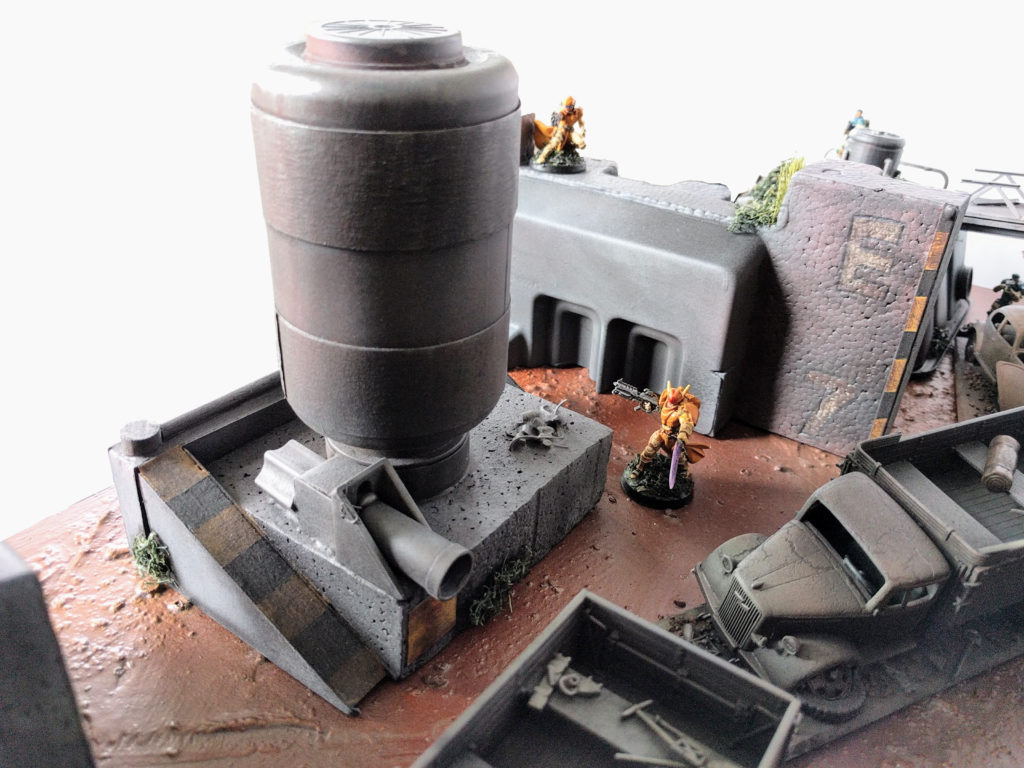
Fuel distribution tank.

Creeping behind the distribution tank.

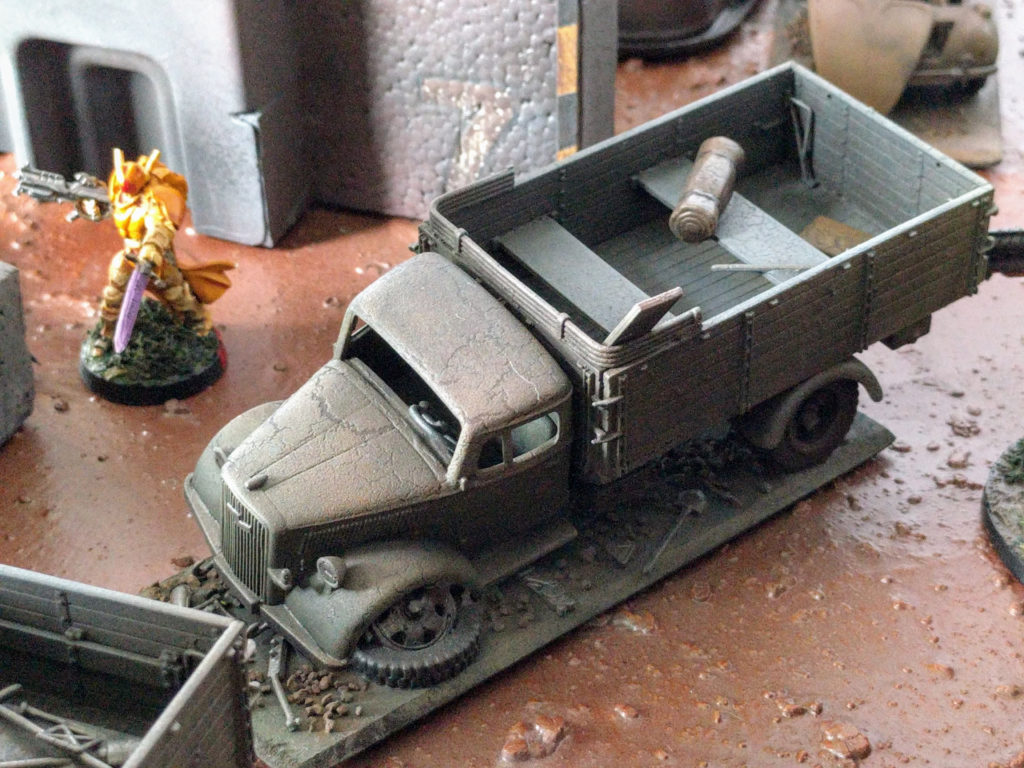
Truck dumped out front the distribution tank.

A silo, the tallest point on the board.

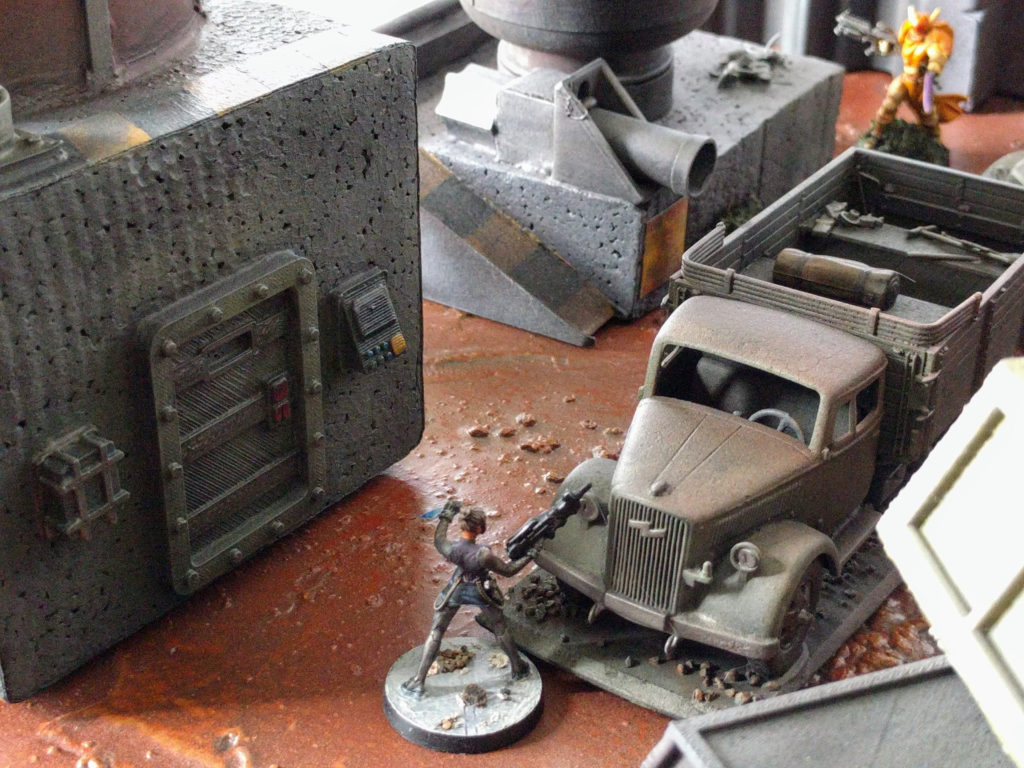
Door on the silo and truck left outside.

Next!

I’m very happy with how the Derelict Depot came together. It was a nice, tractable effort that didn’t drag on forever, and got done on schedule—just barely!—for an event I wanted to use it in. My small library of 3D printable parts made expressly to quickly add details to scratchbuilt terrain like this provided plenty of variety and interesting features, and I enjoyed making good use of a number of found objects. People seem to enjoy playing on the board, the pieces have some neat game dynamics, and the terrain has a lot of character and cool visuals. Mission accomplished!

For another example of this kind of scratchbuilding + scale models + 3D printing, check out my Medea Refinery build. Partly by chance and partly by design, pieces from the two sets go together well to create a really cool, large, detailed board. I also have a few tutorials up on 3D printing and modeling.

I’m not sure quite when I’ll get to them with NOVA and other events coming up, but I’m kicking around a couple neat ideas for new boards and in some cases have even started some work. Stay tuned!

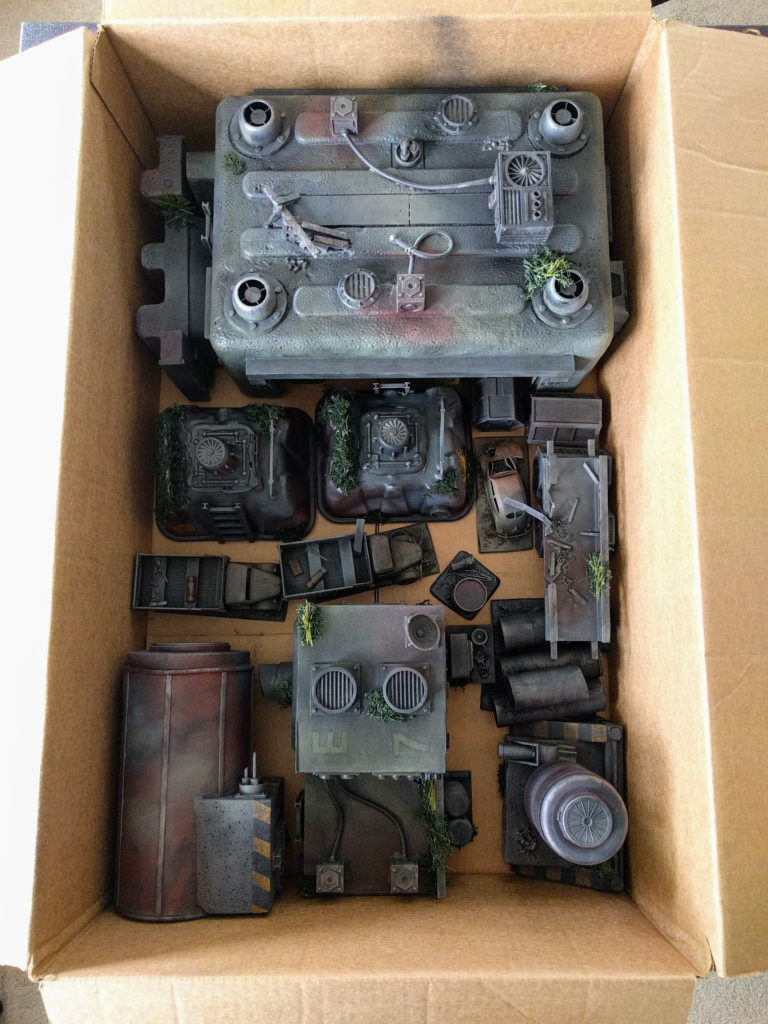
As a bonus, the Derelict Depot packs up perfectly into a box I had on hand!

Derelict Depot: Painting

A few weekends ago I got to painting my Derelict Depot, a mix of scratchbuilding, model kits, and 3D printing as described in the construction walkthrough:

The assembled Derelict Depot.

Colors

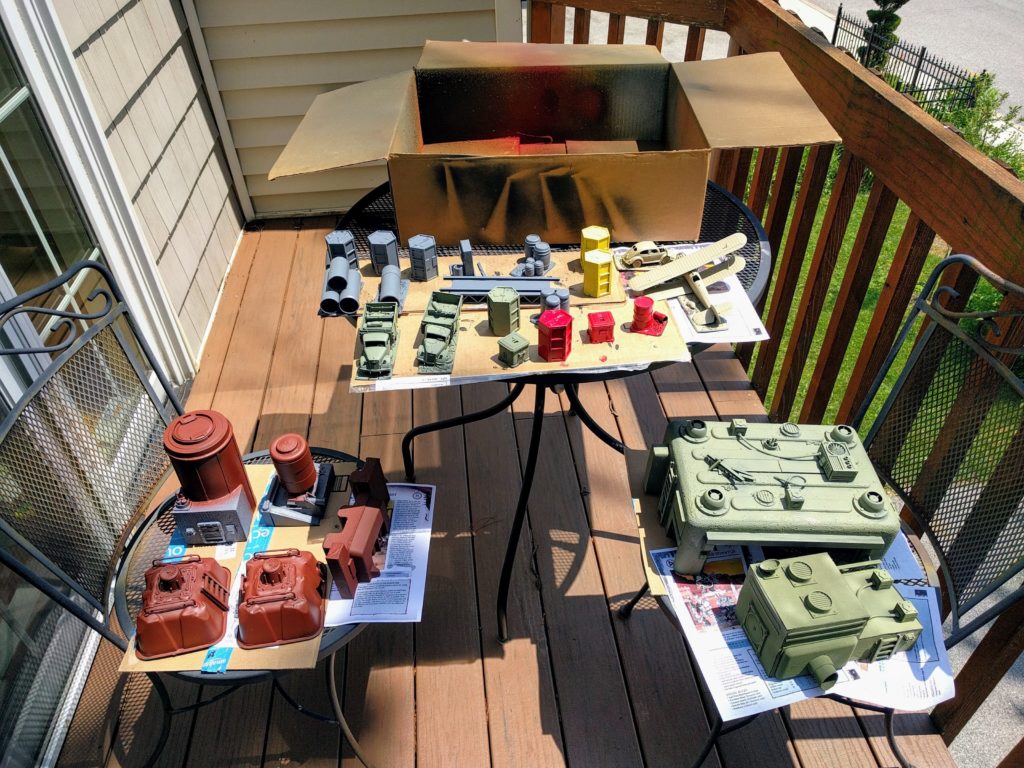
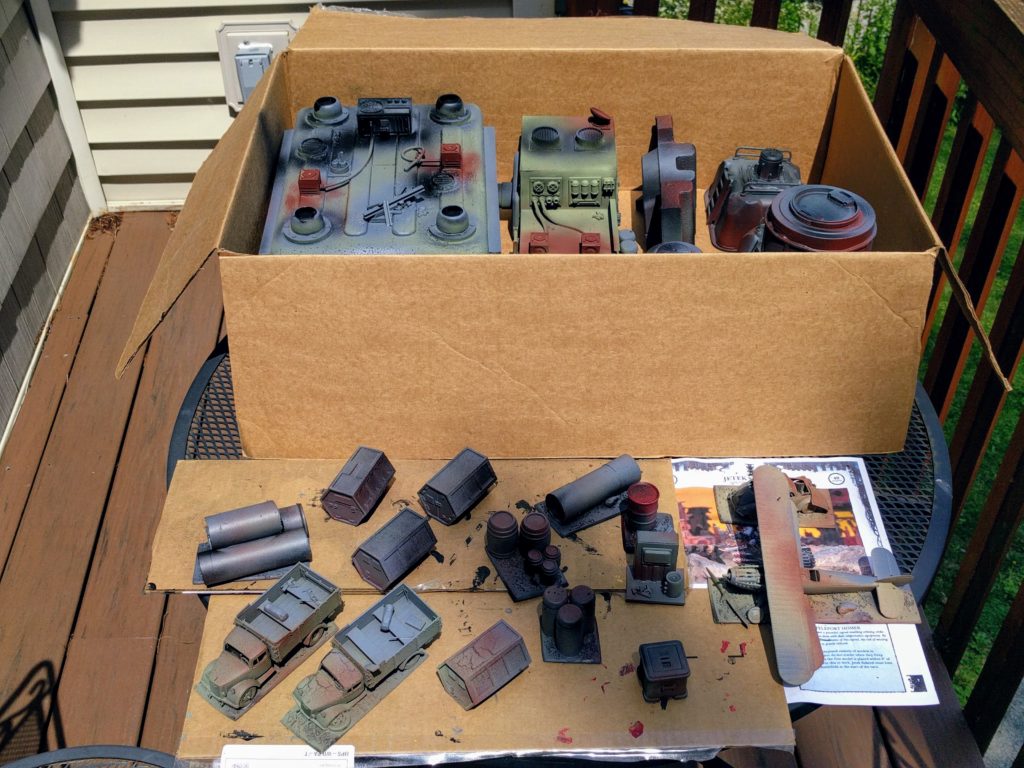
In choosing colors for the set I started with dark red and grey, mostly because I had spray cans of those laying around. But using those also meant these pieces would fit right in with my Medea Refinery board, adding a bunch of LOS blockers and scatter terrain to that collection. To add variety though I opted to do the big buildings here in olive green and some of the containers in red and yellow.

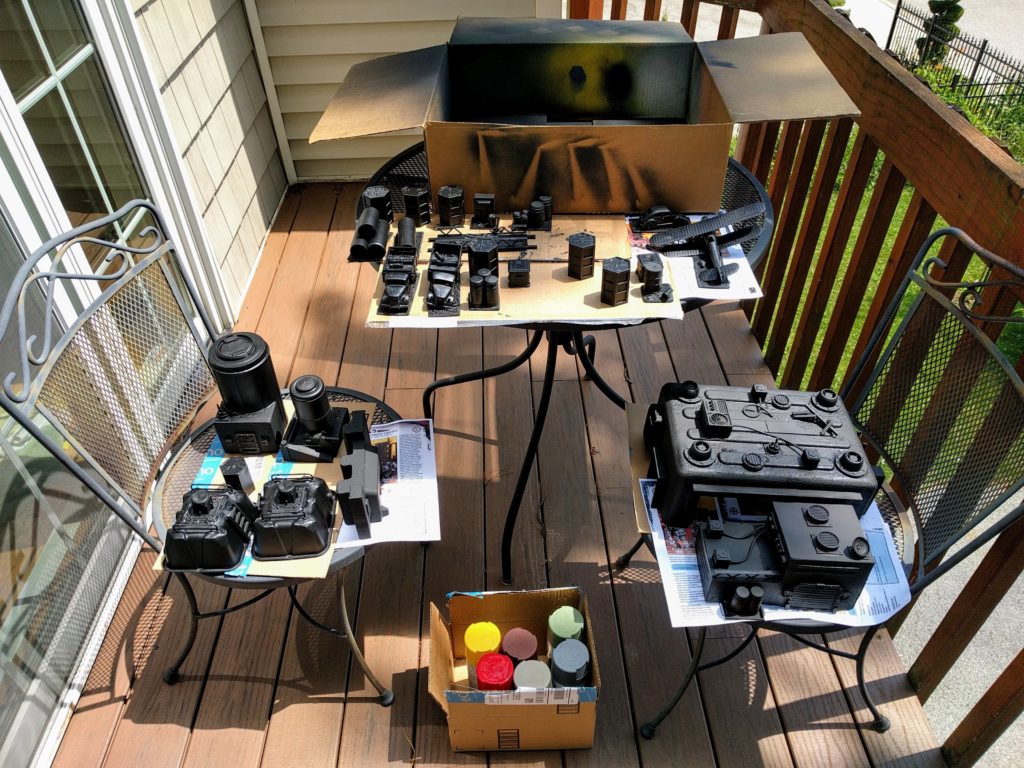
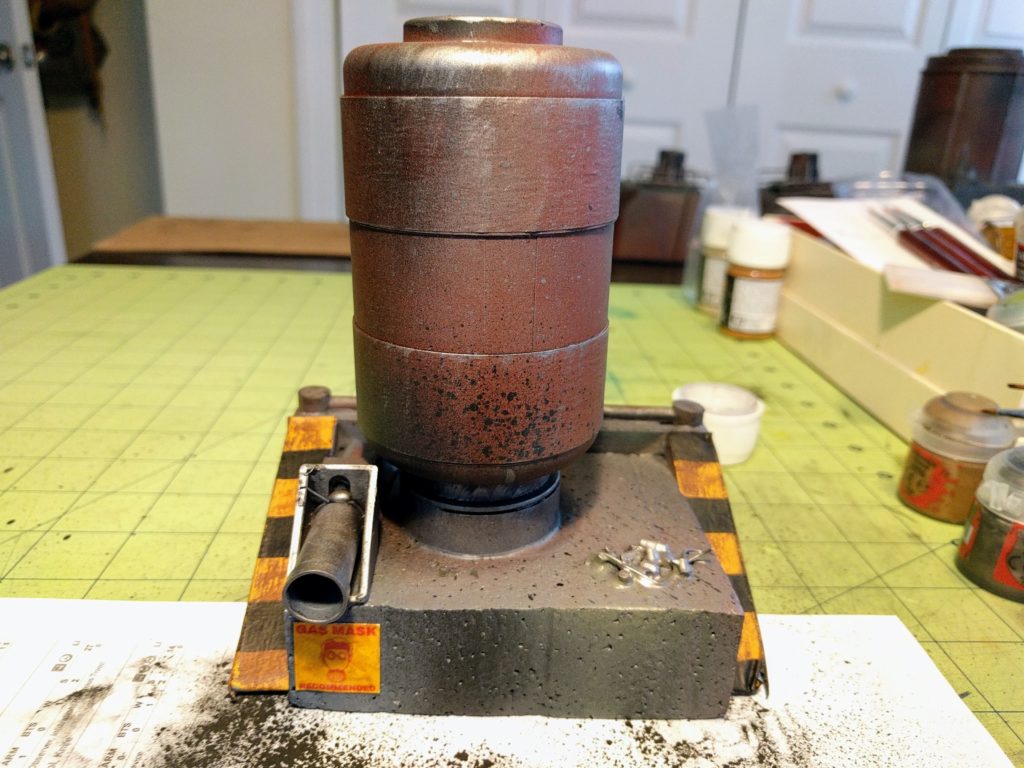
I used a lot of leftover white foam packaging in constructing this set, which some spray paints will melt. Generally I haven’t had a problem with that, but have had a couple cans that did eat such foam, so always test on a scrap piece first. To reduce the amount of spray painting on the white foam though, I brush primed those areas with two coats of black. All the other pieces got a good coat of spray black to start. Often you can just go straight to the base colors if you’re spraying, but the black coats better, adds another layer to help mitigate chipping, and if you spray the colors lighter and from a slight angle it creates some natural shading in the corners and recesses.

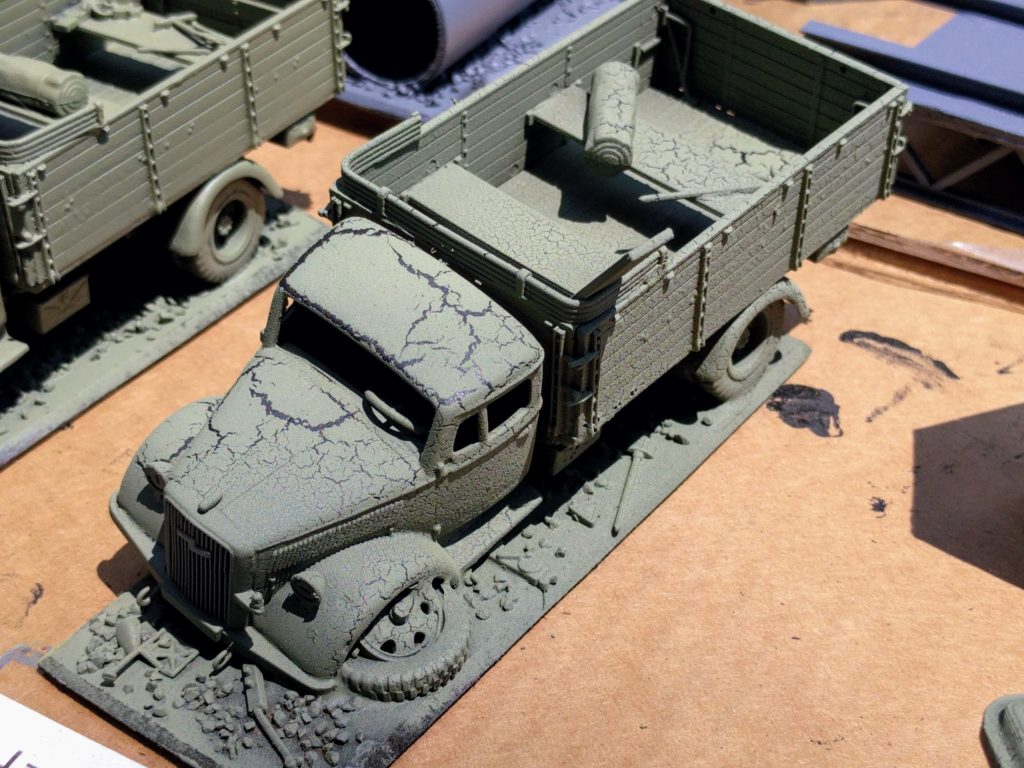
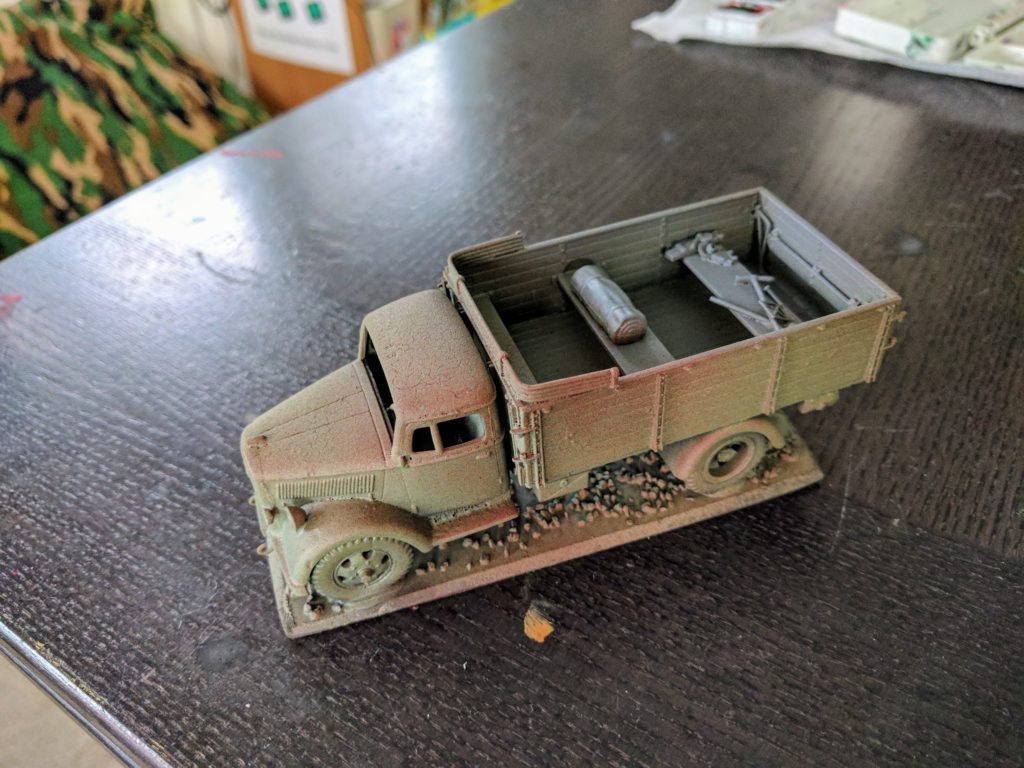
Unfortunately I had not previously used the olive green I picked up and it reacted badly with either the temperature on the day I was doing this, or the materials. On the trucks it cracked and broke, which would have been devastating on a normal model but worked great with the derelict theme. On the buildings though it fuzzed up a bit and became crumbly. Still not really a problem with the theme, but it made them feel funny and the paint a bit fragile to the touch.

Priming everything black.

Colored base coats.

Cracking on one of the trucks.

More Color

Following the base coating I wasn’t sure how much more time I’d get to work on these again before I wanted to use them. So I went with a technique I picked up watching my friend Sascha help paint the Medea Refinery, basically spray painting a bunch of details rather than brushing them. So mechanical boxes, doors, ladders, etc., all got sprayed in various colors without worrying too much about overspray—quite an affront to my OCD tendencies! Definitely wouldn’t work for all styles of terrain and isn’t to everyone’s taste, but it’s fast and I like the look of it for these kind of pieces. All the overspray just looks like rust, wear, etc., and ties everything together.

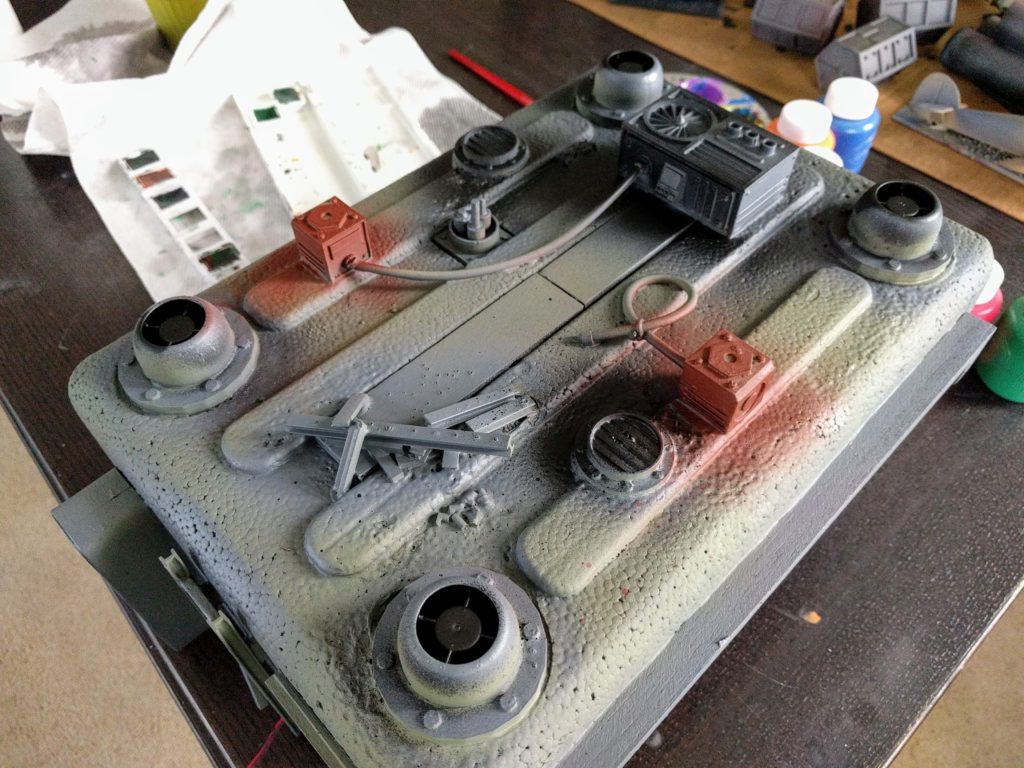
From there, still concerned about getting more time for this and feeling overeager with the spray paints, I went on and lightly oversprayed various colors across all the pieces. Having hints of the whole palette on each piece helps tie it all together visually, and lightly spraying this particular selection of colors also makes it all look weathered. Although I’d started off with a board previously painted, I felt it didn’t match this color scheme well so it got spray painted similarly. At this point I felt the pieces were all interesting and playable as-is even if I didn’t get back to them.

Multi-colored and somewhat weathered pieces.

Top of the garage.

Weathered truck.

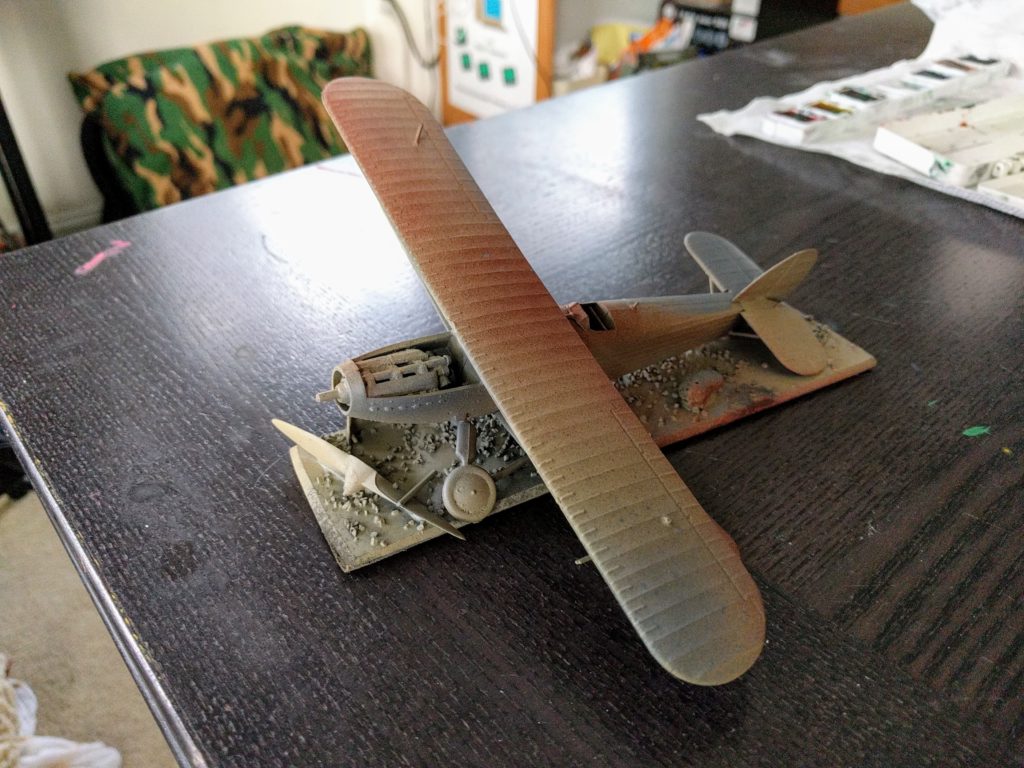
Weathered plane.

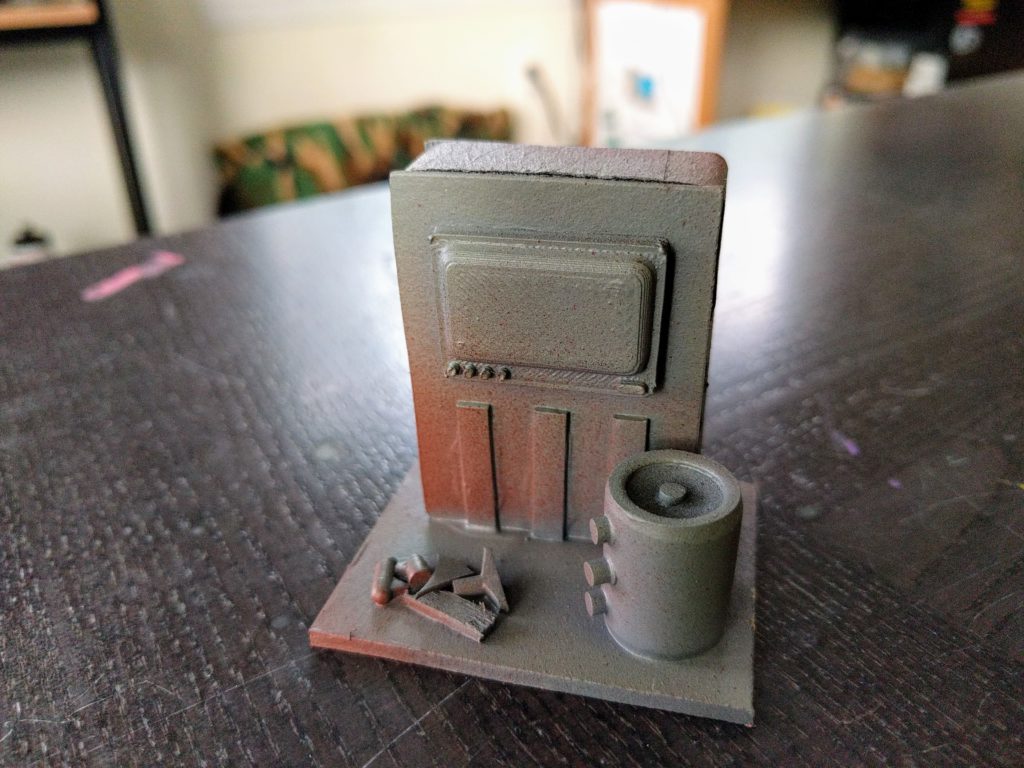
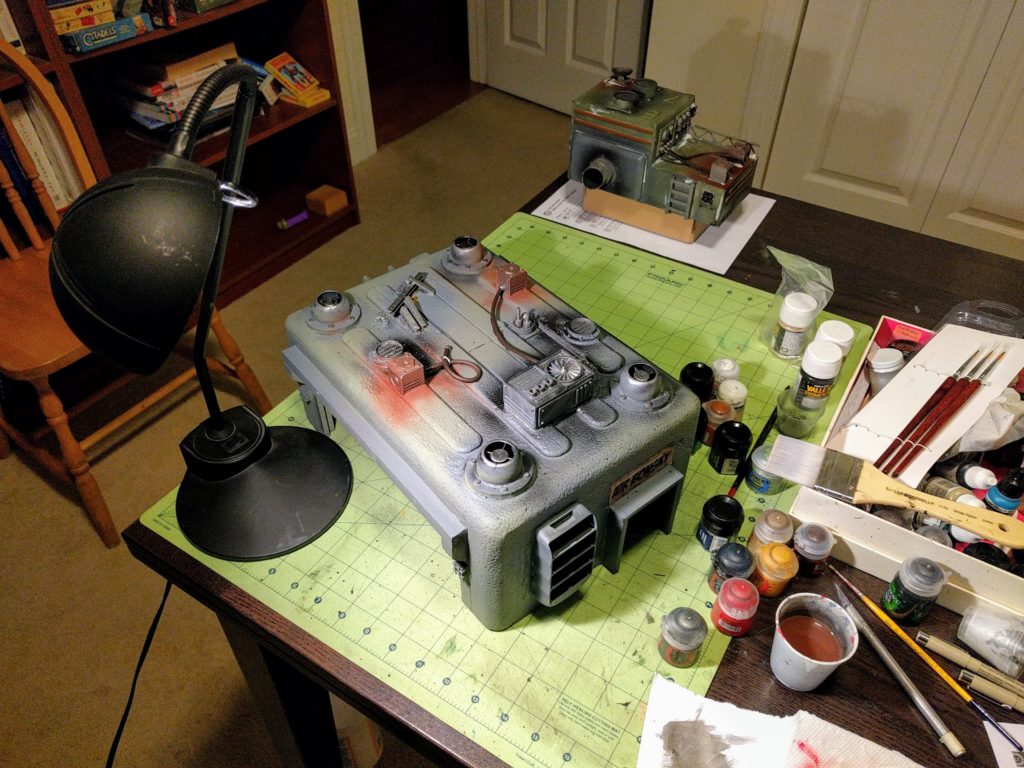
Weathered console.

Site Designations

Fortunately I did wind up with more time to work on the set. So I sat down for a marathon overnight session of detailing and finishing. A key theme throughout this though was still facing a time crunch, trying to add a bunch of visual appeal under tight time constraints before hopefully using it in an event the next day.

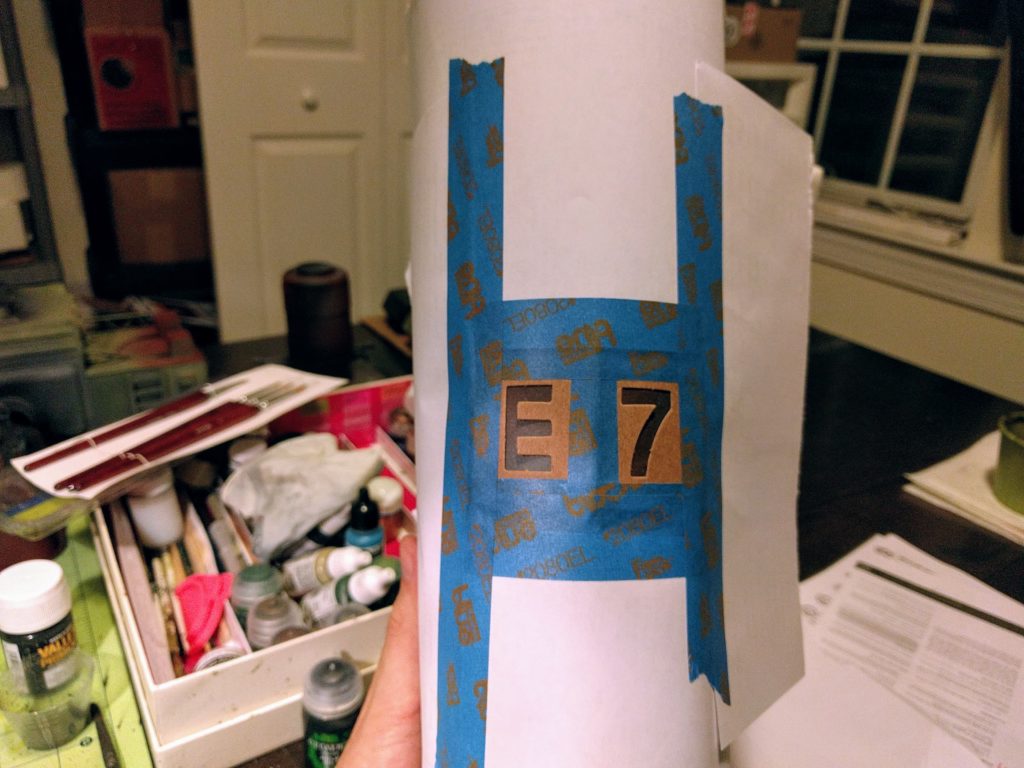
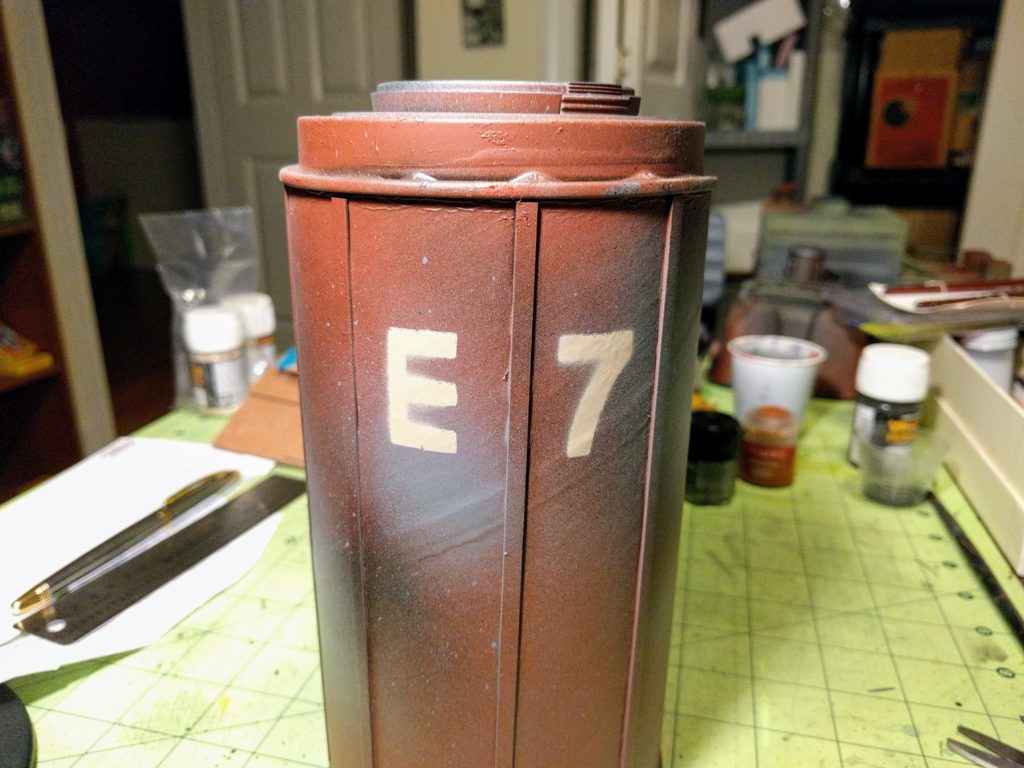
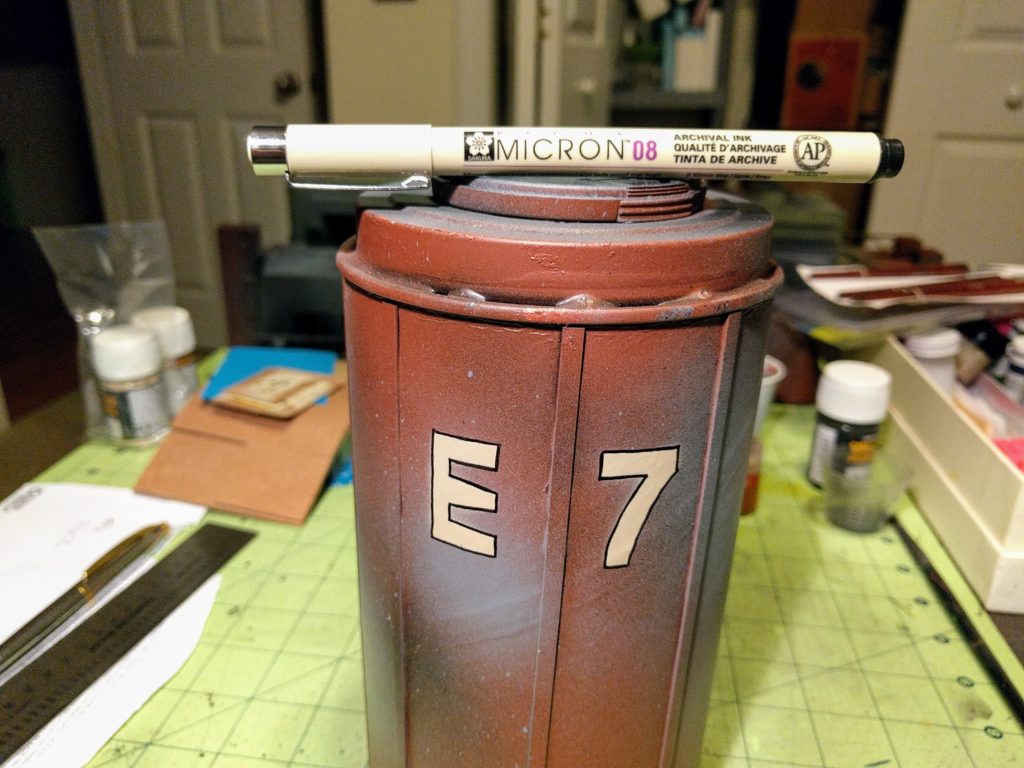
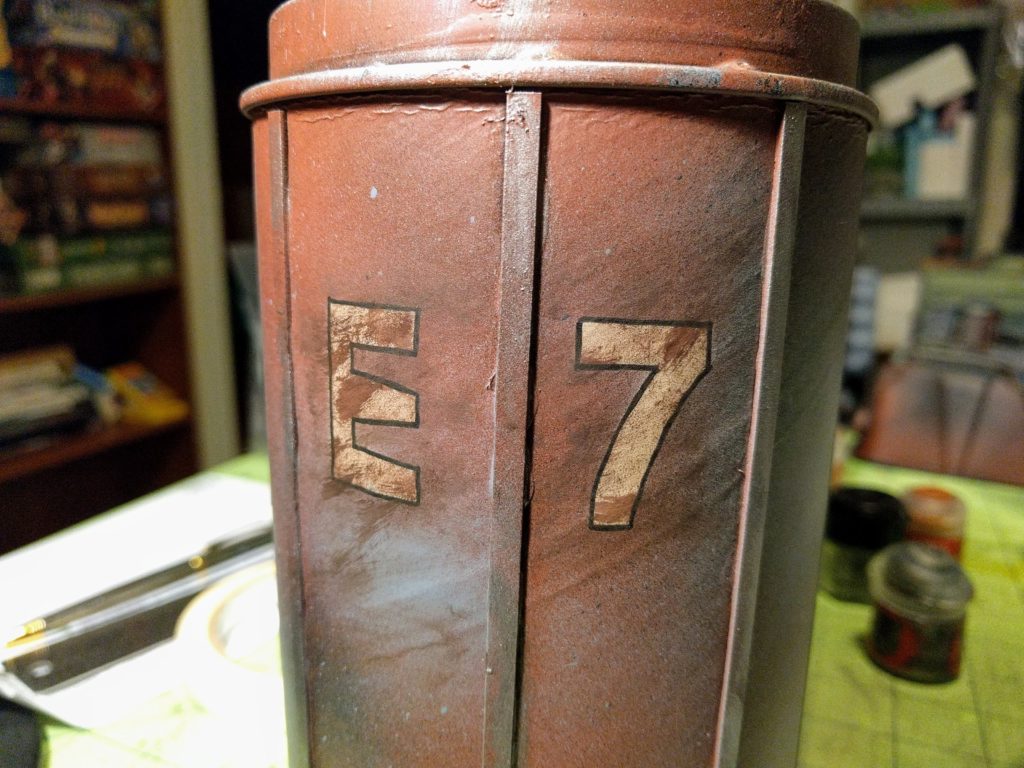
So, thinking about quickly adding color and detail, first I added some site designations. Using some cardboard alphanumeric stencils, I spray painted “E 7” on a bunch of the buildings. A medium tip ink pen then let me quickly outline the lettering with thin, clean black lines. Of course the new lettering stood out against the weathering sprays, so it then got drybrushed appropriately to wear it back into the pieces.

Stencil masking the site designation on the silo.

Site designation after removing the stencil.

Outlining the lettering with an ink pen.

Drybrushing over the site designation to blend it into the weathered paint.

Hazard Stripes

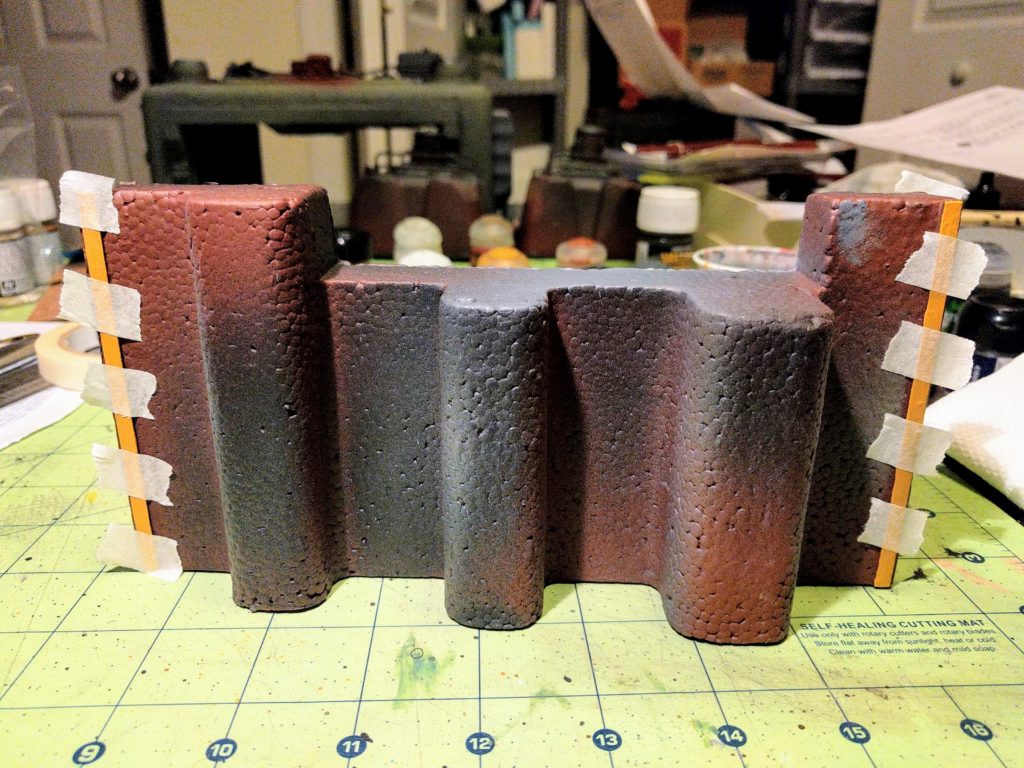
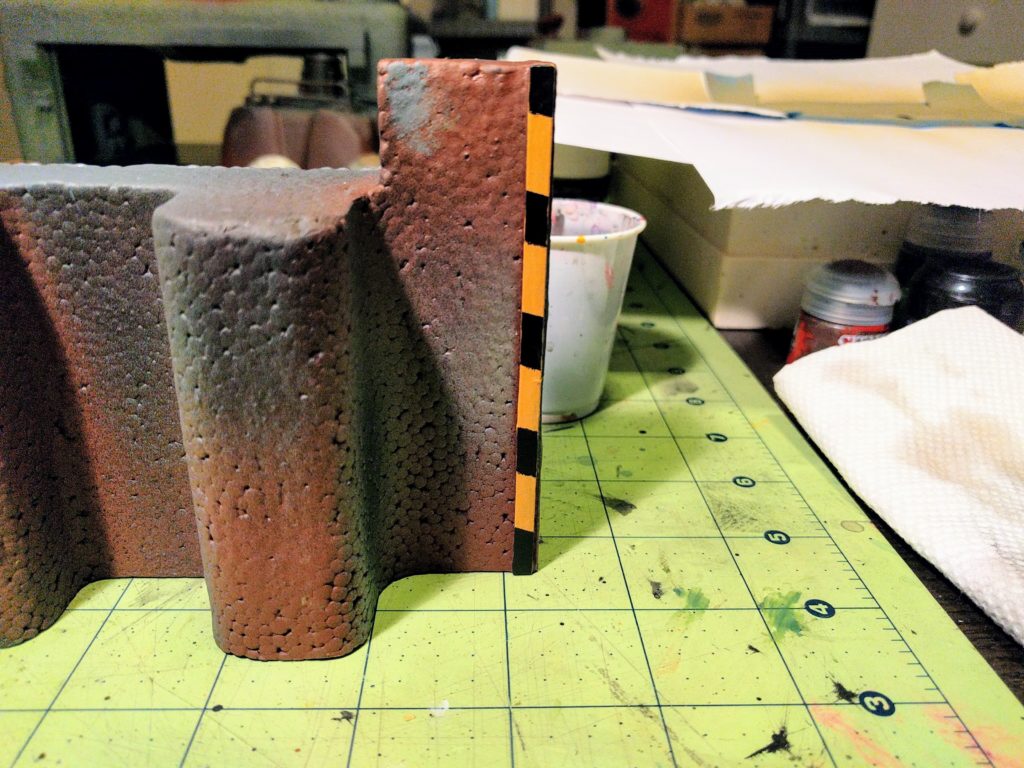
Another quick way to add color and life to the scene was to throw a bunch of hazard stripes on various pieces. These were done real quickly by brushing on several coats of dark yellow, taping off the yellow stripes, brushing on black, and then drybrushing the whole stripe appropriately to weather and blend it into the piece.

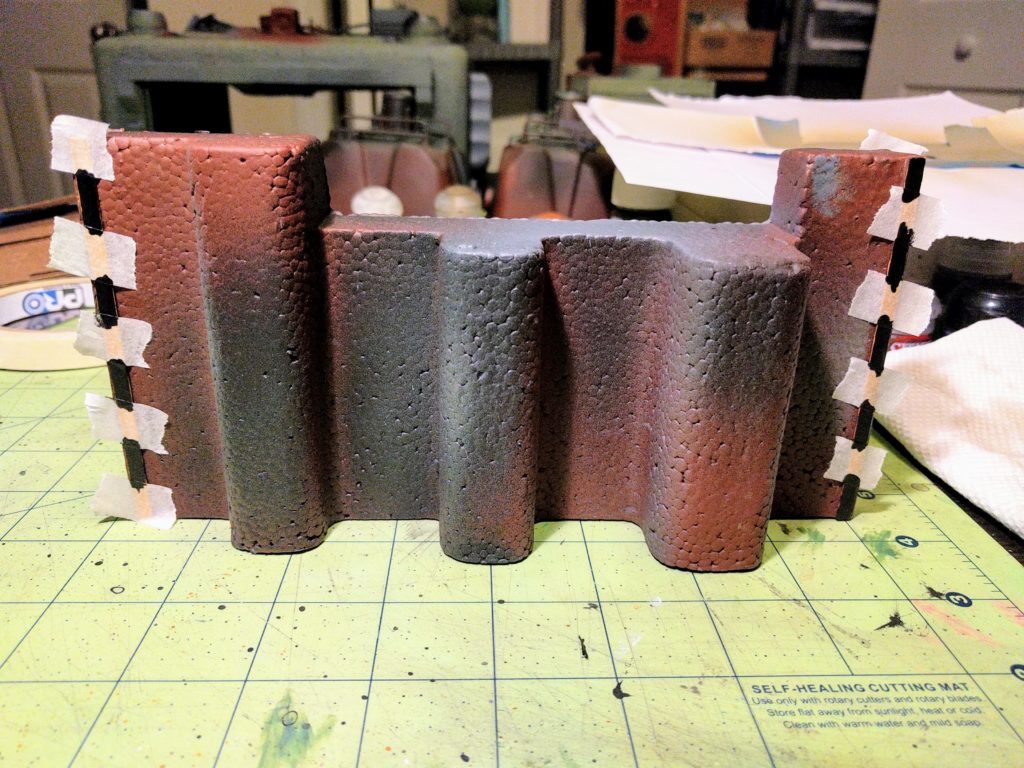
Hazard stripes inverse masked on a solid yellow base.

Black part of hazard stripes painted on.

Finished hazard stripe.

Details

Still good to go on time, I set about with a brush picking out details. Some things were painted as normal and then drybrushed to blend and weather them into the existing paint job. For example, the tires and rims on the vehicles were painted black and silver and then drybrushed rust brown. The few organic elements around, like the duffel bags on the trucks, got painted a leather brown and then washed a dirt brown. Various dead light fixtures and computer consoles were painted black or dark purple and washed with the same. Other features were done solely with heavy drybrushing to add color and distinguish the feature but not break it out too much from the background, e.g., drybrushing a dark brown on the cabling or steel on the various scrap laying around. All the gravel and texture on the bases and the board itself also got drybrushed appropriately. Some metal edges and so on then got a hint of silver drybrushing to seem worn or jagged, like on the ends of the roughly cut scrap pipes.

Painting details on the garage. A layer of Modge Podge cures on the mechanical building in the background.

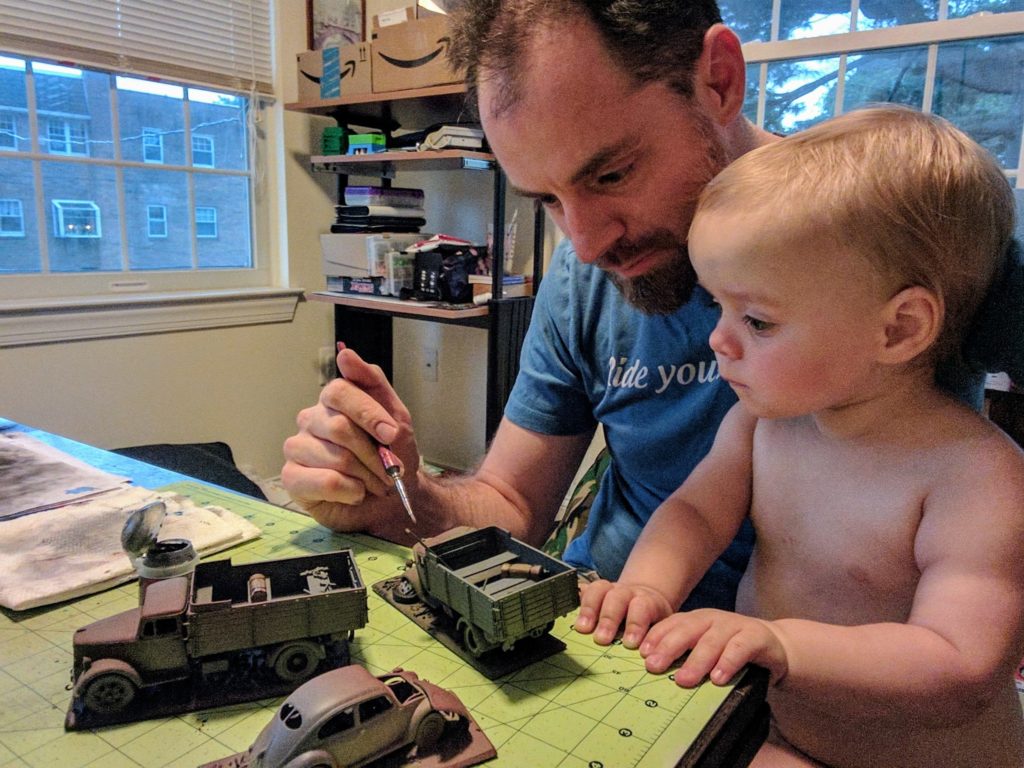
Painting details on the vehicles with my helper as dawn approaches.

Posters

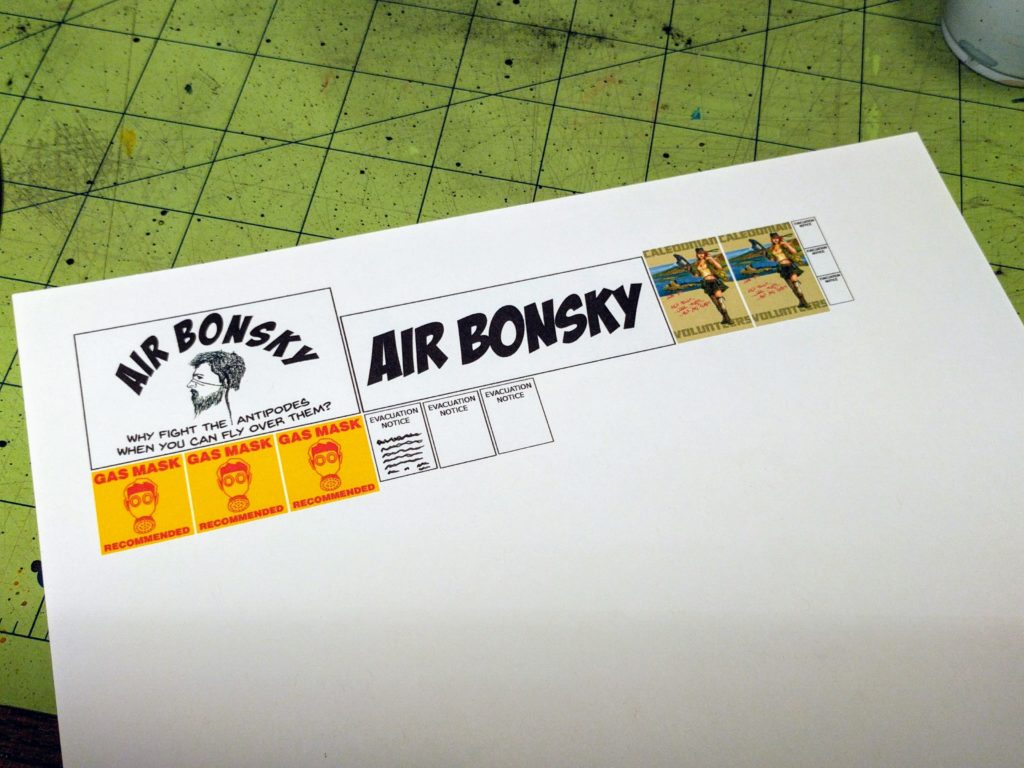
I still had some minutes for detail work, so the finishing touch was to print up some signage and posters on cardstock. These were cut up, in some cases further filled out with ink pen scribblings, glued to various pieces either on the walls or crumpled up as litter on the ground, and then washed brown to age and grime them heavily.

Printed signage, posters, and litter.

Sealing

All these pieces are intended for public use in my local shop’s tournaments and such, so even if they’re not out all the time they still need to stand up to some abuse. The board and all the foam and cardstock surfaces therefore got coated in Modge Podge to seal them with a protective layer. This also resolved the problem mentioned above with the olive green paint having fuzzed up in the heat and feeling crumbly. Modge Podge can add a bit of a gloss sheen, but I knew the final steps would take care of that…

Covering the board in Modge Podge.

Carbon

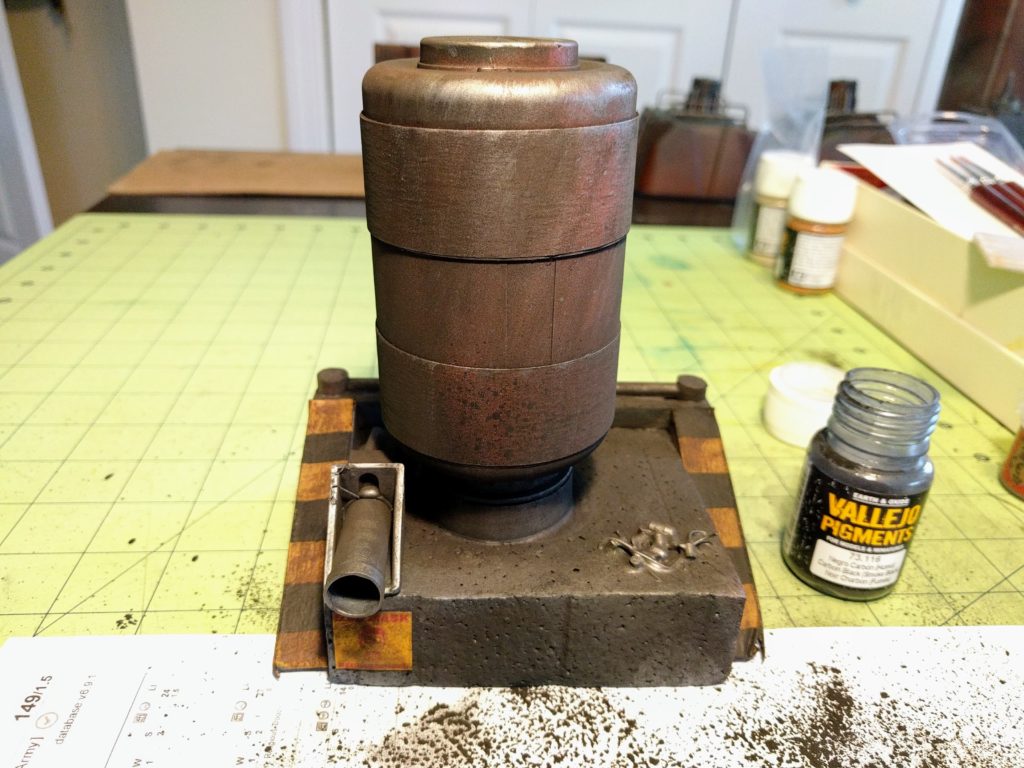
Last up, I wanted to knock down the brighter colors and better blend the brushed details in with the sprayed “weathering.” So everything got quickly “washed” in carbon black pigment. Out of time, I didn’t try to do any real weathering here, caveat being sure to generally throw on the pigment low and then brush it upward so that it tended to collect and be heaviest toward the bottom of pieces. In some cases this “wash” dimmed the colors a bit more than I would have wanted, but overall I thought it really made the pieces feel more lifelike without hardly any effort. It also definitely made the sprayed and brushed details feel uniformly worn.

Once the pigment was on I just sealed it in place with dull coat spray. That’s not really sufficient to secure thick applications of pigment, but for a wash like this and even with some thin accumulation on the tops of a few pieces it was fine.

Fully painted tank.

Tank “washed” in pigment.

Play!

In the end, after working all through the night, at just about exactly noon I did the last batch of dull coat spraying, took a shower, and jumped in the car to head to the shop and get the board set up just in time for a 1pm Infinity tournament—success!

Critical to this was carefully staging all the various tasks so that I didn’t have any downtime. The ordering above is just notional, in reality the various steps were mixed up and interleaved across all the pieces so I was never just sitting around waiting. A prime example was doing the buildings first so I could Modge Podge the fragile parts and then work on painting the vehicles while that dried. All told this whole board got painted in about 16 hours of work: 2+ hours spraying one day and the rest leading directly up to the debut event. In hindsight I wished I had done the detail brush work and then gone back to do the weathering sprays, but it worked out fine in the end between drybrushing and pigment washing so this was an acceptable strategy to ensure I had pieces ready even if I didn’t get to work on them more.

A few of us played games in the newly built Derelict Depot in that tournament and it worked well. One modification needed was that it was immediately clear I needed to add some vegetation and such to make the railings and such provide overt partial cover, as planned in the construction writeup but not completed beforehand, so I did that afterward. The board definitely isn’t going to be loved by everybody, it’s more oriented toward narrative and aethestics than pure gameplay. Some of the details and unique shapes make placing figures, especially in cover, a bit more fiddly in a few places than standard MDF terrain. It’s also super dense if you put on all the pieces—very challenging for my own airborne-oriented squads! Realistically you could probably make two boards out of the collection with a more typical level of density.

But, it looked great, has a lot of unique details both mechanically and visually, and turned out very well. Gallery photos of the final product to come!

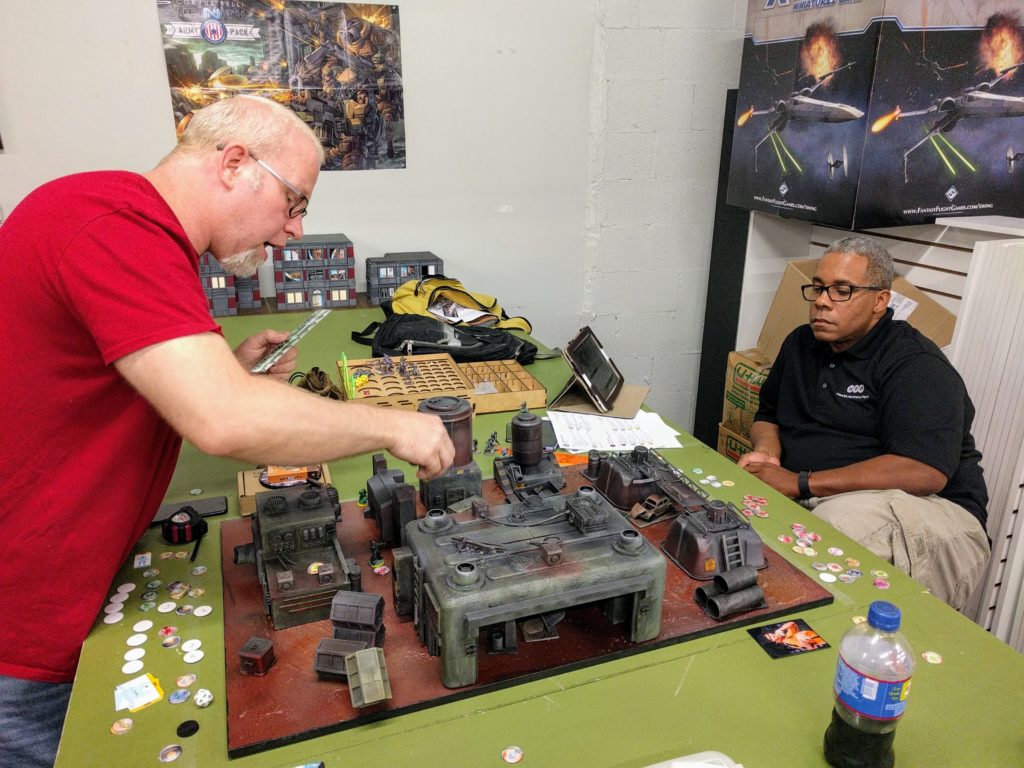
Don and Lovell fighting it out on the brand new board.

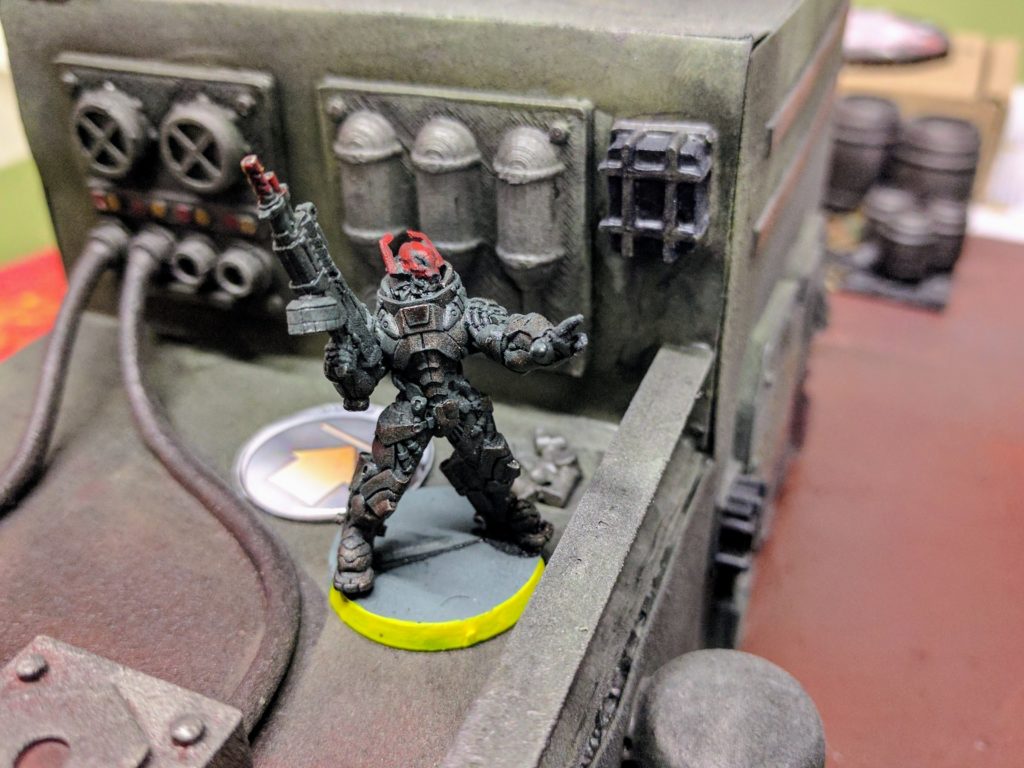
A Morat commands their troops from the mechanical building.

Derelict Depot: Construction

It’s been a long while since I wrote up a terrain project, mostly because I have a couple stuck in half completed limbo. But one is moving forward; I finished construction this weekend, and expect to have it painted up for my local shop’s next RECON+ Infinity tournament: The Derelict Depot.
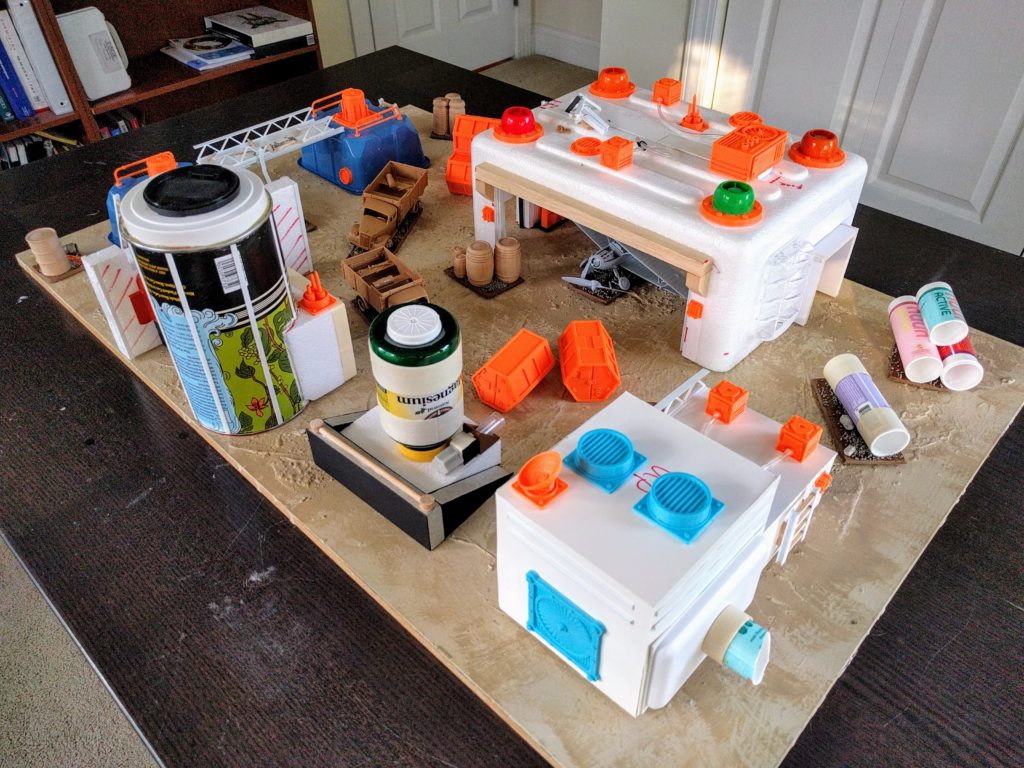
Construction complete!

Planning

RECON+ is basically half the size of a standard Infinity match: 150 points, on a roughly 24″ by 36″ board. I really like the format and we play it often so I wanted to put a new, detailed board into the rotation. Major goals were that it work for Infinity, which has fairly different terrain considerations from 40k, and that it not look or play like the “MDF-box” cities that are somewhat ubiquitous in Infinity. I think the end result will fit right in with the Shantytown, Old City/Slums, and other unique terrain we run at the shop alongside the more standard MDF stuff.

The start was an actual, physical board I’ve had kicking around almost a decade now after I made some basic terrain for teaching 40k to the university gaming club. The desert colors brought to mind a scenery idea I’ve dreamed about for some time but not built yet: A vehicle graveyard. Simultaneously, some interesting packaging scraps laying around got me thinking about a fuel depot or similar. Putting the two ideas together I started building toward an abandoned vehicle depot.
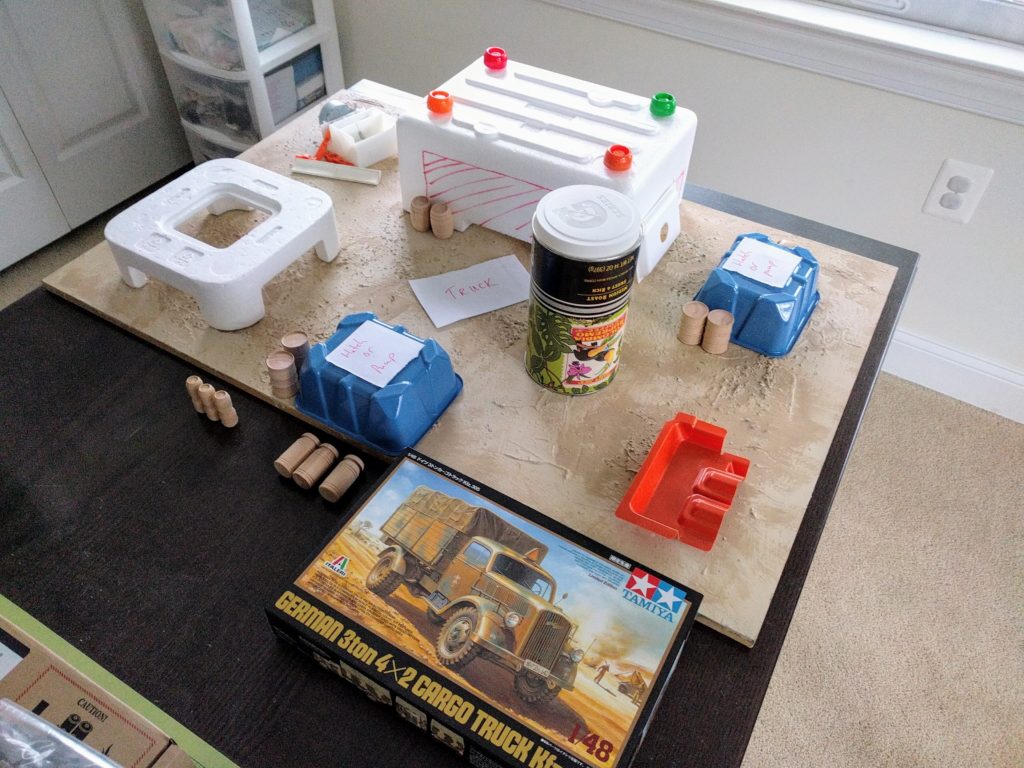
Very very preliminary ideas.

Garage

I quickly settled on the defining piece being a garage of sorts. Our Infinity group doesn’t play many interiors so I thought it’d be neat to force some inside action. I liked the image of two teams shooting it out across a garage while huddling behind small humanoid doorways on the sides. Cutting big vehicle doorways on both sides to make it a pass-through garage was a simple way to make the interior playable. You can fairly easily move figures around inside through the large openings on either side.
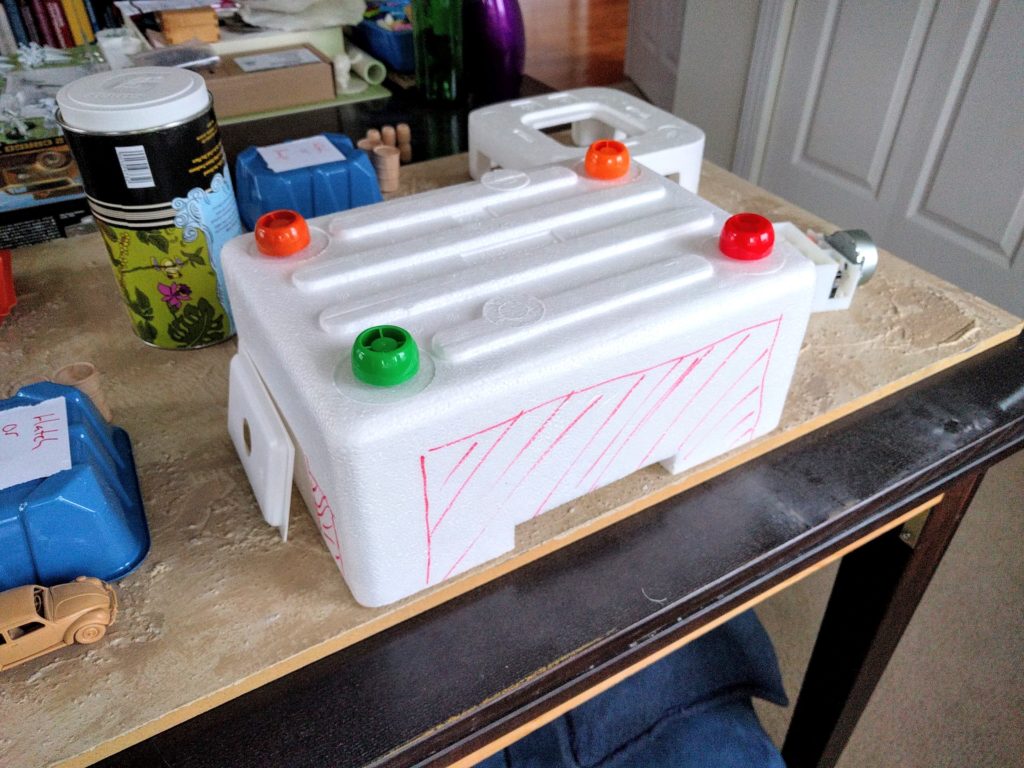
Sketching out cuts on the garage.
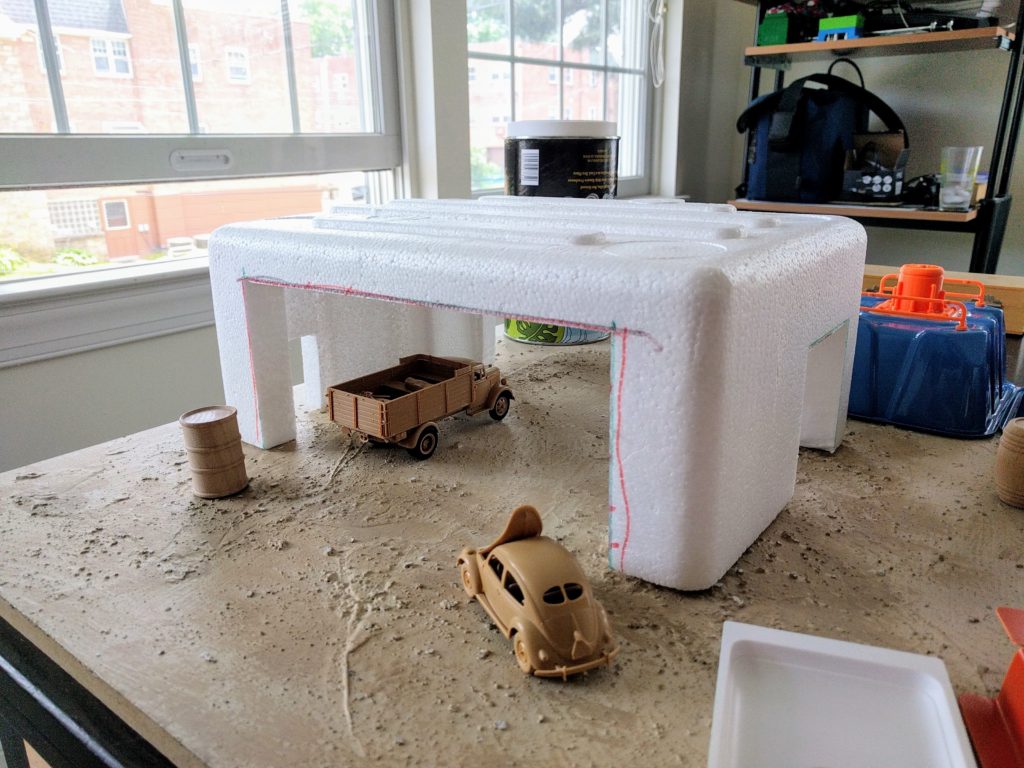
Initial cuts forming the garage.

One quirk about nearly all Infinity “MDF-box” terrain is the little walls on the tops of the buildings, sides of walkways, and so on. They provide obvious, extensive cover opportunities and straightforward gameplay. But it’s a little weird that nearly every little roof and walkway has short solid walls. Most roofs I’ve been on you can just walk off, most walkways have railings, fences are more common than walls, etc..

So rather than put unnatural little walls all around the roof of the garage, I put a bunch of large-ish features that an infantry model could get partial cover behind while prone models could easily duck below and move around safely provided they watch their angles. The turbine ventilation units are stolen off baby food pouches, while the other brightly colored bits here and throughout this board are 3d printed pieces I designed for this kind of assisted scratchbuilding. For this construction I had to rely on pieces I had laying around already as my printer is currently fully occupied churning out another project. Many of them are already available via my Thingiverse profile.
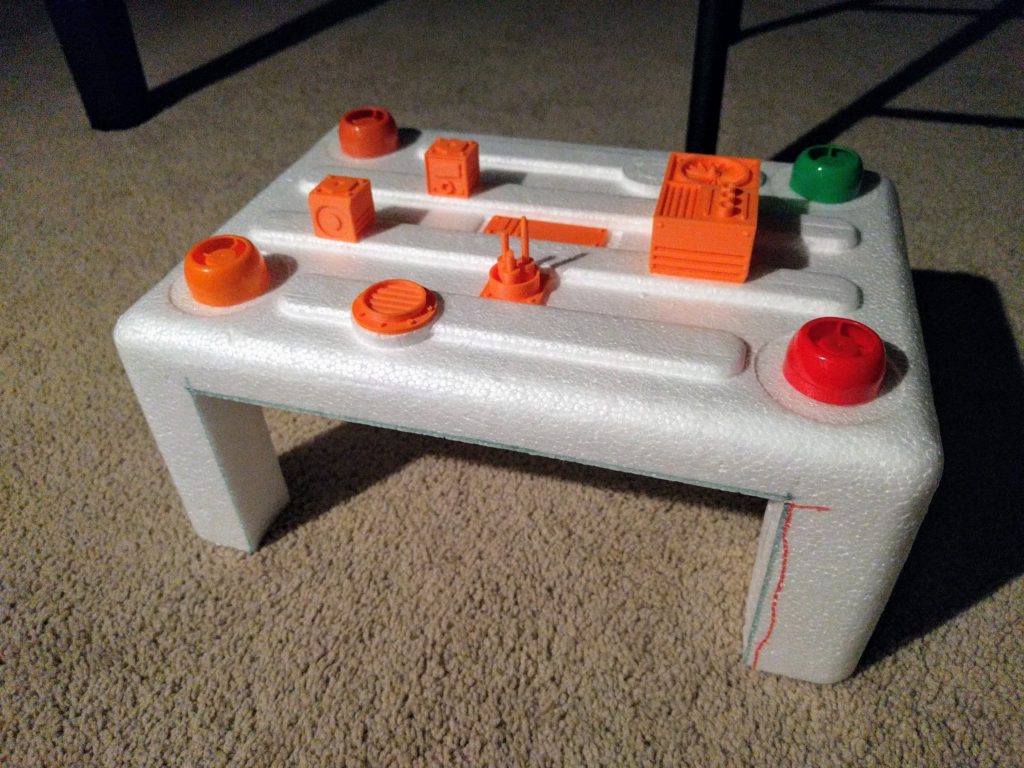
Testing details on the roof to provide some cover.

With the basic openings and roof features selected, I spent a while adding trim and details, just whatever I could think of and had on hand or could create quickly. Just one side got a ladder, in keeping with the idea that Infinity boards shouldn’t be that symmetric, built using a technique I use often. Both sides got outcroppings to provide some cover along their faces. The roof got an additional pile of junk “metal” to make a small cover nest, and some tubing hooked up between the mechanical boxes for flair.
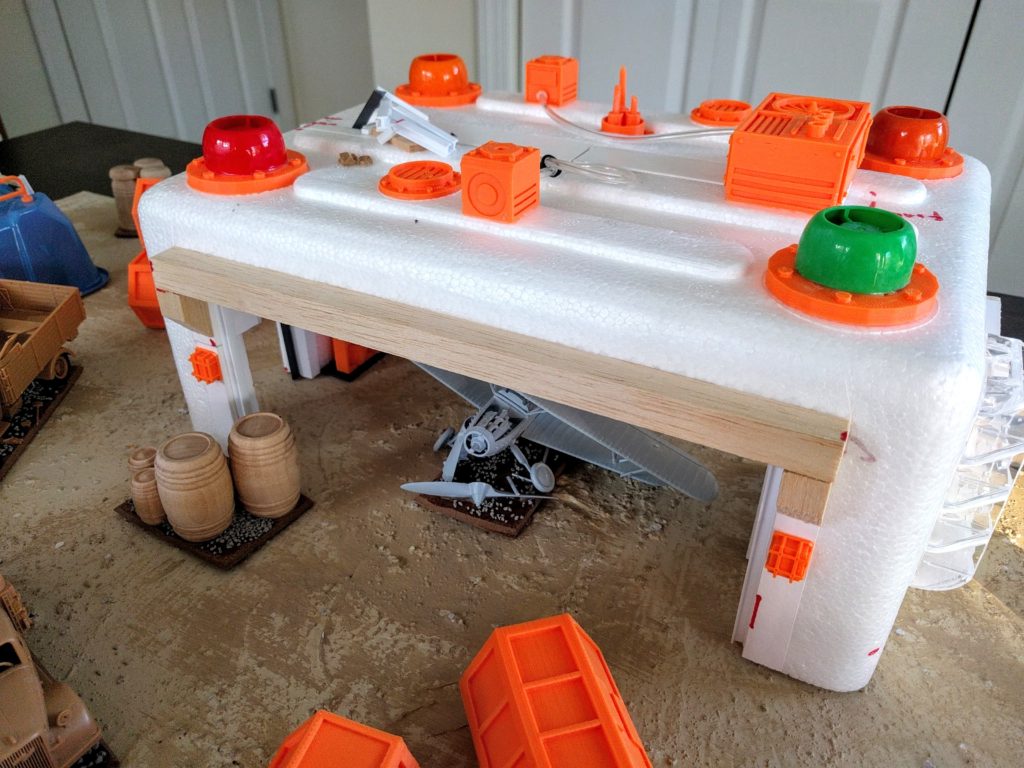
“Front” of the garage (the front and back faces are essentially the same).
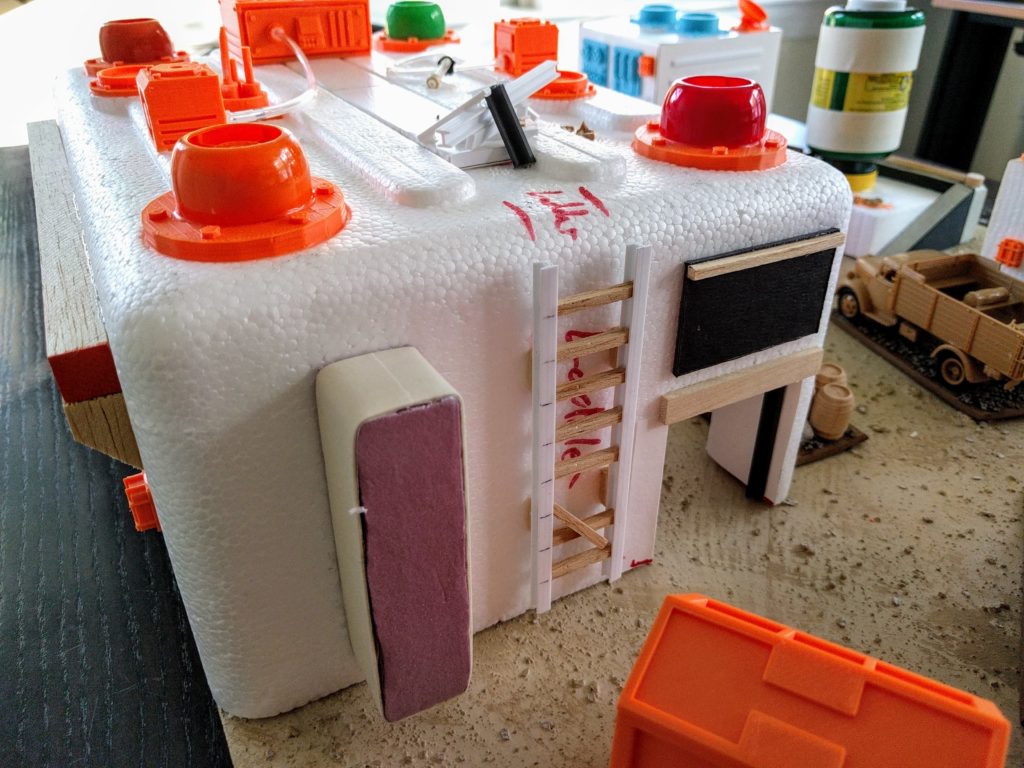
Side of the garage.
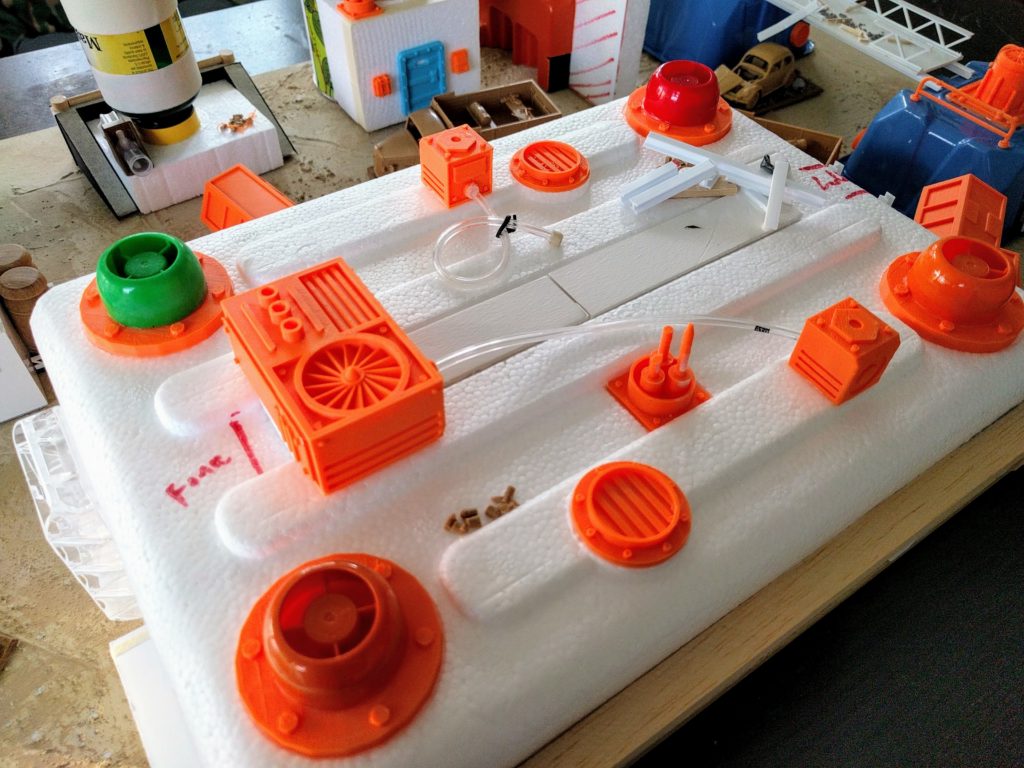
Final rooftop details of the garage.

Fuel Reservoirs

Next up were some fuel reservoirs made of supermarket mushroom containers. The key feature here is some kind of large pump that I imagined keeping the fuel moving around and cooled, or a giant fan for ventilation. These are big enough to provide cover, but I also added some railings on the sides. By themselves these are too slight to reasonably obscure any models enough for protection. However, once painted I plan to add overgrowth all across the board to give it an abandoned, unmaintained feel. Vines and plants draped over these railings will solidify them visually and make it clear that they provide cover, without having just stuck on some solid walls.
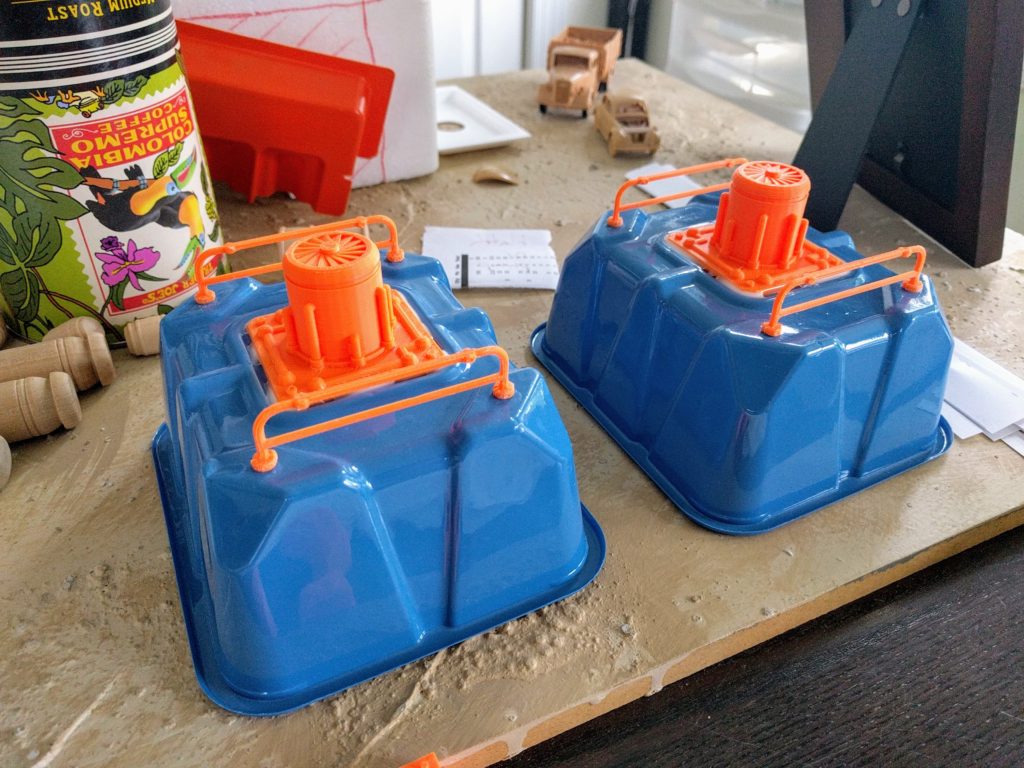
Primary components on the fuel reservoirs.

To create some vertically overlapped space on the board, a distinctive feature of much Infinity terrain, I made a walkway out of polystyrene strips and sheeting to go between the fuel reservoirs. The garage I think is too big for it to really feel like two planes of combat despite having two levels; the roof and interior can’t interact enough. Sizing for the walkway is dictated by having just enough clearance for a 40mm base to definitely fit on it. Overgrowth will provide models some cover while crossing, but mostly only from one direction—one side has already been blasted away! I frequently lose a trooper or two to missile and rocket fire while hiding on walkways by my deployment zone, and I wanted to capture that kind of story vignette here.

Finally, each fuel reservoir got a ladder, and some lights and vents were tacked on. Unusually for my terrain there’s no functional hint, no obvious interface for actually getting fuel in & out of the reservoirs. But I thought they looked fine at this point, I wanted to move on, and that lack of grounding is certainly not out of place in miniatures gaming. Maybe these entire buildings are cooling circulation units for a huge underground reservoir, interfaced through the pipes and fittings on the other pieces?
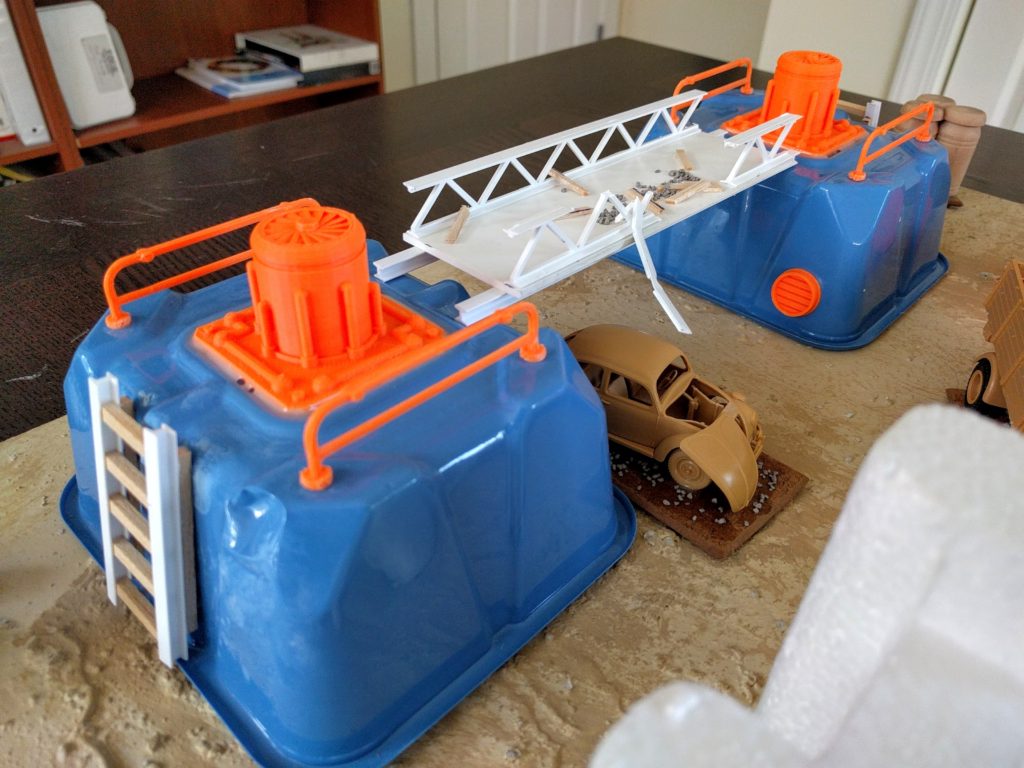
Ladder and walkway.

The mushroom containers are unfortunately very thin and compress too easily, the main effect of which is the features could pop off due to the plastic flexing under them. I’m going to address that by filling the undersides with expanding hard foam.

With the core concepts of the garage and fuel reservoirs nailed down, everything kind of took off. After almost a month of sitting on my hobby table getting poked at every now and then, the rest of the board got built pretty quickly over a couple nights. To those three pieces I added a mechanical building, silo, liquid tank, and a segment of blast wall to provide some additional large elements blocking line of sight. A variety of vehicles, containers, and scrap pipes then filled out the board with scatter terrain.

Mechanical Building

The mechanical building was inspired by realizing some sports drink canisters I had fit perfectly over the hole in a piece of plastic electronics packaging that I wanted to put on a wall somewhere. I started thinking it could be the broken output pipe from some giant pump. Later I realized this idea is a bit of a rehash, it basically combines the pump station and pipeworks pieces from my Medea Refinery build, but that’s ok.

Two blocks of foam covered entirely in cardstock make up the shape of the mechanical building. Again I used chunky details to provide cover rather than just solid walls. One railing is included though, which will get vines and ivy just like the fuel reservoirs to make it actual cover. As on the garage, I especially enjoy the tubing connecting some of the mechanical boxes to the wall inlets as a neat functional hint. The canisters on the front are glued on to break up the wall surface and provide cover straight down its length as the broken pipe does on the back. A short ladder at the back provides quick access the the mechanical boxes on the roof, but I purposefully did not add a second to the top roof so that it would take some extra climbing to get there.
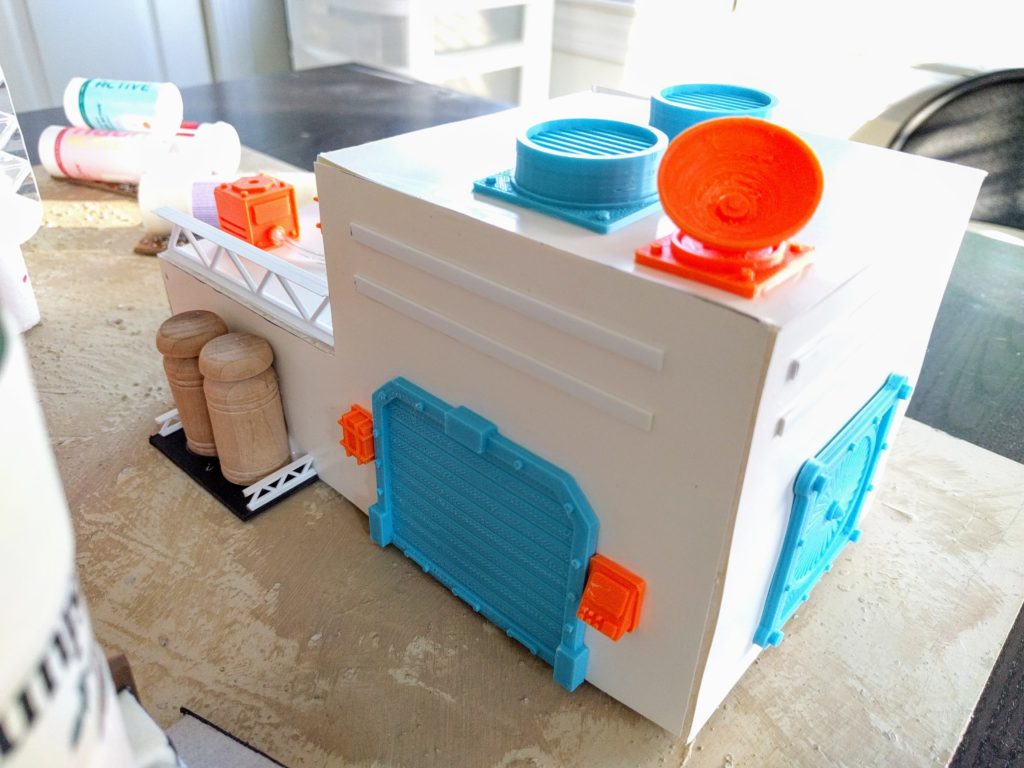
Front of the mechanical building.
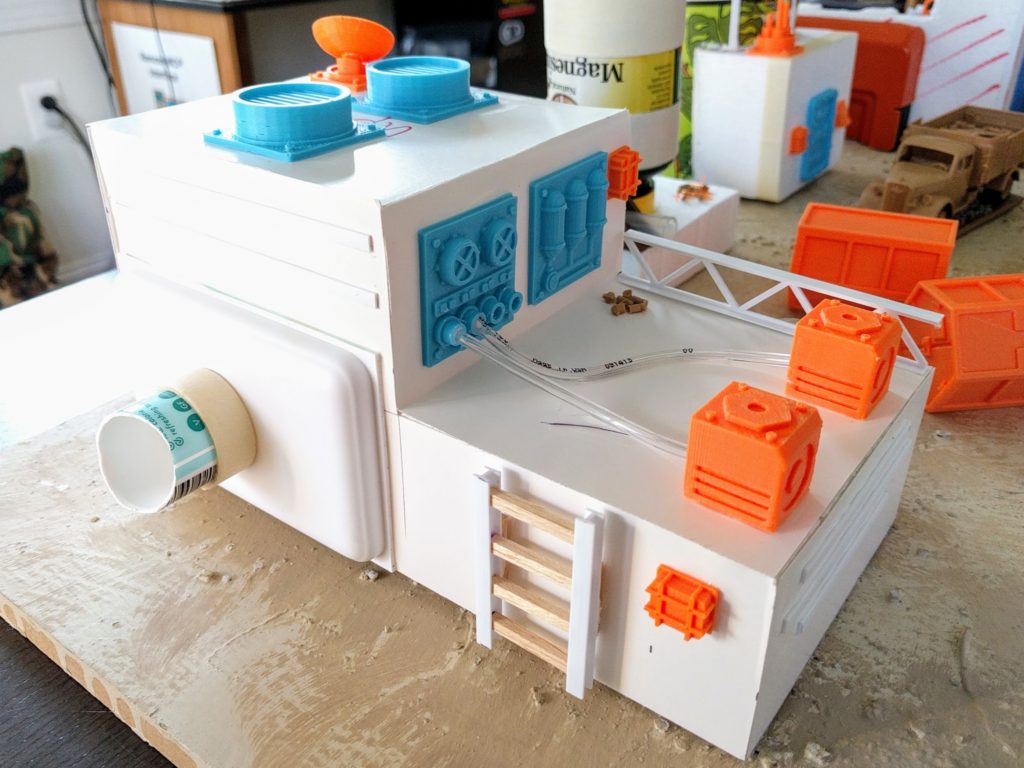
Back and roof of the mechanical building.

Silo and Tank

To create some more big LOS blockers, I made up a silo and a fuel tank out of coffee and vitamin containers. Loops of masking tape and polystyrene strips combined with the foundation pieces hopefully will break up the recognizability of the shapes just a bit once painted. I did not add ladders or platforms to the silo, though I might think about that some more so that any models on top are more accessible to close attack. Hopefully players will know to not place the tallest terrain piece in either deployment zone and let a model just deploy on top unreachably. I also plan to add a lot of built-up overgrowth to the top to make it difficult to place infiltrating snipers there.
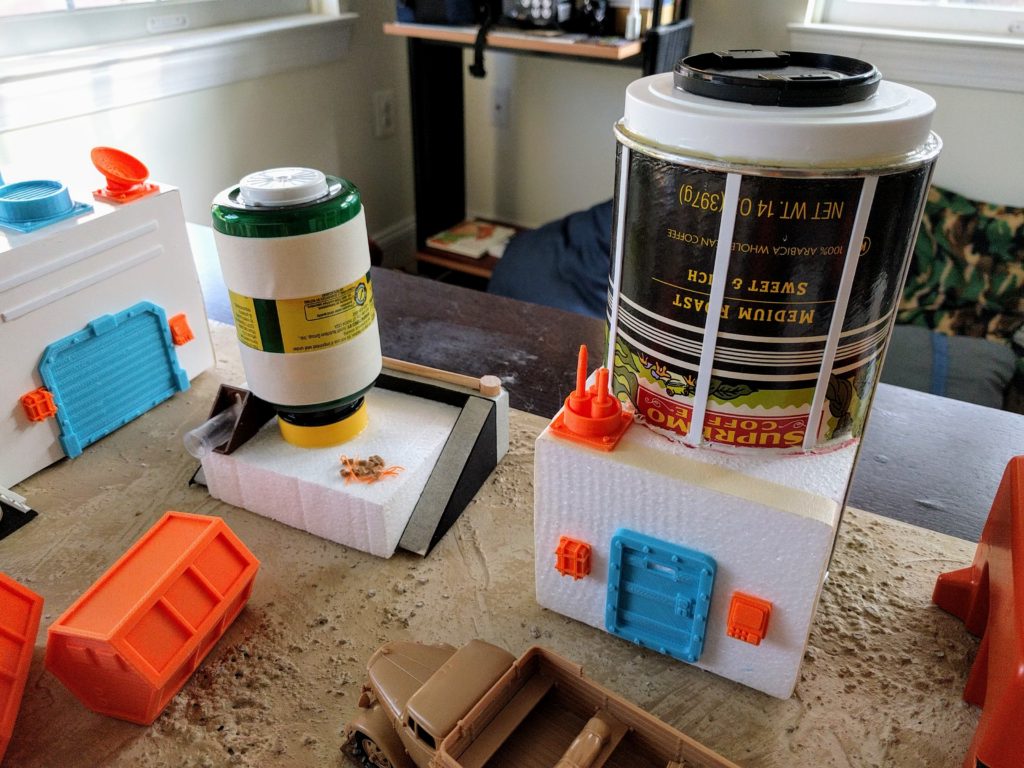
Tank and silo (left and right).

Details

Finally, I made a whole bunch of scatter terrain: Several vehicles, lots of containers, and some piles of scrap pipes. The shipping containers are 3d printed designs I made that have been super useful on several boards. One variant is on Thingiverse. The other containers are wood pieces I got in bulk a while ago and use everywhere. The scrap pipes are sports drink tubes hacked up, and in one case wrapped with tape to make the ends look fitted. I like them being see-through laterally, making the ends tough to use for cover even as the sides are excellent for it.

The vehicles are 1/48 models. For 40k that works for some tanks and is arguably maybe “correct” if you incorrectly consider its miniatures to be 28mm scale models rather than the artistic, loose 28–32mm gaming pieces they are. But for these and most vehicles 1/48 is too small to look right in Warhammer. That’s one reason I never built my original vehicle graveyard idea. For Infinity though, as the figures are generally fairly accurately proportioned and mostly closer to 28mm scale, these models look ok. Next to heavy infantry or such they look small, but they should—those are big warriors in giant suits of armor! Compared to unarmoured troopers and similar the models look fairly plausible, particularly the earlier figures before Corvus Belli started creeping up the scale. Comparison pics to come once the terrain is painted.

I greatly enjoyed clipping and physically smashing down the really broken truck and airplane. I don’t know what kind of backstory justifies a biplane in an Infinity setting. Maybe this depot is on some neglected backwater planet and they use very low-tech vehicles for civilian tasks as they’re easy to build and maintain? I have no idea, but it looks pretty cool in the garage-hangar and is a neat piece of scatter terrain cover.
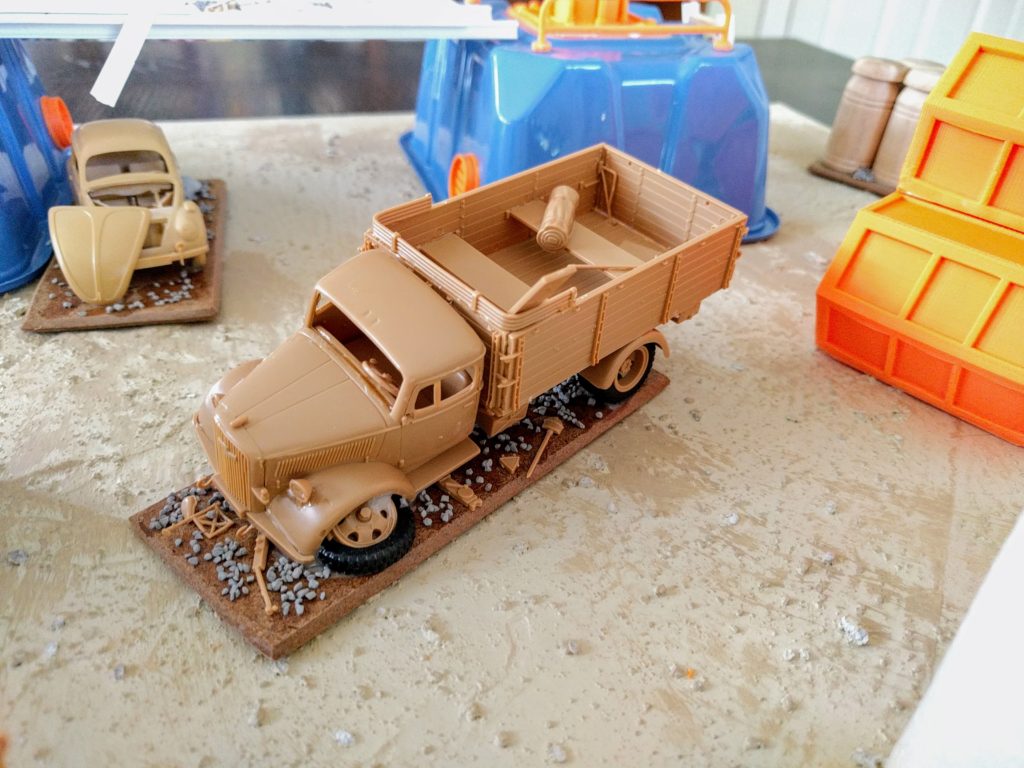
Broken down truck and Volkswagen. Original Volkswagen Beetles have their engines in the rear so that vignette with the hood off will be misread by a lot of people thinking it reflects working on the engine, but it’s still plausible.
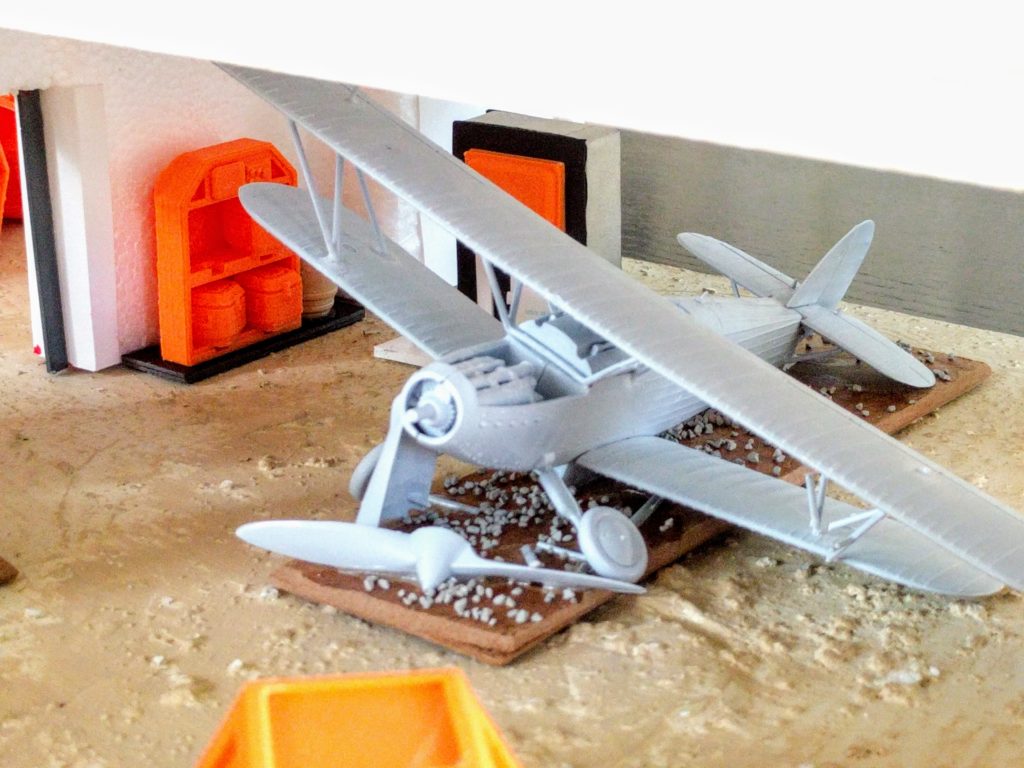
Abandoned biplane in the garage.
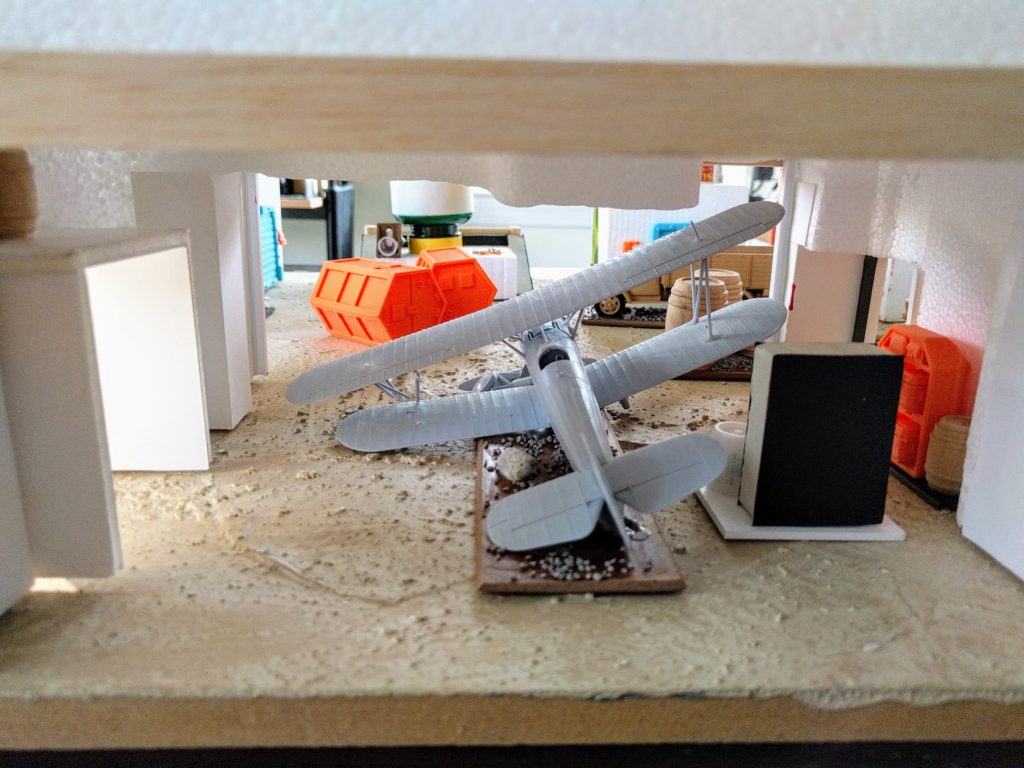
Looking out from inside the garage.
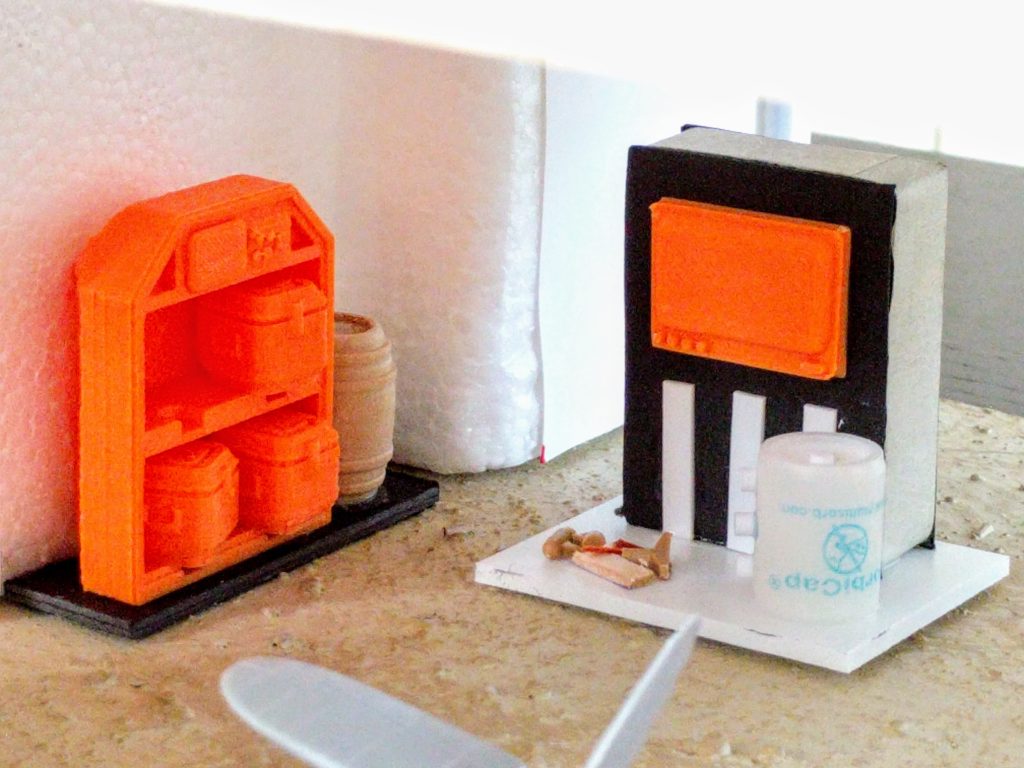
Diagnostics console, supplies shelves, and other equipment inside the garage.
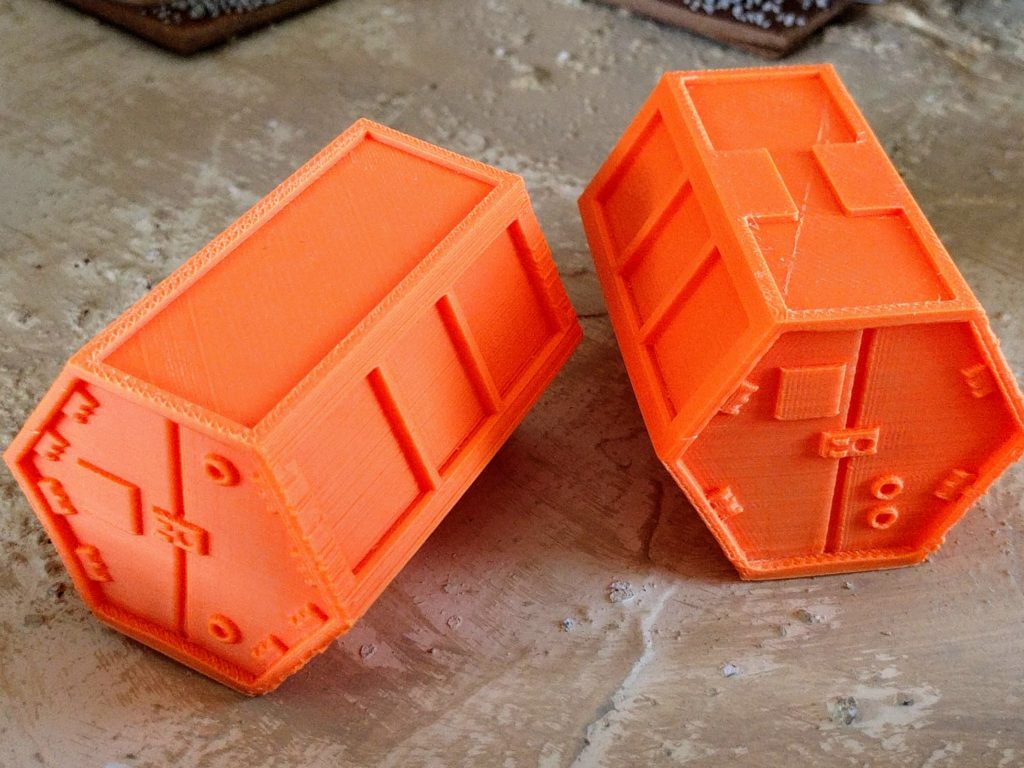
Shipping containers: The true hallmarks of far future war.

American-Style

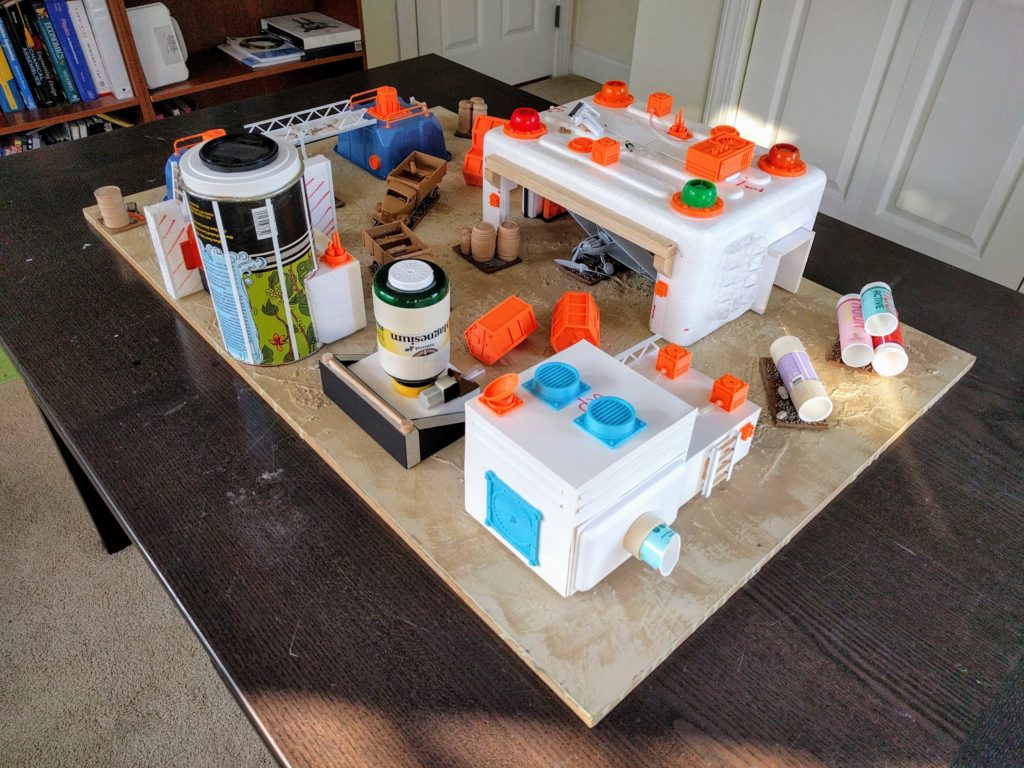
That about wraps up the tour. There’s definitely enough pieces in the depot for the dense “American-style” boards we generally play in my Infinity scene, much to the sadness of my airborne troops. Big models have enough to hide behind, and there’s plenty of ways to prevent overly long firelanes and lots of partial cover over which to advance cautiously. Variety in heights should create good reasons to go up or slink around. Boards made with these pieces will definitely not be symmetric, an important property required to give meaning to the choice between initiative or deployment zone selection. On the flip side, the board is so dense that it should be difficult to inadvertently leave one side overly exposed. Finally, the pieces have a good level of detail, but easy playability and only a few features here and there that look particularly amenable to breaking, so I think it will hold up ok to public play.

Next up is painting, hopefully to be completed for next month’s tournament!
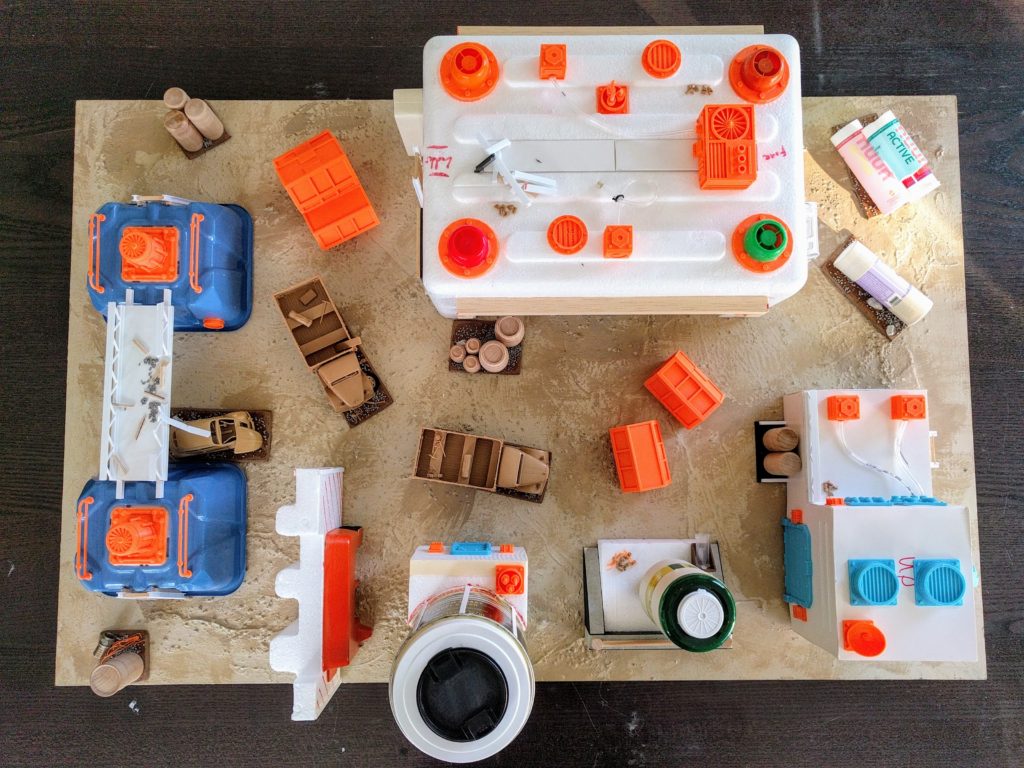
Top view.
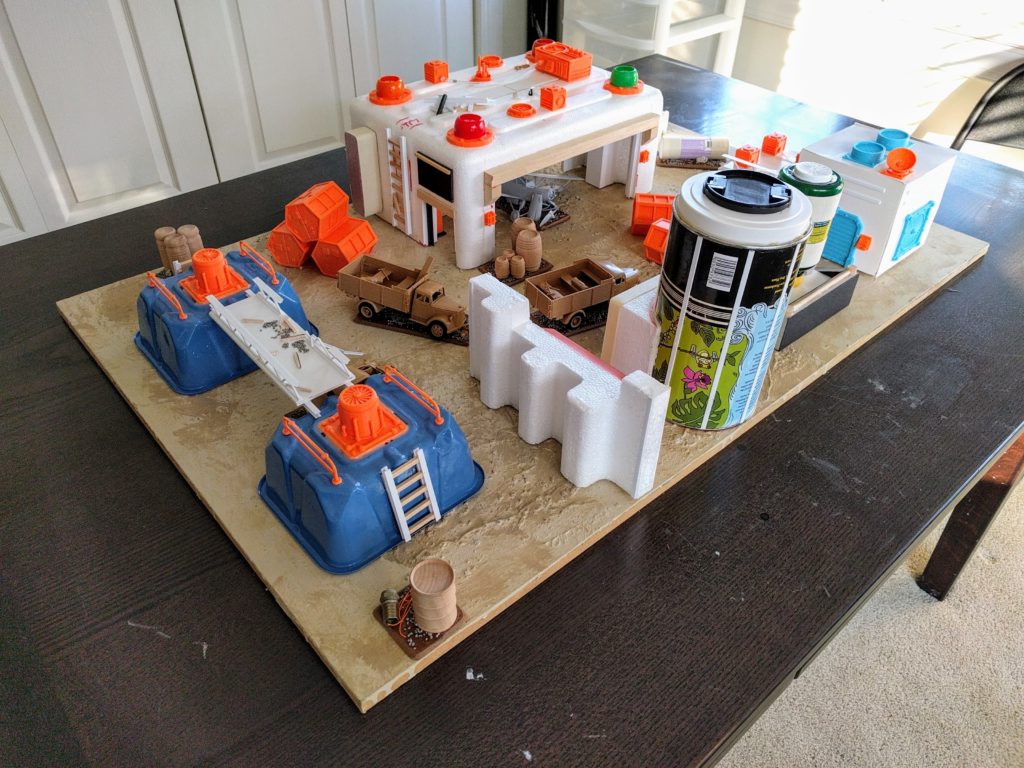
Left airborne view.
Right airborne view.
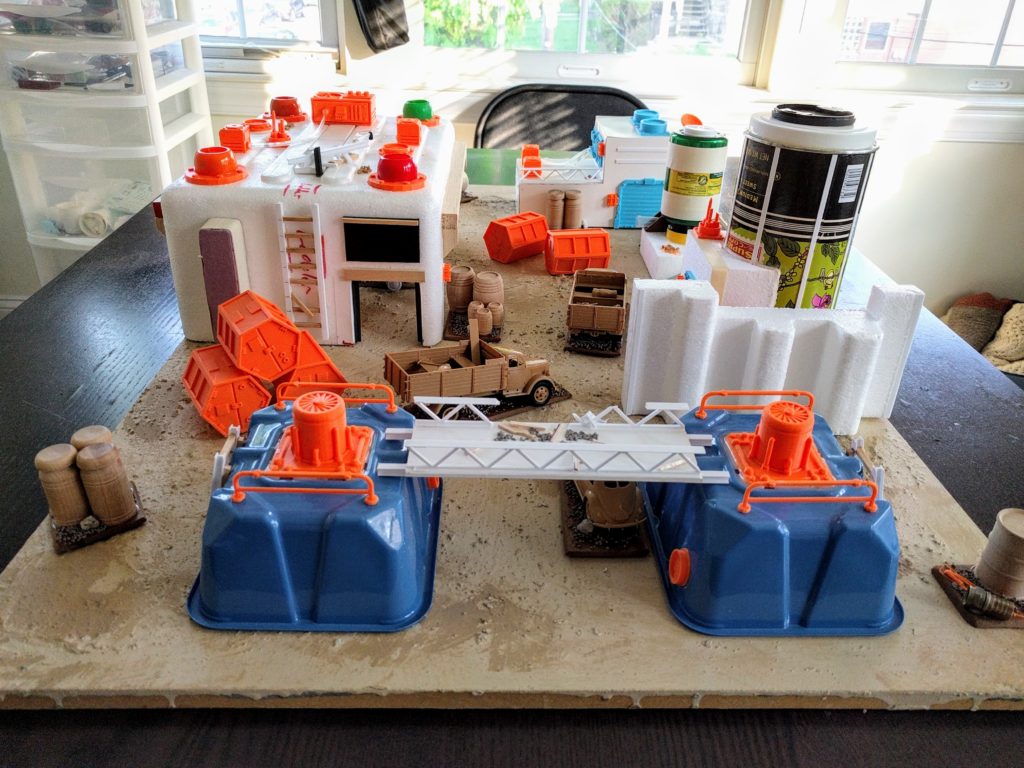
Ground view left.
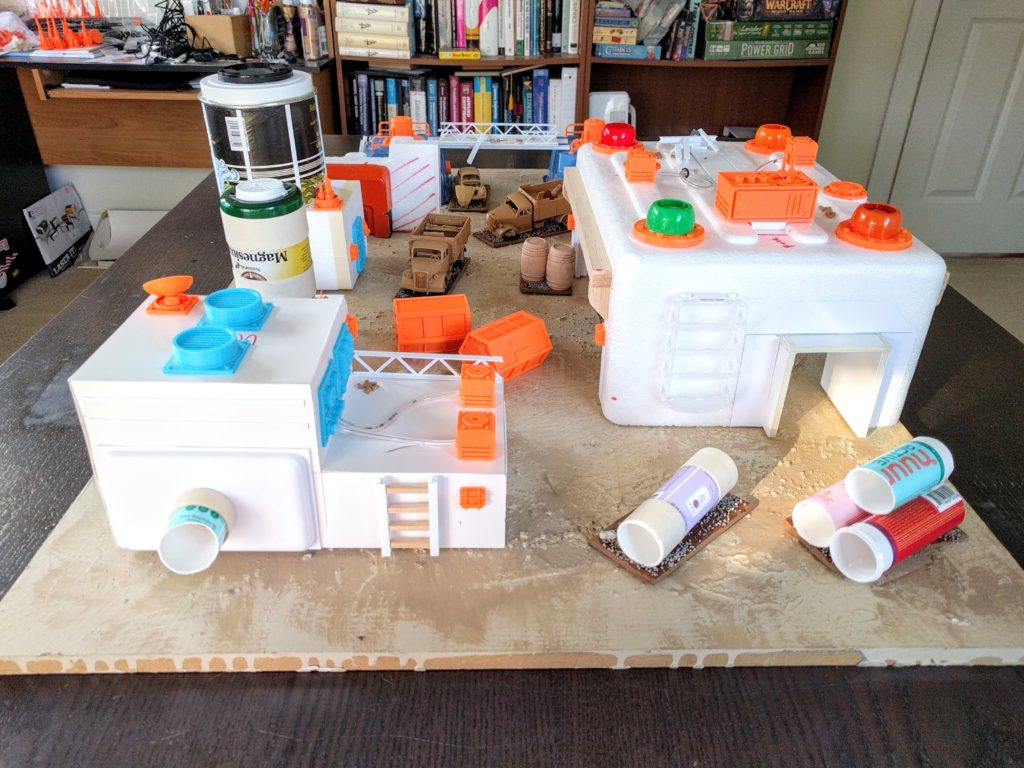
Ground view right.