Escalation on Solypsus 9

banner

Yesterday concluded the map portion of our Solypsus 9 campaign! Fickle as they are foul, The Legions of Discord realized a losing battle when they saw one and quickly retreated from their beachhead gained last month. That left Spoilers and Order battling it out for control of the colony:

  • Forces of Order: Skitarii, Kingbreakers Space Marines, Sanguine Hunters Space Marines, and Grey Knights
  • Spoiler Horde: Tyranid, Dark Eldar, and two complements of Necrons

There are a few more photos in the gallery. Full results and missions are on the event webpage. Campaign mechanics are in the Solypsus 9 outline. Coming up next month is the conclusion of the series in an Apocalyptic mega-battle for the planet!
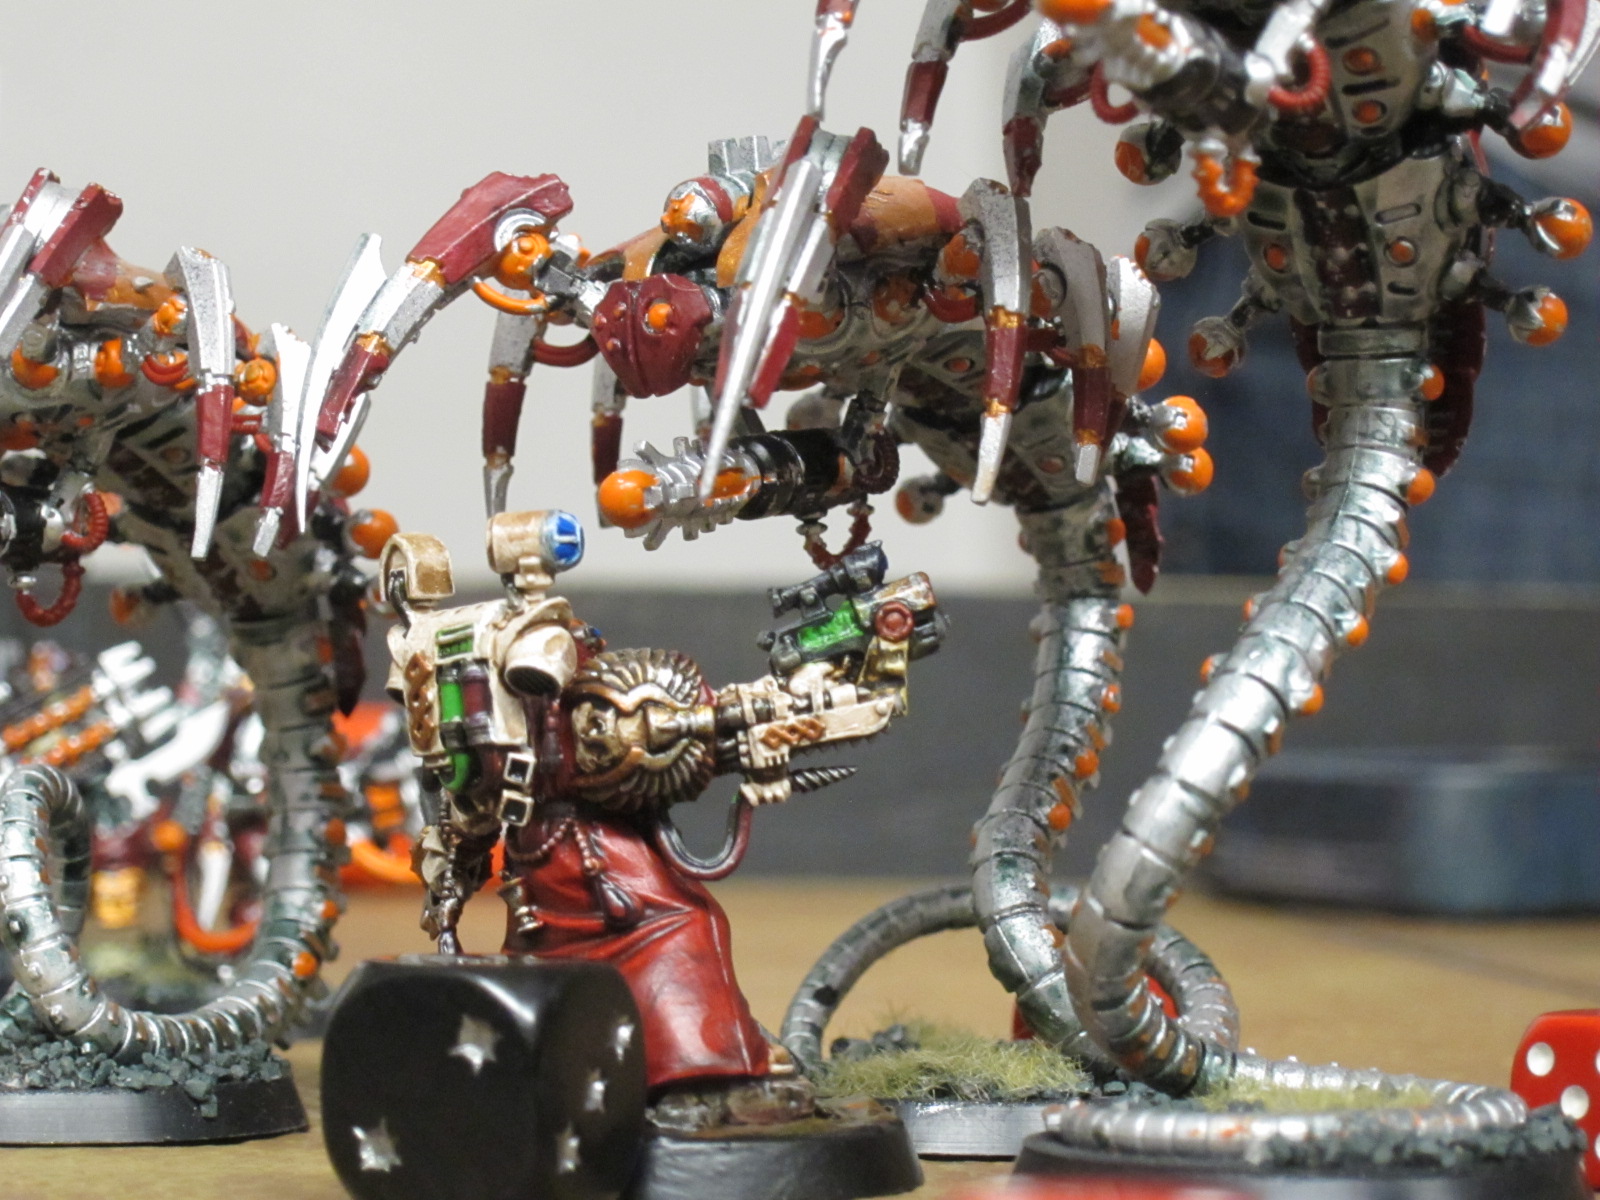
Master Apothecary Sauvon of the Kingbreakers singlehandedly holds back a flight of Necron Wraiths on their way to a key objective.

Master Apothecary Sauvon of the Kingbreakers singlehandedly holds back a flight of Necron Wraiths on their way to a key objective.

Solypsus 9

Apparently desperate for even the most meager source of biomass, months ago a Tyranid horde dropped on the small, forgotten, and largely barren Imperial outpost of Solypsus 9. Among the horde was a new Ork hybrid xenomorph assimilated in the course of earlier fighting throughout the sector. Caught off guard by this new threat and attack vector, Imperial forces rushing to defend the colony successfully shored up the major technical installations, reinforcing the Mine, Lab, Comms Tower, and Starport, but left the miserable population trapped within the Hab Blocks to be overrun and feasted upon.

Encouraged by this small blow to the Imperium, all manner of xenos then joined the fight, whether simply to revel in the bloodshed or for darker motivations. The significance of Solypsus 9 then shifted, as the Imperium continued reinforcing the planet rather than abandoning the fight or declaring it Exterminatus, while the Tyranid made good a new, purposeful assault on the Laboratory and knocked the defenders back to the Generator.

Intrigued by this deeper shading on the conflict, the Chaos gods finally sent their minions and champions to the conflict. Intense multi-faceted fighting between all three alliances splintered control for the colony, knocking the Spoilers out of all the major installations and the Legions of Discord securing a breachpoint on the planet among the Hab Blocks and Order regaining the Laboratory.

Finding nothing of interest to their unknowable minds, the major Discord forces were quickly redrawn by their overlords, but still the Order and Spoilers alliances battle on in an ever-escalating war for Solypsus 9…
Final disposition of armies and territories after the third event.

Final disposition of armies and territories after the third event.

Battle

Fighting in the fourth phase of the campaign focused on the Mine and Lab:

  • First Round: Tyranid moved on the Mine from the desert and crushed the just-arrived Grey Knights to gain a defensible position. Kingbreakers counter-attacked in the desert, but were intercepted and soundly beaten by Necrons and mind-controlled Tau. Dark Eldar went to investigate why the Tyranid and Imperium have shown so much interest in the Lab, but were blocked by Skitarii and a Mechanicus reclamation team, their sudden appearance yet another sign of the colony’s hidden significance. Sanguine Hunters and Necrons both besieged the Hab Blocks, with the Blood Angels successors displacing Discord defenders as well as prevailing over the automatons.
  • Second Round: Tyranid violently tore through the Skitarii to regain the Laboratory. Sanguine Hunters attempted to reclaim the Mine, but were ensnared en route by Dark Eldar raiders. Necrons marched on the Starport and obliterated the defending Kingbreakers. Grey Knights and Necrons fought over the Comms Tower, but Order maintained control.
  • Third Round: Vengeful Kingbreakers counter-attacked the core of the Tyranid campaign at the Laboratory and regained the facility in a swirling maelstrom of ground-to-air combat. Grey Knights attacked the Mine but Dark Eldar raiders once again swept in to cut and shatter the thrust en route. Necrons decisively defended their hold on the Starport against the Sanguine Hunters. At the Comms Tower, heavily augmented Skitarii waged a chillingly brutal yet ultimately bloodless combat with the fully automated Necron and won the field.
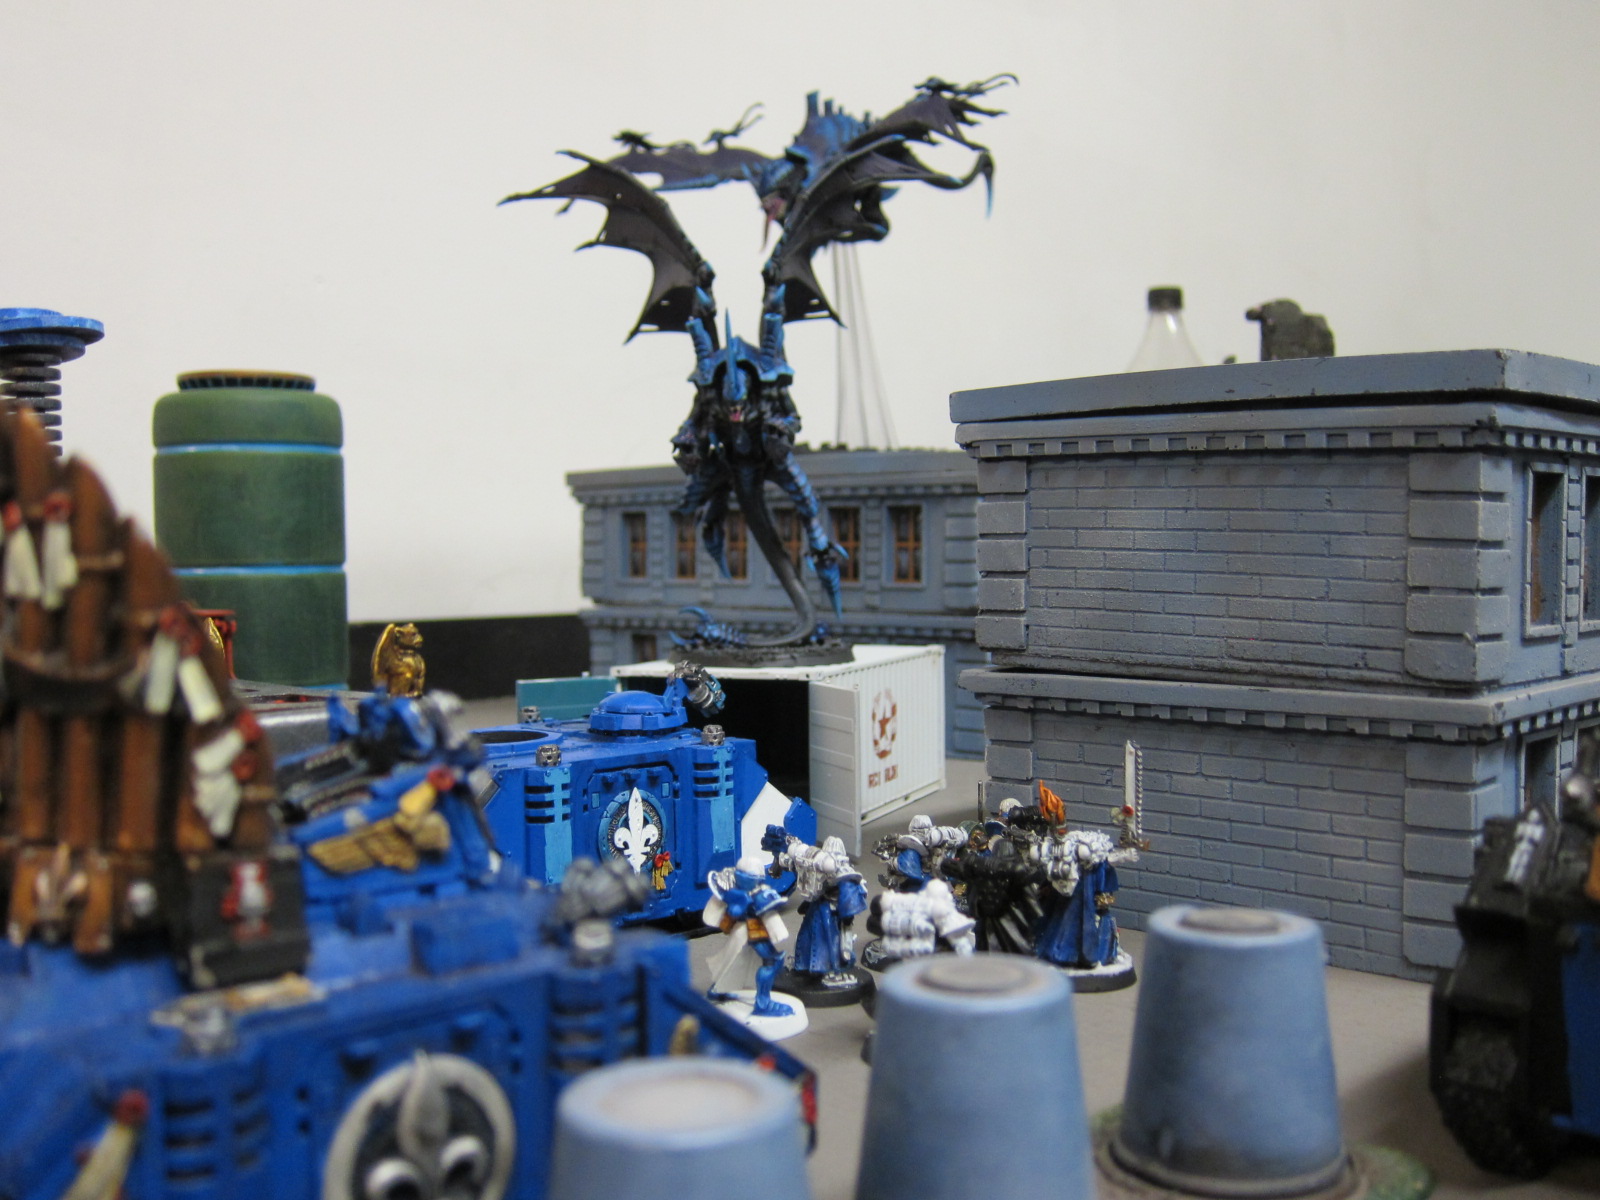
Tyranid swarm over ground defenders far below.
Tyranid swarm over ground defenders far below.

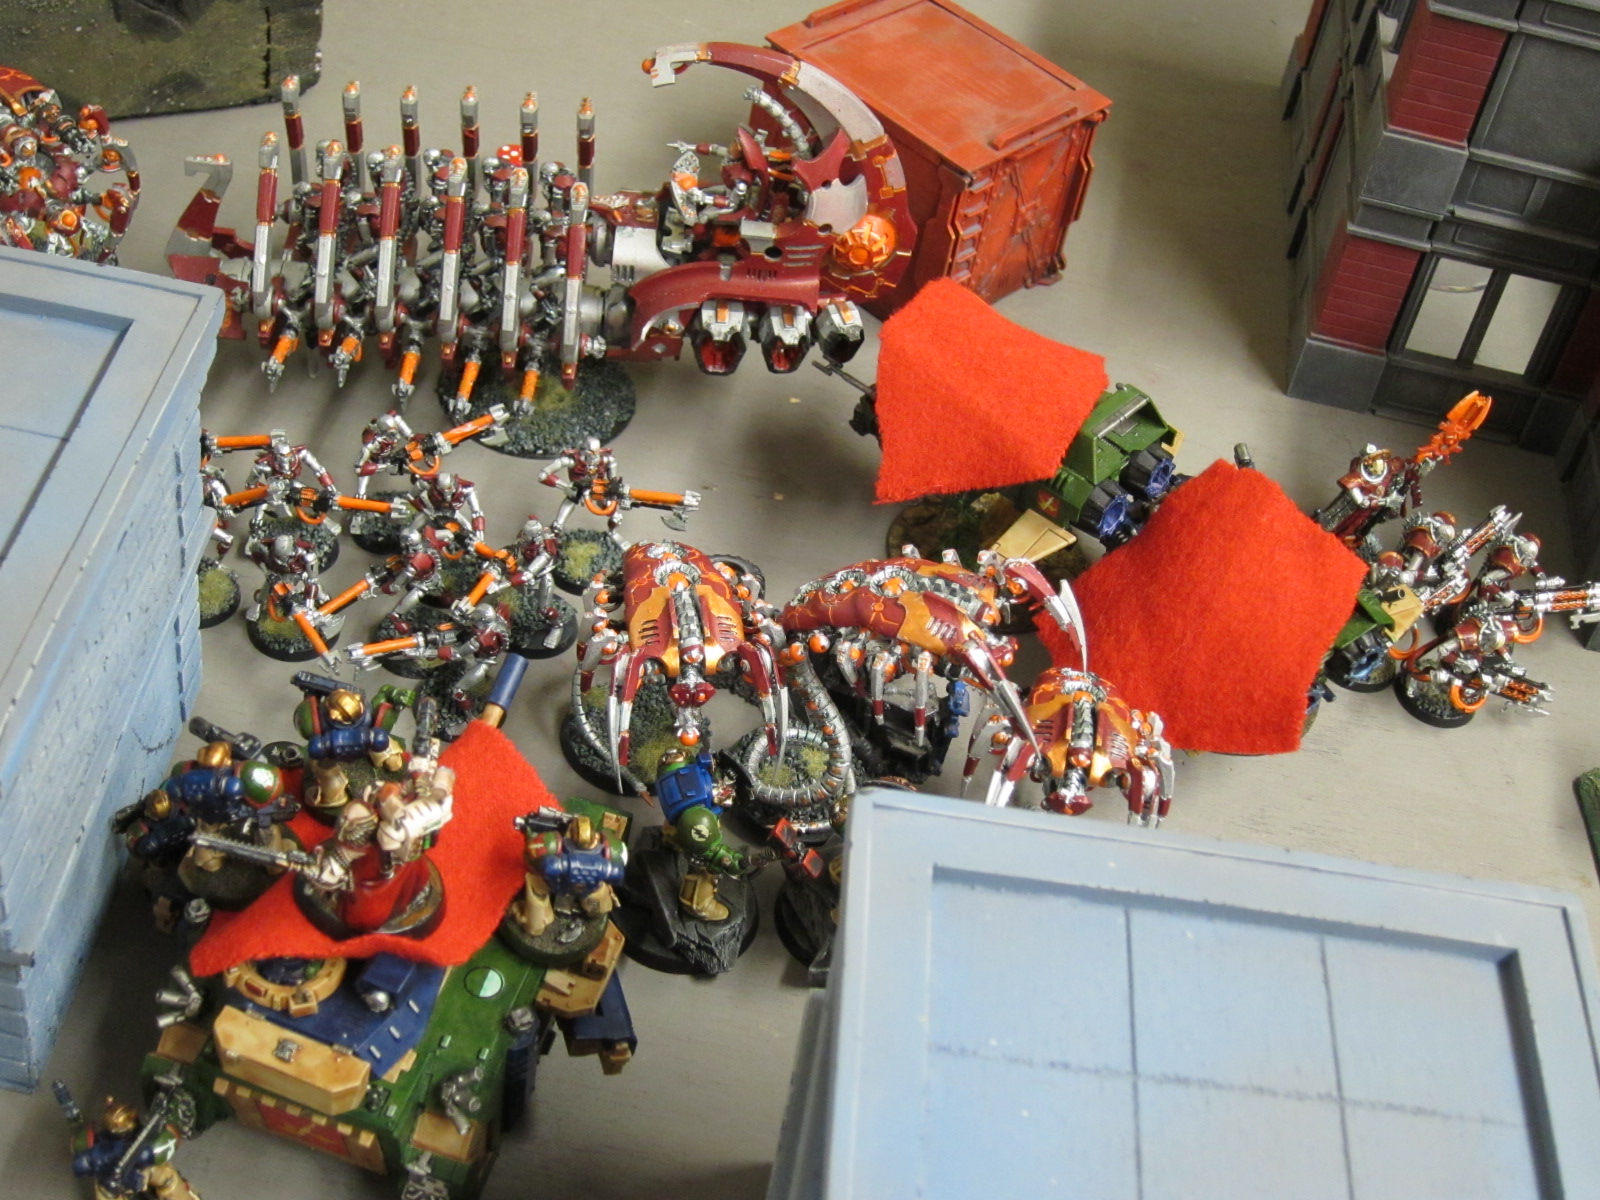
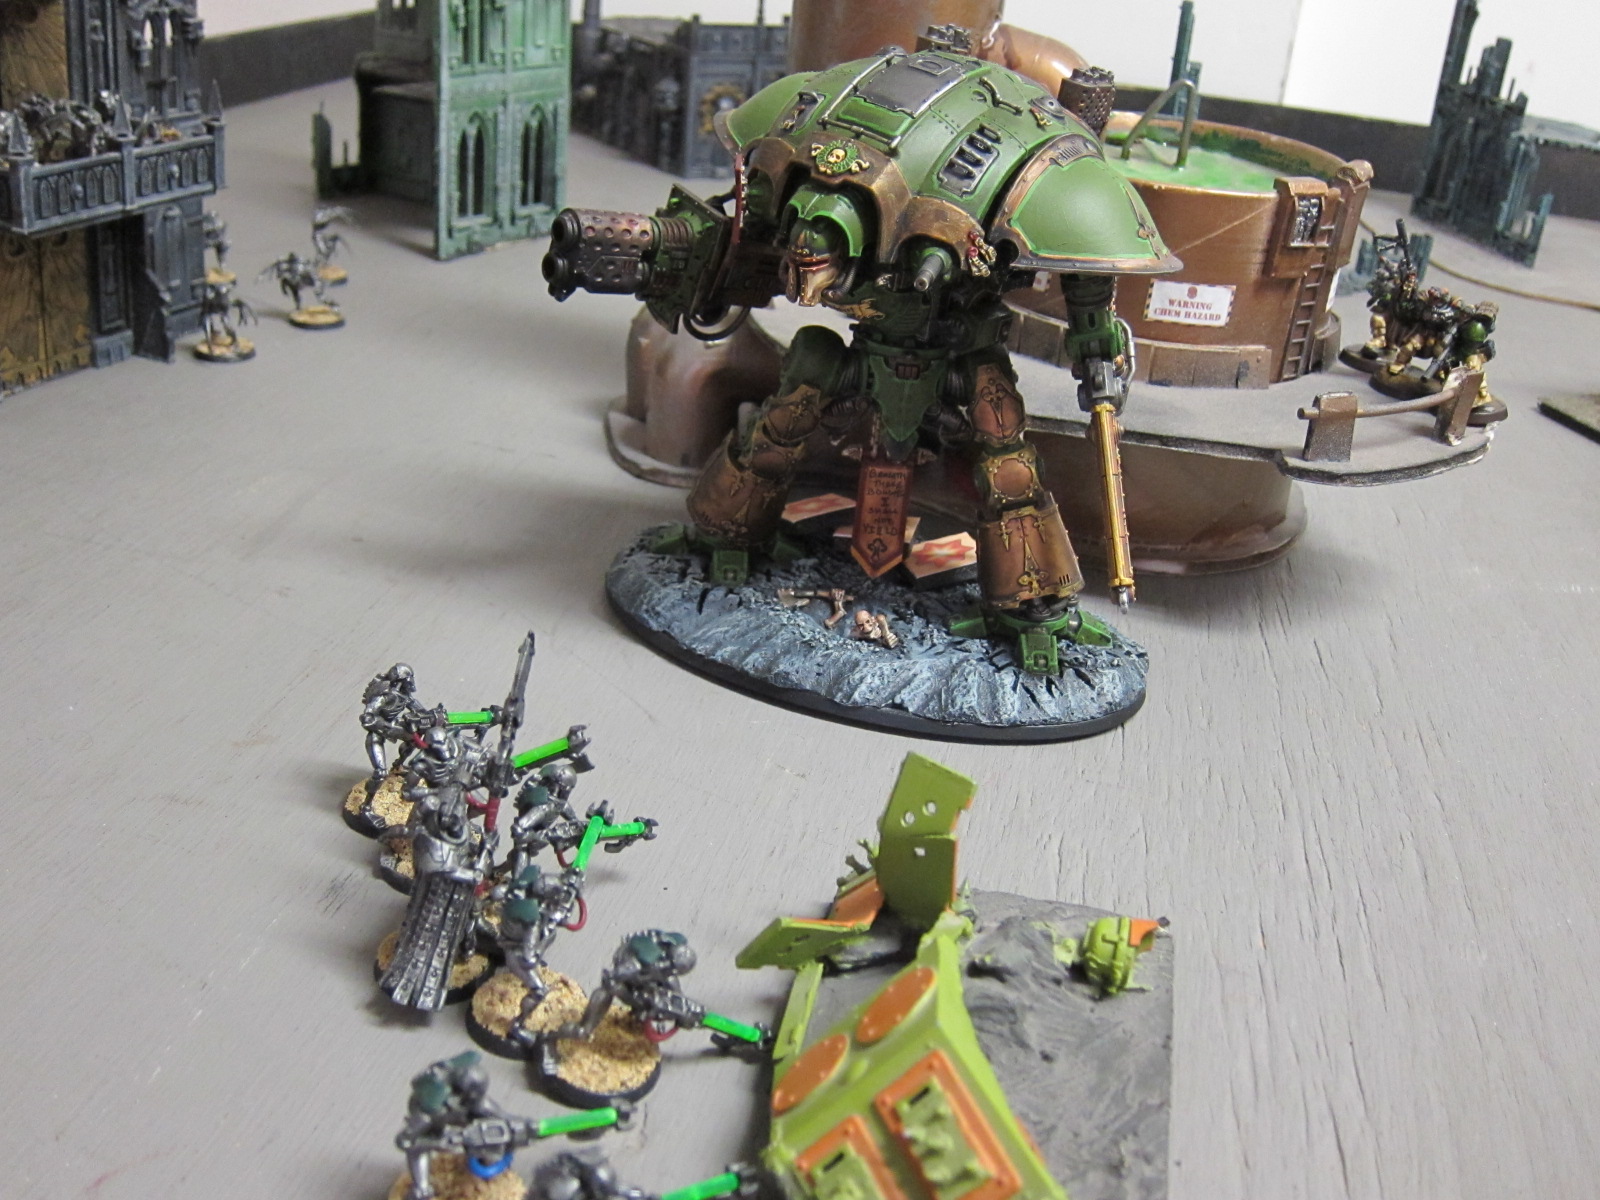
The Knight Errant Greenheart fights Necron among the colony's installations.

The Knight Errant Greenheart fights Necron among the colony’s installations.

Kingbreakers march to fight the Tyranid over ground already corrupted by Chaos' brief occupation.

Kingbreakers march to fight the Tyranid over ground already corrupted by Chaos’ brief occupation.

Outcome

Spoilers won the first round of the day significantly, more than doubled out Order in the second round, but lost significantly in the third round due to a couple Order players securing both massacres and their covert missions. The horde though still carried the day, 173 to 134, and closed the gap toward Order’s tally. That puts the total victory points earned at:

  • Order: 123 + 179 + 76 + 134 = 512 victory points
  • Spoilers: 110 + 140 + 66 + 173= 489 victory points
  • Discord: 114 victory points

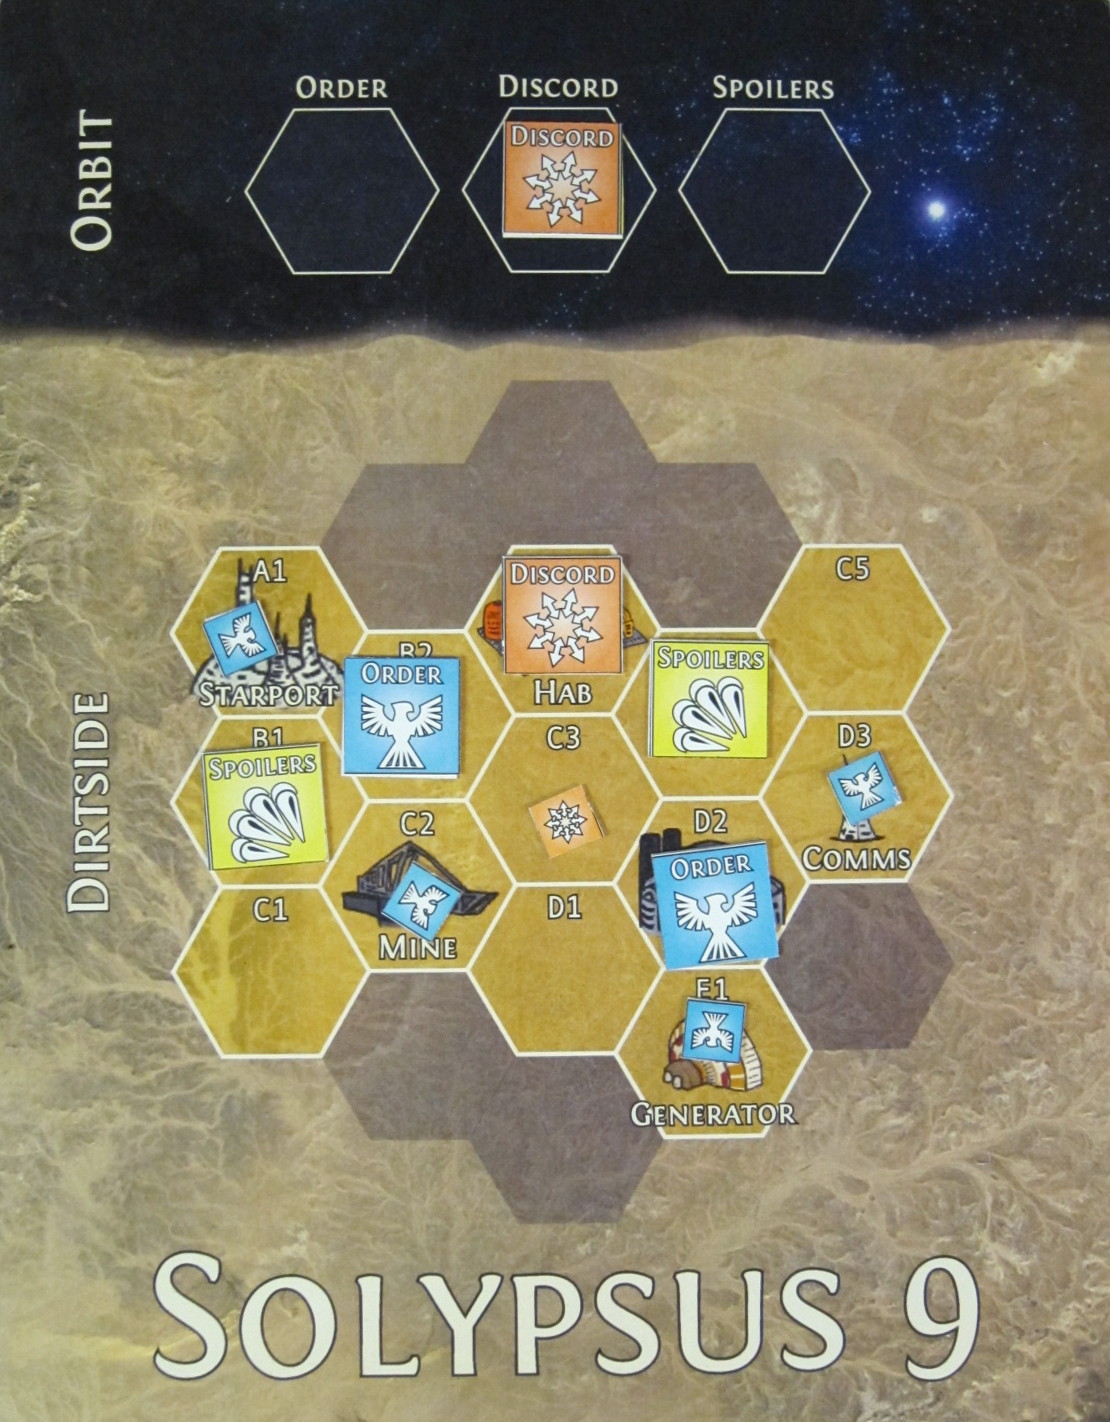
Despite the Skitarii leadership’s strenuous and ominous exhortations for Order to make sure it has a way to get off the planet, the Spoilers took hold of the Starport in addition to the mine. Order regained the Laboratory and the remains of the Hab Blocks, and continues to hold the Comms Tower and Generator. Both alliances achieved their chosen strategic objective for the day: Spoilers for the Mine, and Order for the Laboratory. That puts the total campaign points earned at:

  • Order: 5 + 5 + 12 + 14= 36 campaign points
  • Spoilers: 1 + 4 + 0 + 9 = 14 campaign points
  • Discord: 6 campaign points

All told, Spoilers and Order have waged a closely fought tactical war, with just 23 victory points separating them. But Order has managed to largely defend and control the colony from the onslaught. They’ll be hard pressed to defend all those installations though when the world is thrown into Apocalypse!

Disposition of Solypsus 9 after the fourth event.

Disposition of Solypsus 9 after the fourth event.

Revelation Is At Hand

Next month our Solypsus 9 campaign will conclude with an epic mega-battle as the Apocalypse arrives and the alliances battle it out for final control of the colony’s installations. Stay tuned for details, as there will be a fair amount of coordinating beforehand to ensure a fun, strategic game for everybody.

kingbreakers-iconFirst Sergeant Scolirus subtly flexed the fingers of his powerfist impatiently as the Skitarii in front of him chittered away. He had no idea what it was trying to convey and didn’t much care for their heavily augmented kind, despite or perhaps because of the bionic reconstruction throughout the left half of his face. Moments from pushing it off and walking away though, he suddenly somehow understood the smallest part of the message.  The Mine. There was something important in the Mine? The Skitarii shook its head and blatted out its techna-lingua at an even more frantic pace. Finally Scolirus got the message.  Not something, but someone…

The hive mind comes to take what it wants...

The hive mind comes to take what it wants…
Alliances of Solypsus 9

banner

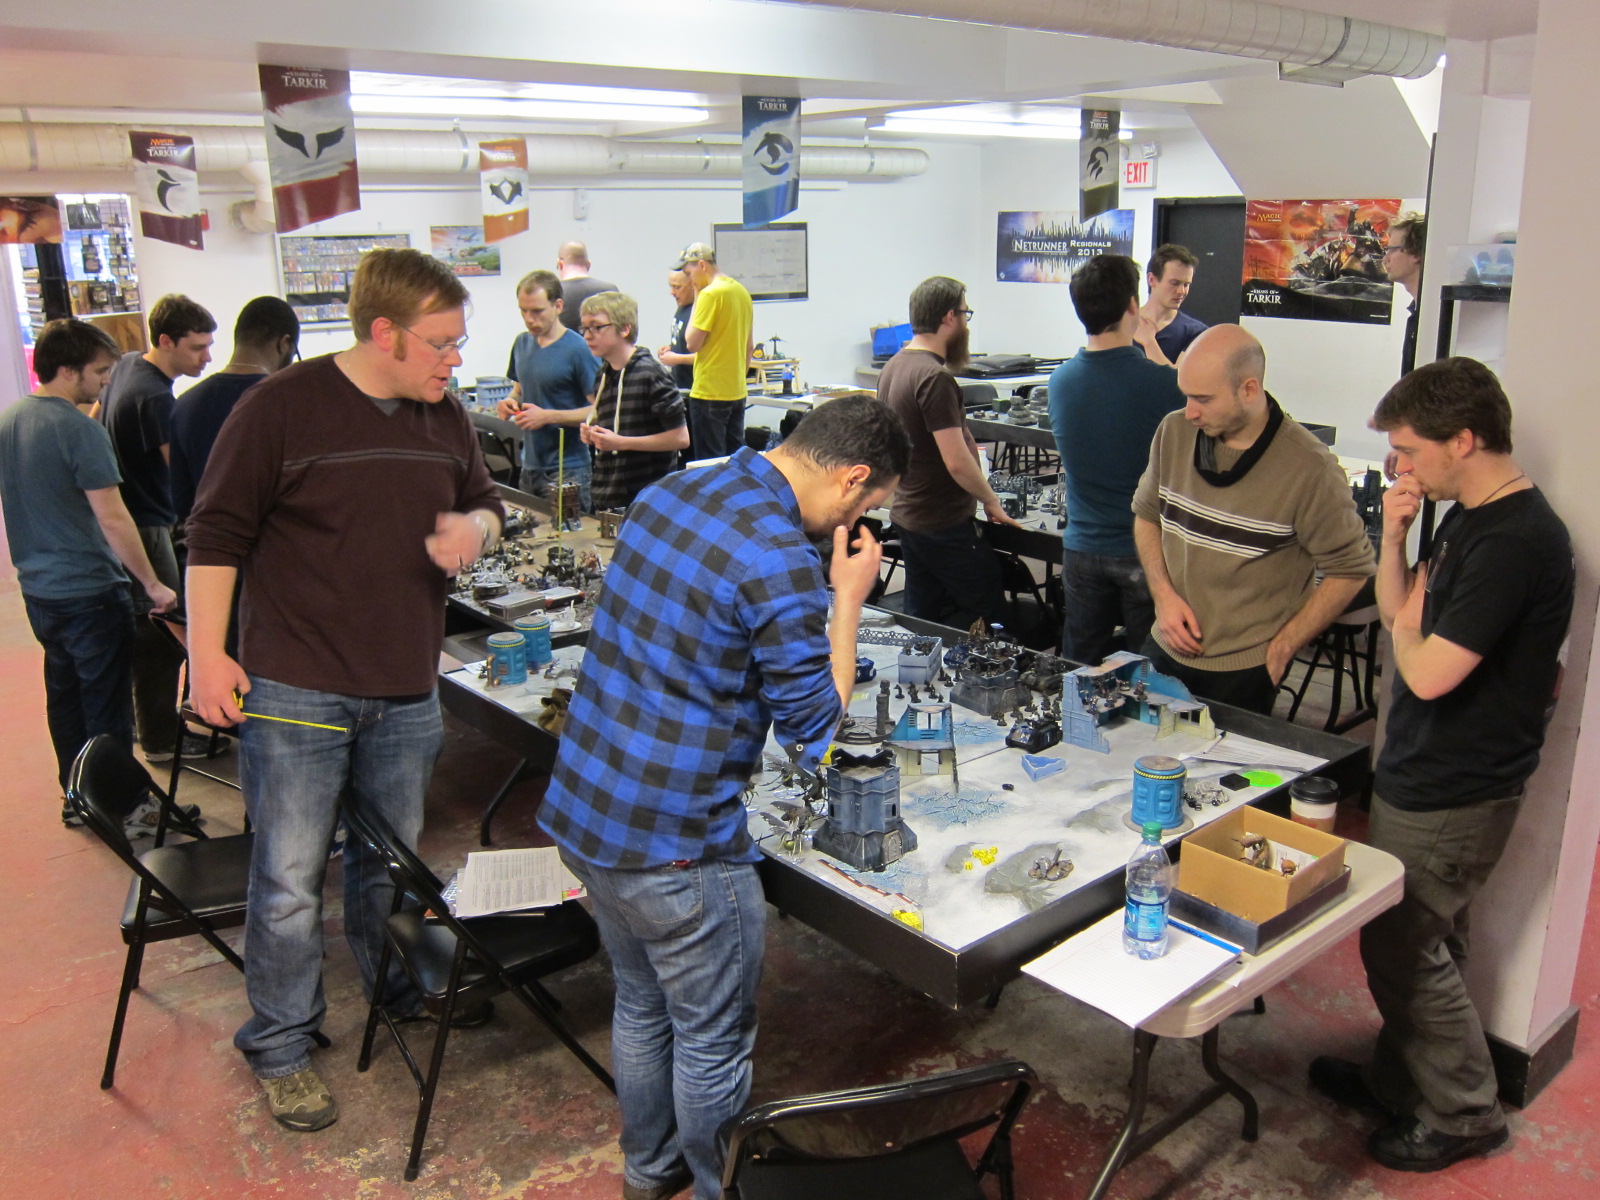
The third event of our Solypsus 9 campaign was yesterday. Eight teams comprising sixteen players total competed in the doubles format, each player fielding 1000 points. The Legions of Discord joined the battle, working to carve out a beachhead on the planet from the Spoiler Horde already invading and the Forces of Order defending:

  • Forces of Order: White Scars, two contingents of Imperial Guard, Adepta Sororitas, Kingbreakers Space Marines, and some surprisingly friendly Orks
  • Legions of Discord: Four contingents of Chaos Daemons, Chaos Marines, and Dark Eldar
  • Spoiler Horde: Tyranids, Dark Eldar, and two contingents of Necrons

More photos are in the gallery. Full results and missions are on the event webpage. Core campaign mechanics are in the Solypsus 9 outline.

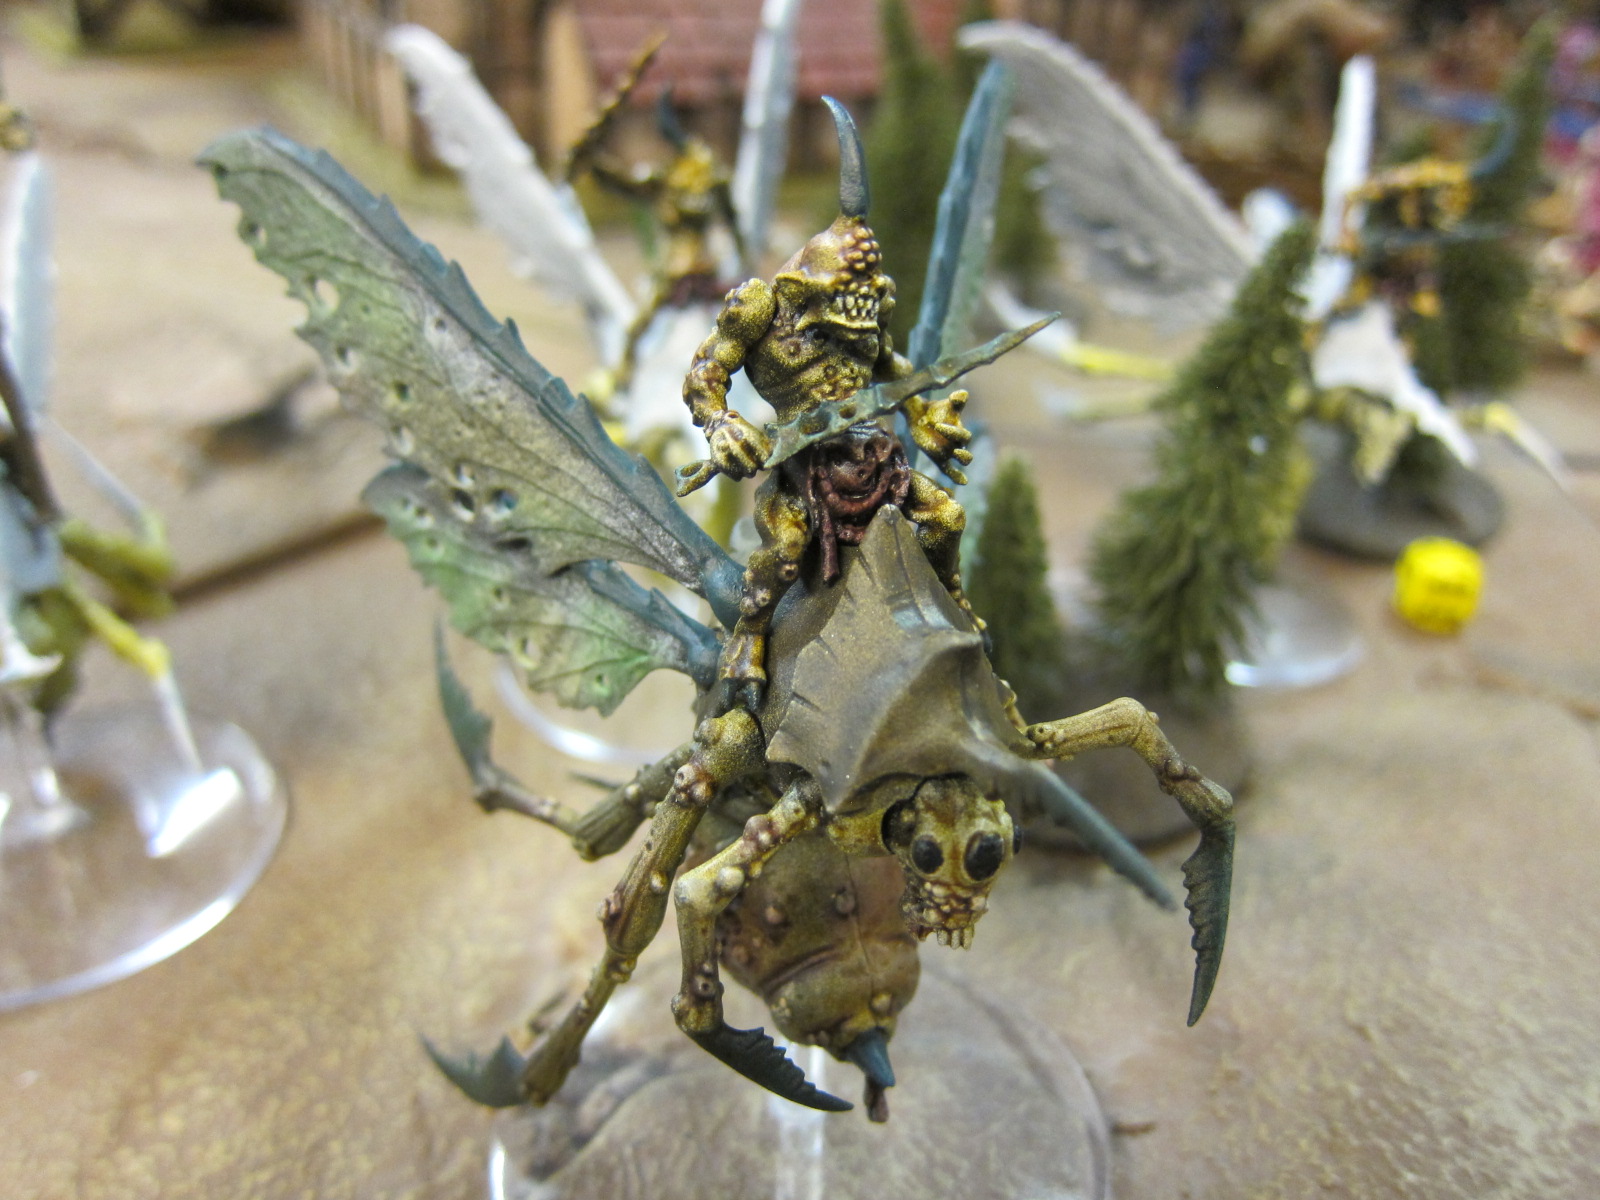
Chaos arrives, on the wings of plague!

Chaos arrives, on the wings of plague!

Solypsus 9

The last two months of fighting began with a Tyranid and Ork horde dropping on the forgotten Imperial outpost of Solypsus 9. The horde quickly overran the Hab Blocks, but Imperium armies successfully shored up the Mine, Lab, Comms Tower, and Starport. In subsequent fighting the Spoilers took the Laboratory but the displaced Order troops reestablished themselves at the Generator. No doubt delayed in The Warp, this month the Legions of Discord finally arrived, hungry for battle.

Battle

Fighting renewed focused around the Lab and Hab Blocks.

  • First Round: Dark Eldar and Necron Spoilers correctly anticipated the primary threat on the Laboratory, making a move against the center of the settlement just as Imperial Guard and Sororitas troops attacked from there. The Spoiler attack though was disrupted by Chaos Daemons and the remaining Necron and Tyranid defenders in the Lab overrun. Meanwhile, yet more Daemons also clawed out of The Warp into the heart of the Hab Blocks, overwhelming the defenders and terrorizing the populance.
  • Second Round: Chaos Daemons and Imperial Guard both moved on the Necrons and Tyranids regrouping on open ground, but the Order was soundly rebuffed even as the Spoilers were crushed. On the hunt for fresh victims to buff up their strength, Dark Eldar supported by Necrons also successfully raided the Hab Blocks.
  • Third Round: Fighting spilled out all over the settlement, with Daemons and Kingbreakers making attacks on open ground to scour fleeing troops. Dark Eldar were routed from the Hab Blocks in the closing moments by Chaos Marines working in tandem with other denizens of Commoragh to betray their kind.
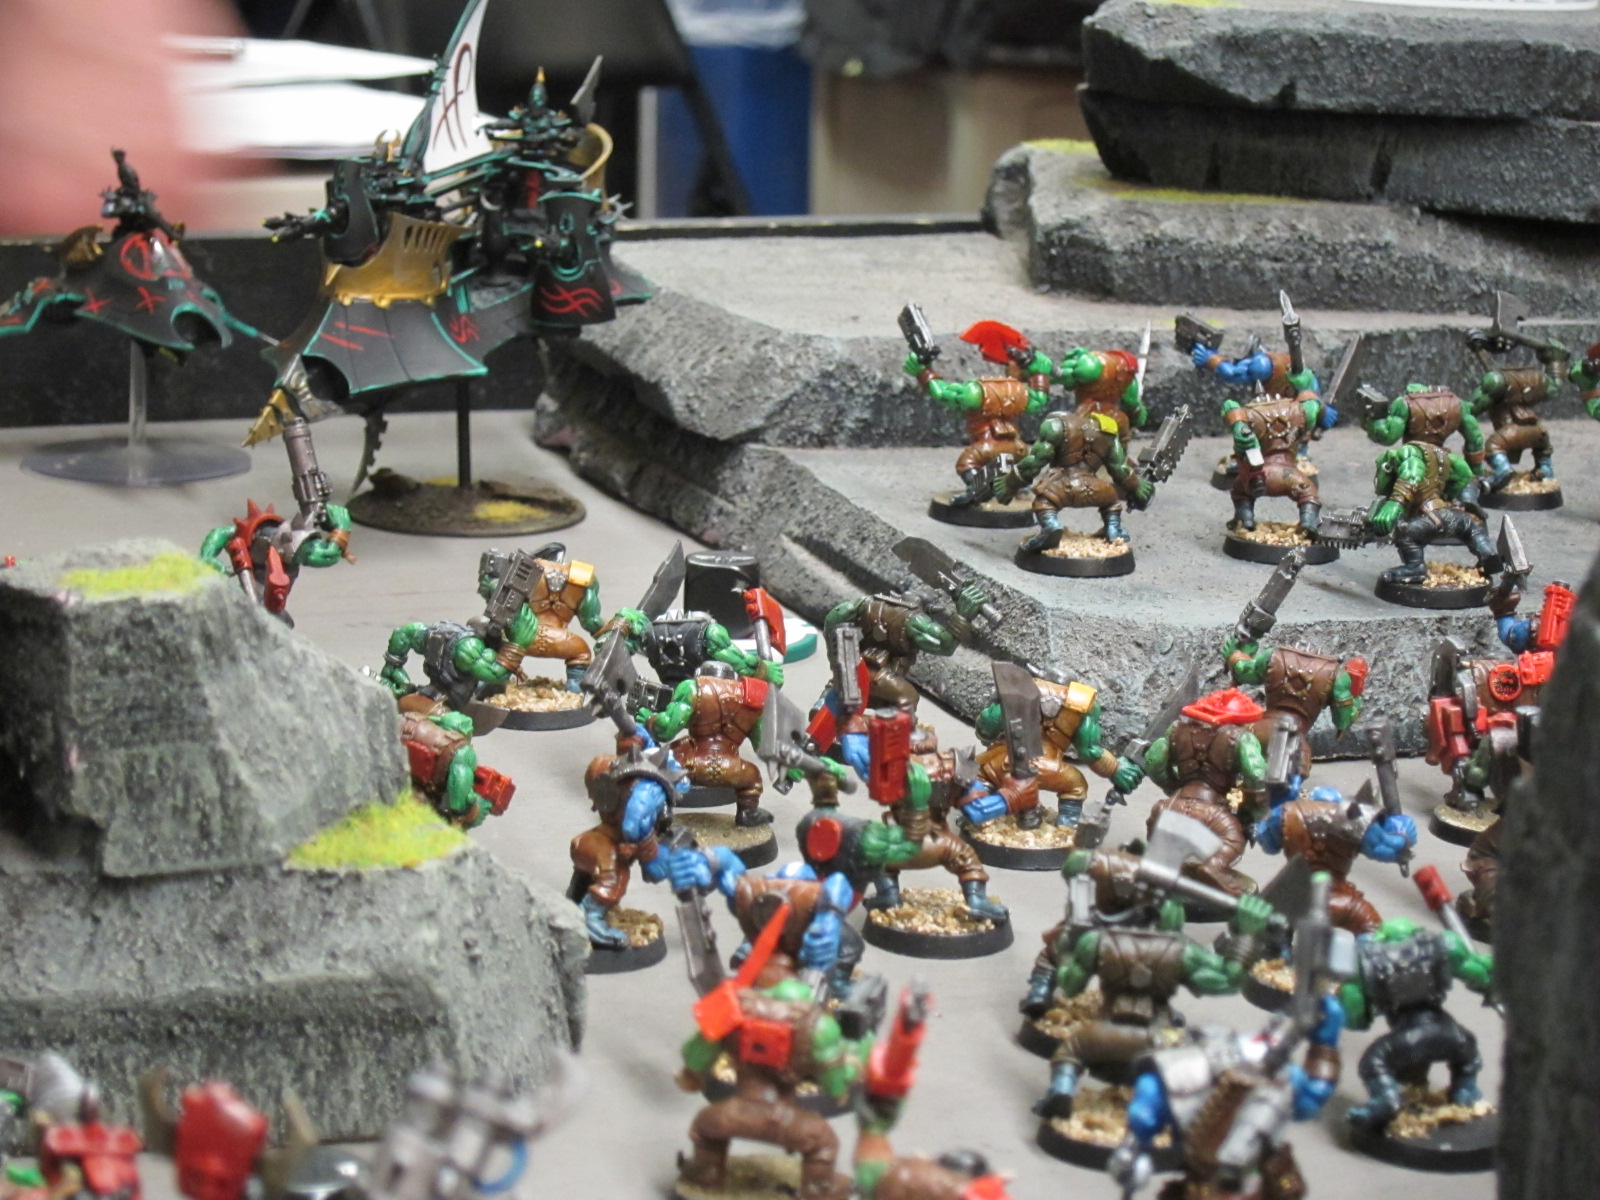
Tyranid harry Sororitas forces.

Tyranid harry Sororitas forces.

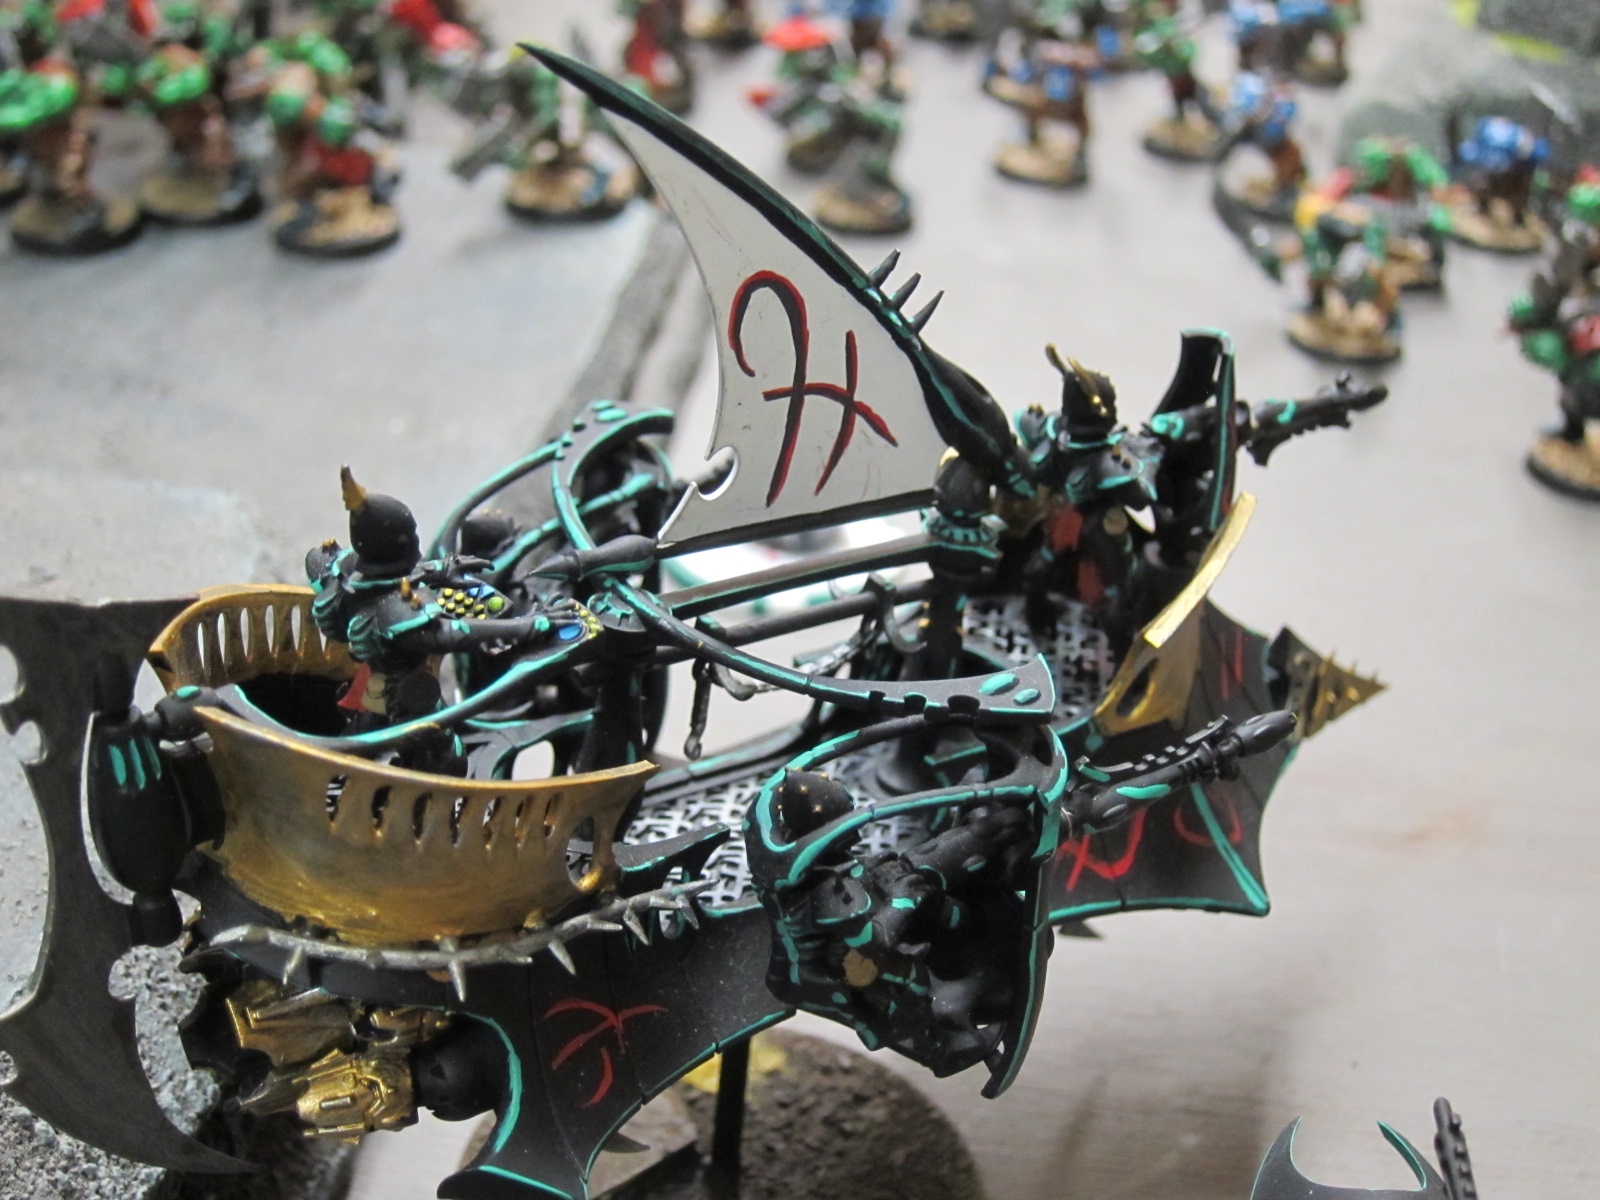
Dark Eldar swoop in from the skies.

Dark Eldar swoop in from the skies.

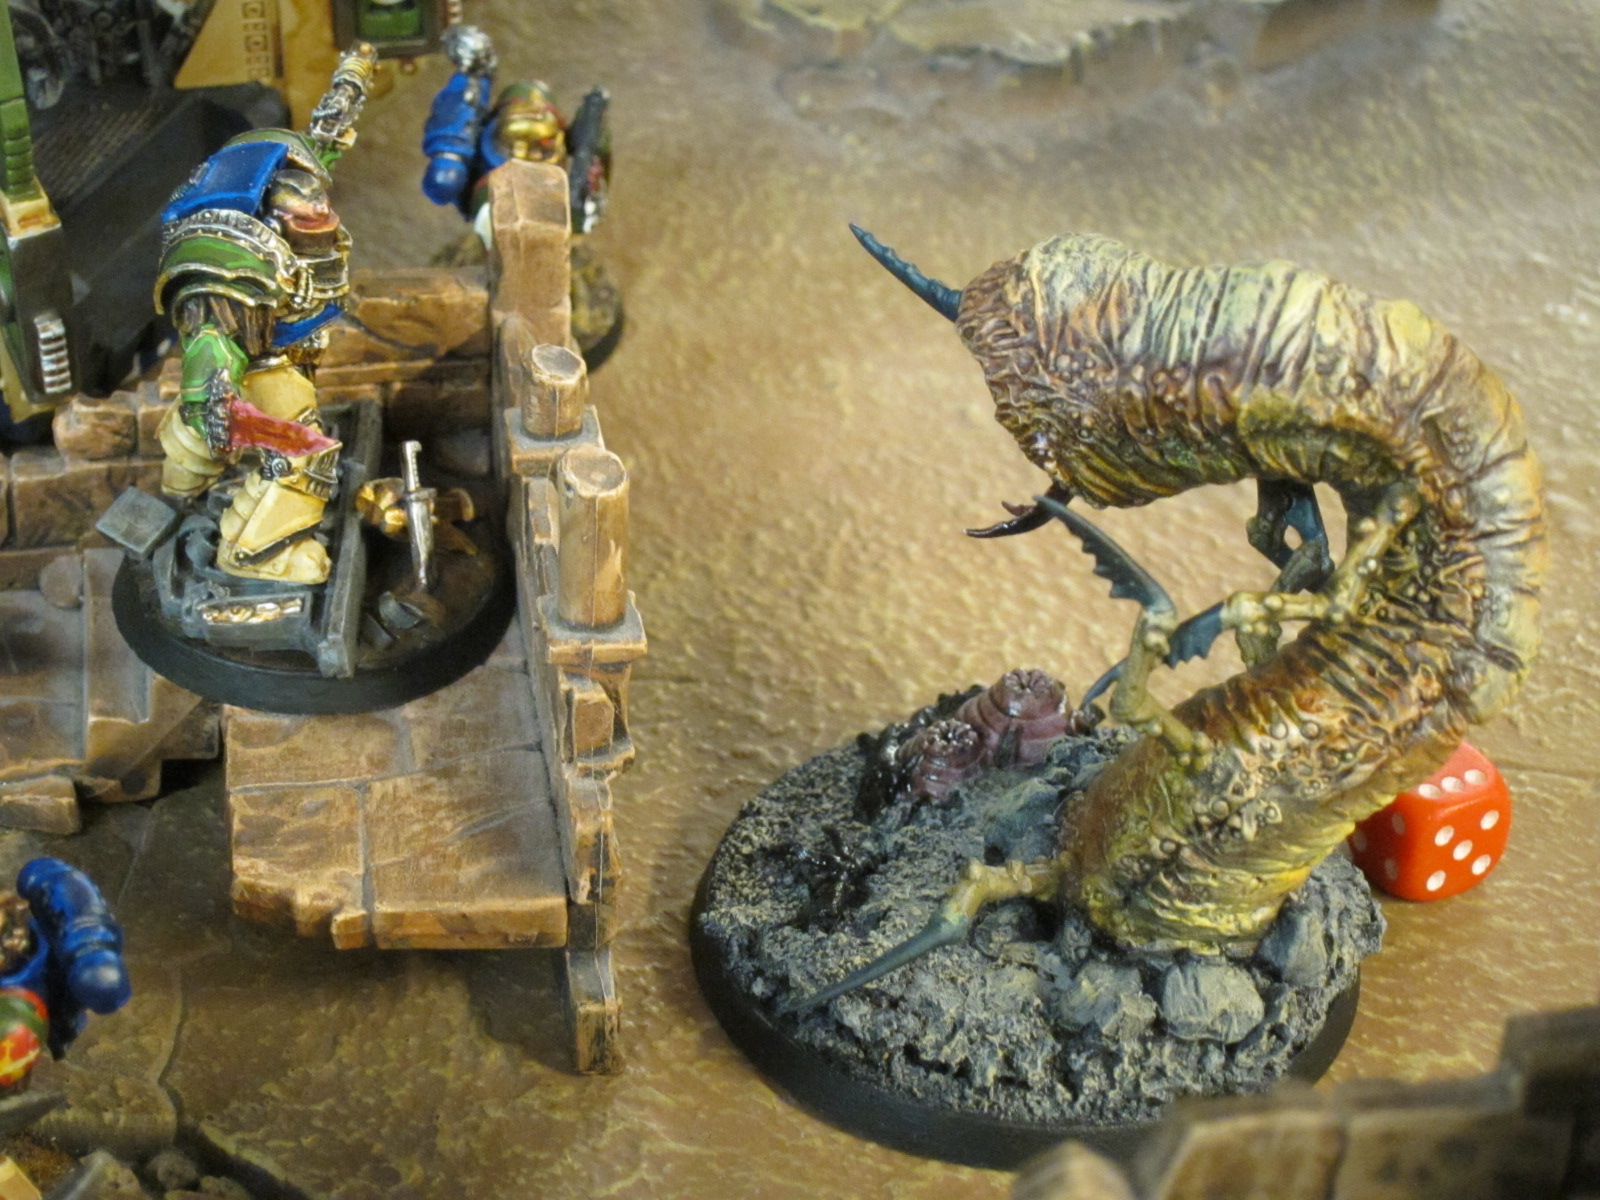
Captain Angholan faces off against the wormlord.

Captain Angholan faces off against the wormlord.

Outcome

Discord handily won each of the three rounds, for a total of 114 points versus Order’s 76 and Spoilers’ 66. Spoilers were routed from all the installations, with Discord taking up control of the Hab Blocks while Order regained the Lab while retaining the Mine, Starport, Generator, and Comms Tower. With both Discord and Spoilers targeting the Hab for control in this session but Discord winning out, the latter gained 6 campaign points in its first appearance. By gaining the Lab order achieved its target and, combined with the other installations, earned 12 campaign points. That puts the current standings at:

  • Order: 5 + 5 + 12 = 22 campaign points; 123 + 179 + 76 = 378 victory points
  • Spoilers: 1 + 4 + 0 = 5 campaign points; 110 + 140 + 66 = 316 victory points
  • Discord: 6 campaign points; 114 victory points

It was very clear very early on that all of the games would be extremely pressed for time in the doubles format, so I left out some of the narrative campaign elements originally planned. They’ll just have to make an appearance in next month’s finale.

Final disposition of armies and territories after the third event.

Final disposition of armies and territories after the third event.

Kingbreakers

An Ork player did not have a partner, so I wound up playing two matches with him and then a third on my own after he left.

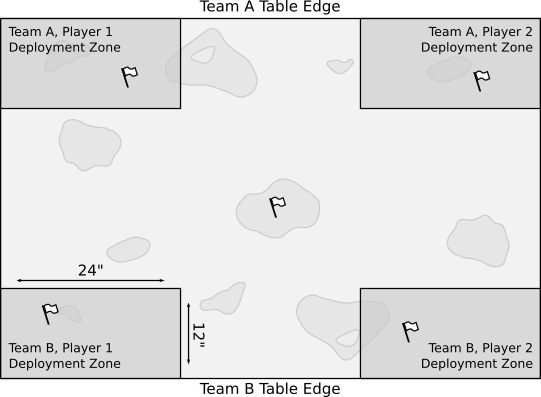
Round 1: The opening deployment setup split up each team, and already not having a ton of obvious synergy with the Ork Green Tide we basically wound up playing two separate games on opposite flanks of the table. Facing oncoming Chaos Marines, I managed to sacrifice a Rhino and some Marines to draw their beast pack into combat with my Terminators. Otherwise I was concerned that the beasts would literally just run around them, the Kingbreakers never being able to tag them before they could swoop around to my home objectives. Unfortunately though the Terminators all failed their 2+/3++ saves and were swept off the field en masse. That left nothing with a realistic chance of stopping the Juggernaut lord from sweeping through all of my rear infantry. The Orks meanwhile were largely contained by opposing Dark Eldar, and the whole thing went down to a loss.

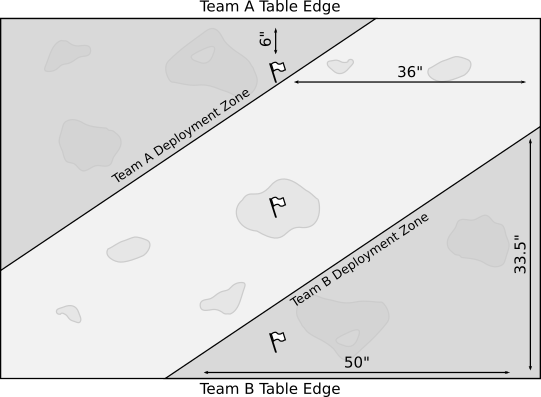
Split deployment zone setup for round 1.

Split deployment zone setup for round 1.

Round 2: Next, the opposing Dark Eldar + Necron team did a good job on mutual target priority and support in this Maelstrom battle. They wound up fighting as a real combined force, first primarily whittling away the Kingbreakers and then shifting focus to the Orks, still operating largely as distinct armies. In the early going though we established control over most of the board and leapt ahead. At one point we drew the Commander tactical objective (1 VP per objective) and were easily able to claim a whopping 5 of 6 objectives that turn. Several other objectives cards were also easy pickings. After that though the Kingbreakers were spread all over and picked apart, while the Ork blob couldn’t effectively claim new tactical objectives. The Spoilers slowly clawed their way back from a substantial deficit and eventually won by a few points.

The mob swarms through the rocks.

The mob swarms through the rocks.

In the first two rounds we were a bit disadvantaged as it just wasn’t clear how my Marines could work well with the Ork mob. With over 100 Orks crammed into 1000 points, they simply filled an entire sector of the board. Mixing the armies together evenly or putting the mob forward would have limited the more mobile Kingbreakers from moving about or engaging in longer range shooting. Conversely, putting the mob on rear defense would have forced the Kingbreakers’ defensive units into an awkward role. So, we wound up essentially splitting the board into two flanks.

That would be fine as such a mass of Orks could hold down an entire side, but they were grouped up into a Green Tide formation, making the vast majority of the army a single unit. That made them near impossible to dislodge, but rendered that huge points percentage only able to hold a single objective. Combined with being on foot, the blob just wasn’t able to effectively hold down all the objectives on its side, particularly in the more dynamic Maelstrom mission. We spent as much time trying to figure out how to move the other units of Gretchin and so forth through our own troops to actually claim objectives as we did working out offensive tactics.

Overall then, we had an awkward mix. Kingbreakers could take objectives easily, but needed support from a longer lasting force. Orks were longer lasting, but couldn’t really move to support or take objectives themselves.

Necrons and Kingbreakers pile in.

Necrons and Kingbreakers pile in.

Round 3: The final round was an old school matchup of 2000 points of Kingbreakers versus Chaos Daemons. I gave myself little odds of winning on the primary objective of annihilation, so from the start I focused on the secondary objective of holding markers. In addition, given that every match had been pressed on time and the opposing Chaos army particularly slow-playing with all its spells, Warp Storms, and other trickery, I strongly assumed the game would make it at most to Turn 4. This was born out when we only made it through Turn 3 and my army had taken heavy losses but few units been broken, while also claiming two of the markers and Linebreaker as well as First Blood. That eked out a win and nothing substantial would have changed in a turn, but a full five or six turn game would have swung hard the other way as units were wiped and markers forfeited.

Key here was that I had exactly what I needed to quickly grab the three secondary objectives and start off having to be dislodged, rather than fighting my way in: A bunker to put on home base, tanks to roll onto the midfield, and Drop Pods to go after the opposing marker. In general Marines can also just take a fair bit of abuse before they crumple. Terminators did a good job tying up several incoming units long enough that they had no chance to slaughter my squishier rear units. Captain Angholan (Vulkan) , Master Sauvon (Harath Shen), and Squad Scolirus similarly hung tough to draw out combat with both a Greater Daemon and a Soulgrinder in order to claim the far objective. Meanwhile, the other units did their best to not die and to make what contributions they could, like Sternguard in a single volley taking down a Nurgle Beast skulking about on the far flanks, for First Blood.

Placement of the three secondary markers.

Placement of the three secondary markers.

Finale

Next month will be the conclusion of our Solypsus 9 campaign. We’ll be running a 1000 -> 1500 -> 1850 point escalation format, with each list having to contain the previous list, as the armies and alliances hurtle into the endgame for control of the planet. Don’t miss out!

In the second round.

In the second round.

Asteroids: Moving Objects

Recently I’ve started mentoring a local high school student a bit on implementing a video game, and this is a technical note toward that.

How objects move in simple arcade and action games is usually fairly straightforward, nothing more at the core than basic trigonometry and physics.

Game Loop

Most action games are a kind of real-time simulation, the core of which is a loop that updates essentially the entire world, all the objects and environmental effects in it, each cycle. That cycle is usually driven directly or indirectly by the frame rate, how many times a second the video display can or should be updated. Modern action games generally target 30 or 60 frames per second (FPS).

The relationship between frames and updates can get complex, but here we’ll assume we simply want to draw frames as frequently as possible and will update the world each time. A key detail even in this simple setup though is that a variable amount of time may pass between each update: The program will execute at different speeds on different computers, may slowdown if many other programs are open, and so on. We therefore need to account for that time in the update, so that the game plays basically the same in different environments.

The core of a typical action game program is then a loop that looks something like:

  While playing
    Calculate elapsed time since last update
    Update each object in the world by the elapsed time
    Render the current world

Calculating the elapsed time is a simple task of polling the computer’s clock. At the start of the program, the variable is set to the current time. Each update cycle, that variable is subtracted from the current time to give the elapsed time. The variable is then set to the time for this update cycle.

Rendering the world can use a wide variety of techniques, e.g., looping over all the game objects and applying a polygon drawing technique as discussed last time.

This rest of this post addresses moving objects in the world update.

Straight Line Movement

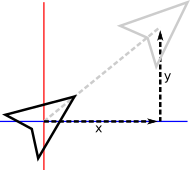
Moving in a straight line is a simple matter of displacing an object, shifting its x and y position.

ship-move

In practice, game updates may happen at slightly different intervals each frame, so it’s not quite as simple as merely adding a fixed value each cycle. Instead, the object is given a velocity which is multiplied by the time interval since the last frame to calculate the object’s displacement over that period.

x' = x + xvel*time
y' = y + yvel*time

Here x and y are the current position of the object, xvel and yvel the two axis-components of its velocity, and x',y'is the updated position of the object.

To set the object moving in a given direction, we simply set xvel as the cosine of that angle times the speed we desire, and yvel as the sine times the speed.

xvel = cos(angle) * speed
yvel = sin(angle) * speed

As discussed previously, keep in mind that most computer trigonometry functions operate on radians rather than degrees, and because the y-axis points downward, counter to typical conventions in mathematics, 90 degrees actually points down-screen.

Inertia

For objects that don’t change direction, the above is all that’s needed. Others, like the player’s ship in Asteroids, need to change velocity, e.g., in response to player input. In most games the player doesn’t change direction immediately but instead has some inertia, slowly moving from one direction to the next rather than just jumping to a new direction immediately. This is yet another reason to base movement around velocities and simple physics rather than fixed displacements or other schemes. Many games will additionally model acceleration to easily incorporate concepts like the drag of moving on a surface eventually slowing an object to a halt, or gravity speeding an object down to the ground when it falls.

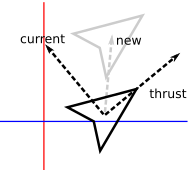
The precise implementation and numbers used are some of the key elements defining how a game feels to play, and entire tomes have been written about these primitive physics in classic games, e.g., for Sonic or Mario. In many games inertia is fairly subtle. In Asteroids though it’s an overt, characteristic feature. The player’s ship moves as though it’s in space, gliding along endlessly with no friction to stop it, simply rotating in place until thrust is applied to change course. A simple way to do this is to track which direction the ship is currently facing, and manipulate that whenever the player hits the keys to turn. The keys to thrust forward and backward then simply trigger computing a velocity for the current direction, which is added to the current velocity.

xvel' = xvel + cos(angle) * thrust
yvel' = yvel + sin(angle) * thrust

Where thrust is the acceleration to apply. This is effectively taking the current vector of the ship, the new vector the player wants to move in, and adding them together to produce an updated vector reflecting the thrust applied to the ship’s inertia.

ship-inertia

Regulate Velocity

To keep the gameplay sane we need to cap the ship’s speed at some amount. Unfortunately we can’t just check to see if either velocity component has gone beyond a bound, because then the ship’s movement will be fixed in just that axis and it will move very oddly. Instead, we need to check if its speed—the magnitude of the velocity vector—is too high, and adjust its velocity accordingly. We do the latter by normalizing it, identifying the fraction of its speed contributed by the velocity’s x and y components, and multiplying that by the maximum speed we want to produce new, reduced x and y components that together fall within the bounds.

len = xvel^2 + yvel^2         // Compute length of the vector squared;
if len > max^2 then           // If we're moving too fast;
  len = sqrt(len)             // Compute the length;
  xvel' = (xvel / len) * max  // Normalize the components and multiply
  yvel' = (yvel / len) * max  // by our target max speed.
end

Note that we compare against the square of the maximum speed because computing a square root, to get the actual length, is traditionally a time-consuming calculation, though for this example it doesn’t matter. We therefore only want to compute it if necessary, and compare instead against the square of the bound we want to impose, a computationally cheap calculation to make.

Screen Wrap-Around

Finally, a critical part of basic movement is how objects interact with the boundaries of the world, which are often simply the screen itself. That in and of itself is a major question: Is the game world bigger than a single screen? Related questions further define critical basic behavior: Does the object stop at a world edge? Bounce? Wrap around to the other side? Does it have different reactions at different edges? As one small example of the latter, my little arcade game Gold Leader gives the player more tactical options, makes the screen feel bigger, and gives gameplay an interesting twist by wrapping the player around the x-axis but bounding them along the y-axis, whereas most similar games stop them at the edge of both.

In Asteroids, objects wrap around both edges of the single-screen world. This is handled through a simple series of checks and shifts in position.

if x < 0 then
  x += screenwidth
else if x > screenwidth
  x -= screenwidth

if y < 0 then
  y += screenheight
else if y > screenheight
  y -= screenheight

Note the additions and substractions. It can be jarring to just set the ship to the opposite side once it crosses over an edge. Hardly ever will the ship land exactly on an edge within a frame, instead it will typically have moved several pixels beyond. Adding and subtracting the dimensions preserves that slight difference and helps ensure the movement is visibly smooth.

Implementation

All of the above has been implemented in this little demo. Click on the game below to give it focus or follow that link, and then drive the ship with the arrow keys.

You can view the source to see the elements above implemented.