X-Wing Squad Building for Beginners, and Better B-Wings

A couple friends recently started playing X-Wing miniatures, so I’ve put together here some links I’ve found useful and a few of my ideas toward constructing your first full squads beyond the introductory scenarios and ships in the core sets. This post is not a comprehensive guide to getting started in the game. As you might guess for a well designed Star Wars game featuring cool little models, there is A TON of blogs, forums, etc., out there. Searching around will quickly yield lots of good stuff, including many detailed beginner’s tutorials. My intent here is just to provide links to a few tools and some ideas to keep in mind putting together your first standard 100pt dogfight squad, including an introduction to some very simple quantitative analysis supporting them.

Along the way I also develop a solid, quantitatively supported argument that my Bey’s Bees squadron is very similar to but might work better for many fellow B-Wing aficionados than the frequently suggested BBBB and BBBBZ formulas.

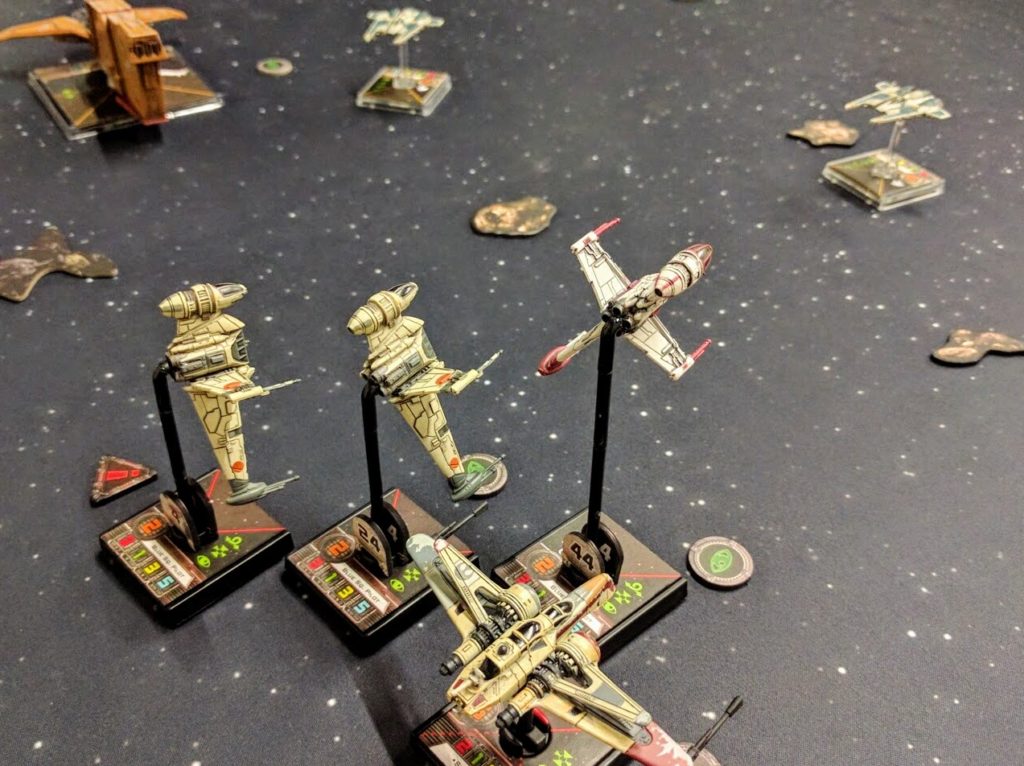
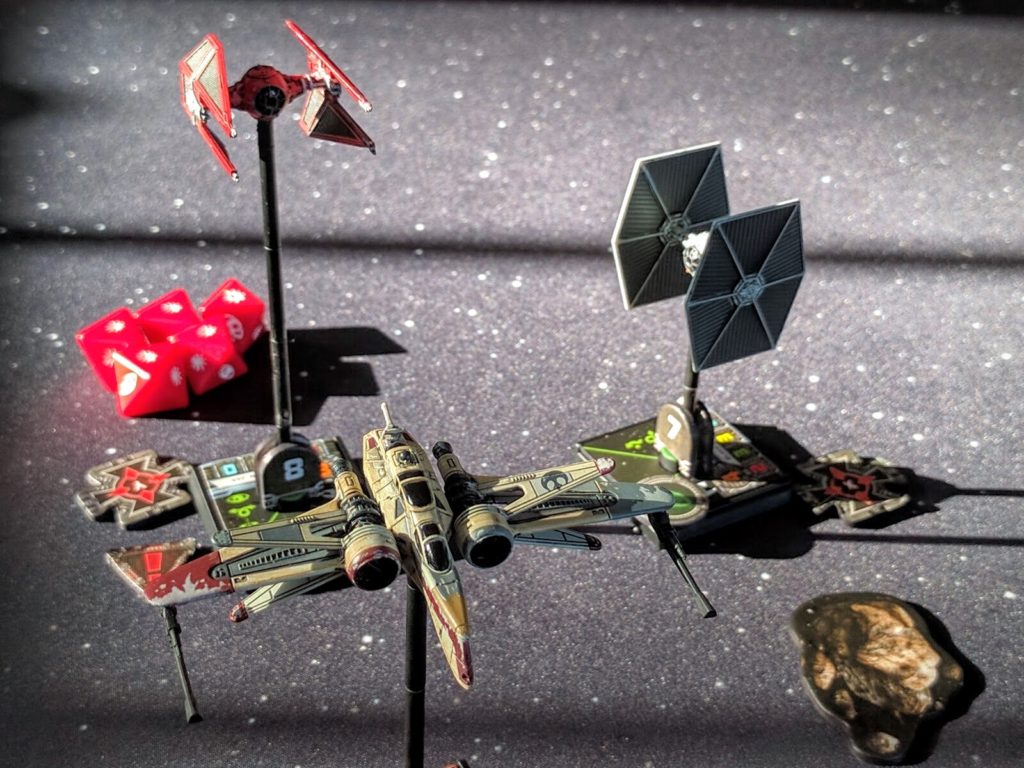
Shara Bey's ARC-170 tailgunner fights to keep off Carnor Jax in his TIE Interceptor.

Shara Bey’s ARC-170 tailgunner fights to keep off Carnor Jax in his TIE Interceptor.

Research

Many resources exist for looking up cards, but the X-Wing Wikia is my go-to. It has too many ads on mobile or without an ad blocker, but is otherwise very good.  If you want to know what a card does, Google “x-wing [card name],” go to the Wikia link, and you’ll get the details.  It has info on every ship & card in the game, and many pages have extensive threads discussing how cards work as well as strategies for their use.

Fab’s Squadron Generator has a page that I personally find unfortunately hard to read for the details (hover over the card names for info), but it is a good visual overview of every product in the game.

For every expansion that comes out, Fantasy Flight publishes a preview article that generally does a good job explaining the main features of that ship or set, the new capabilities it brings, and why they’re interesting. So looking back through these archives can help understand what role particular ships are supposed to have. You can find these linked from the product pages on their site. If you search for “Fantasy Flight Turn Zero,” they’ve also published several good articles by a 3-time world champion covering some fundamental ideas of basic tactics and strategies in the game.

Building

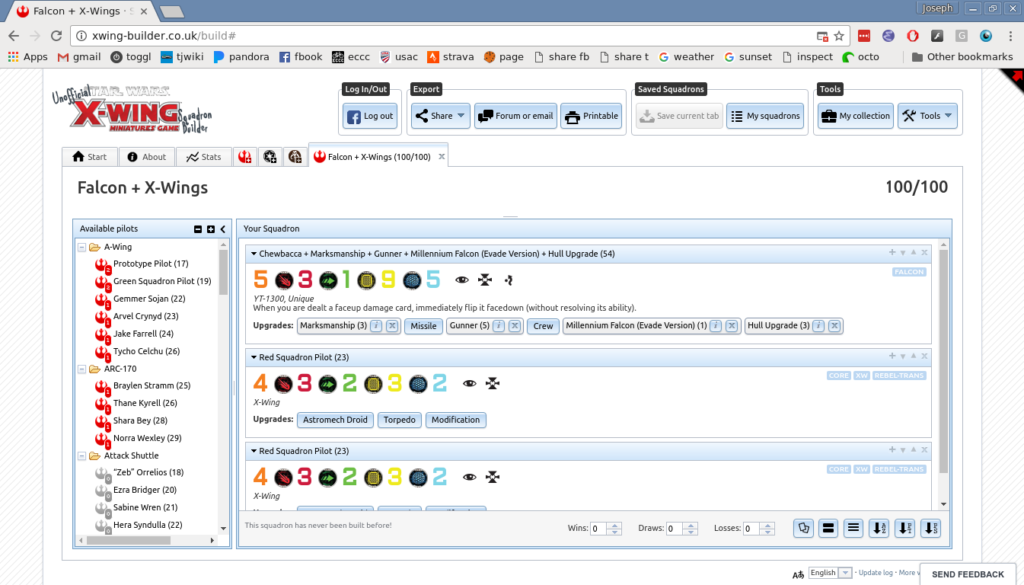
There are a whole bunch of online X-Wing squad building tools, making it faster & less error prone to construct and think about lists. I personally prefer Voidstate’s app. It has a nice & attractive user interface, presents all the ship & card details nicely, and includes useful tools to track your collection and highlight the ships & upgrades you already own when making choices. One clear downside though is that it’s not usable on phones; the mobile-compatible version only supports browsing previously made lists. If that matters to you, many other options can be found by Googling around. I’m not personally a huge fan of it—though it’s certainly functional—but the app by geordanr is the squad builder I probably see linked most often in discussions on Reddit.

Voidstate's squad builder.

Voidstate’s squad builder.

Design

My battle report from my local shop’s tournament this past August talks a bunch about my usual personal approach to designing and evaluating squadrons that I intend to be somewhat more competition-oriented (though my focus even then is flying what I will enjoy rather than purely what I think will win the most). The battle report from my first tournament, last holiday season, also talks a bit about list design for beginners as well as being a bit of an introduction to what a tournament is like.

I place a lot of emphasis in squad design on simplicity and robustness, which I argue is a good mindset for many beginners, following a simple 4 point rubric:

  • Durability: Does the squad have a bunch of shields & hull points so you don’t have to fly perfect and never get tagged? High agility (green numbers/dice) can take the place of that to a large extent, but is of course more of a gamble on the dice rolls. In contrast to both, a different paradigm is to simply not get attacked in the first place. Beyond just good flying, squads can be built to offer more maneuvering options and emphasize tactics like “arc dodging” out of the way of incoming fire. This approach is very viable, but takes more practice & flying skill. Another common style is regenerating damage, e.g., using R2-D2. This also though can require effectively using various abilities and flying in certain styles. Especially for beginner flying, sometimes it’s just nice to have a lot of hull points that you can count on without requiring specific actions or maneuvering.
  • Firepower: Does the squad have a bucketful of straightforward shooting from high attack stats (red numbers/dice)? Many effective squads use upgrades and special actions to add attack dice. Another approach is to maximize the reliability of your shots, as opposed to simply taking more shots—two guaranteed hits is better than three possible hits. But both of those approaches tend to eat into your squad points and usually require more skill to enact the appropriate actions at the best times or steer the game toward optimal conditions for your effects. There’s something to be said for just having a bunch of baseline attacks.
  • Ships: Does the squad have enough ships to have options and robustness, but not so many as to need fancy precision flying in formation? This basically means having 3 or 4 ships. There are many very powerful 2-ship squads out there, and some I would consider possibly appropriate for beginners by their simplicity. But generally speaking, more ships gives you more options, and provides some tolerance to not getting them all on target at once or even losing a ship or two. More ships also generally means simpler ships, whereas 2-ship builds are often kitted out with suites of complex capabilities and effects. That said, at the opposite end of the spectrum, at six ships or more you’re usually looking at a swarm of relatively weak ships that need to fly in a coordinated fashion and often must hit the same target all at once to be successful. That requires more skill, and successful flying in tight formation takes substantial practice. Stepping down from that, five ships might be workable if they don’t all need to fly very closely. With three or four though they can definitely fly reasonably close enough to support each other, but loose enough to not require skills like judging template distances and angles with high precision, and lots of formation flying experience.
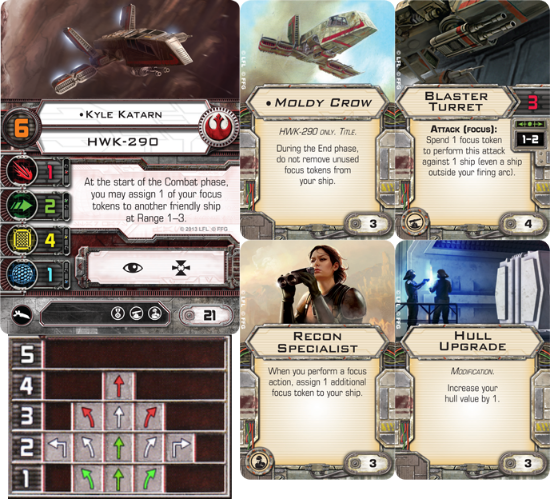
  • One Trick: Does the squad have a single, simple special ability to augment the squadron’s basic durability and firepower? If your squad relies on utilizing a whole bunch of different actions and special effects, then there will be a lot simply to remember to use, let alone be able to use well and synergistically. So minimizing the number of tricks needed to make your squad work well reduces the opportunities to make basic mistakes or play suboptimally. Note that this is not as straightforward as just having one special attack or something like that. The core goal here is minimizing the conscious decisions you need to make, and especially the activation actions you need to take. Purely reactive effects or always-on buffs entail less cognitive load and fewer special trigger conditions, so you can discount them a little bit in terms of gauging the complexity of your list. A good example is my August list: The “one trick” is simply that the HWK-290 flies around near the B-Wing formation handing out a focus token at the start of each combat. But that one very simple idea is constructed via a loadout of 4 specific cards to build a focus pool, share it, and let the HWK itself draw on that pool to shoot better (as opposed to, say, also needing target locks to use its secondary).

Clearly this rubric is just one way to think about squad design, and it tends to encourage specific kinds of builds (more on one of those archetypes follows below). Many other approaches are certainly viable and perhaps even better. But I think this is a good, simple framework for beginners setting about constructing their first lists. Too many people get hooked too early on developing overly elaborate lists leveraging many special rules that ultimately wind up being overwhelming for them to actually execute well, prove too brittle once actual enemy contact is made, and so on.

Ship build enabling "one trick": Passing focus tokens around.

Ship build enabling “one trick”: Passing focus tokens around.

Acquisition

For whatever they’re worth, the following are thoughts on growing from a Force Awakens (blue) core set to some very initial 100pt standard dogfighting lists. They follow the squad design philosophy above and keep the monetary investment low until you know what faction, tactical style, etc. you want to focus on. I don’t assert that these are super “competitive” lists, but I think they’ll perform credibly enough for casual gaming, and should be fun to fly while you learn various mechanics and figure out which aspects of the game you like most and are your strengths & weaknesses.

Rebels

To fly for the treacherous Resistance/Rebellion, again starting from a Force Awakens (blue) core set, I would grab a Heroes of the Resistance expansion first. That is, if you can find one. It just came out recently, sold out almost immediately in most locations, and may not be restocked by many retailers for some time. Don’t buy any of the offerings on eBay, Amazon, etc., marked up to $55 or even $60+; it’s a $40 set. If you can grab one though, in it is a YT-1300 (the Millenium Falcon), a T-70 X-Wing (in Poe Dameron’s colors), and a slew of pilots and upgrades so that you can play around with various special rules. Two X-Wings and a YT-1300 are a reasonable starting squad with solid durability, firepower, and simplicity, so this is a good cost effective option.

If you can’t wait until the Heroes set becomes more easily available again, it would not be crazy to instead buy a second Force Awakens core set. Frequently on sale for $24 or less, that’s pretty reasonable for another X-Wing and additional dice (it will be frequently convenient to have more than 3). Separately those alone cost $23, but the core set also gets you two more TIE/fo Fighters and a spare set of templates and cards. To the two X-Wings you can then add an original trilogy YT-1300/Millenium Falcon, which is now discounted in many places because of the Heroes box and its new trilogy update. The pilots and upgrades in the older expansion though are still useful and have their place in the game alongside the Force Awakens stars. A starter list I’d consider is:

The “one trick” here is that Chewbacca takes critical hits merely as facedown damage and has a good amount of shields and hull, so he can relatively safely use Draw Their Fire to absorb critical hits on the X-Wings that might otherwise kill or cripple them. Alternatively, if you find yourself not using that ability much, you can go even simpler by swapping out Draw Their Fire for Veteran Instincts, which will enable Chewie to shoot before mid-skill pilots, though still not before any true aces.

Either way, the real core element of this list is simply that all 3 ships are fairly fast & maneuverable due to their solid dials combined with boost actions. The YT-1300 especially is super maneuverable with its 1-hard turns and very fast due to being a large ship (the larger base means they necessarily move faster for any given template length). It has a strong weapon mounted as a turret so you don’t have to chase targets into arc, and then Gunner makes it fairly reliable. Gunner is not included in the core or YT-1300 box, but earlier in 2016 a version of it with alternate artwork was featured as a top half/participation prize in FFG’s official tournament packs, as well as coming in two popular sets (Slave-1/Firespray 31 and YT-2400), so many people have multiples of it and will be more than happy to just give a new player one of their copies.

An alternative would be two X-Wings and a YT-2400, which is similar to the Falcon but has some unique, strong pilots, such as Dash Rendar who is quite popular for his ability to ignore obstacles (asteroids and debris fields) during his activation (moving & action).

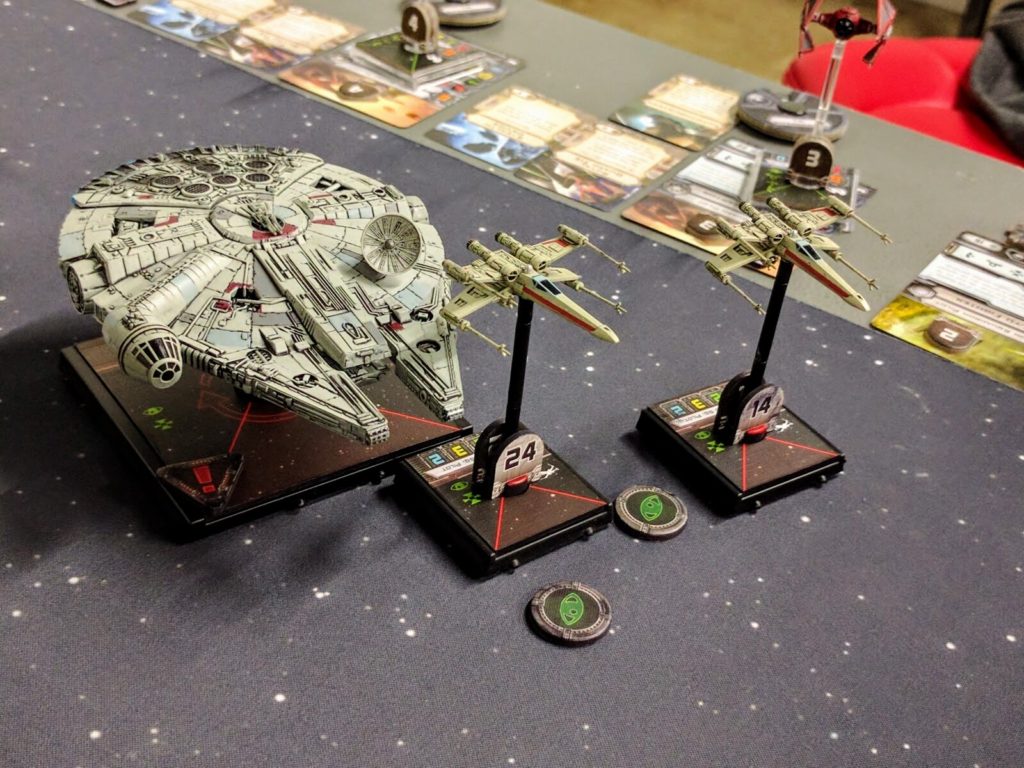
A pair of original trilogy X-Wings and Chewbacca patrol the outer rim.

A pair of original trilogy X-Wings and Chewbacca patrol the outer rim.

Imperials

On the honorable First Order/Imperial side, I would pick up another TIE/fo Fighter from the blister pack or, more efficiently, a second core set on sale, and then a VT-49 Decimator. Then you could run a starter list like:

You might notice a pattern at this point. Large ships like the YT-1300 (the Falcon) and VT-49 Decimator tend to be durable, pack some firepower, often have a built-in turret so you don’t have to worry about your firing arc, and productively consume a fair amount of squad points such that the list stays simple. One large ship anchoring the squad in either an aggressive or a support role and several small ships escorting it is thus a primary squad archetype entailed by the durability & simplicity rubric above.

In this specific list, the Kenkirk pilot and Isard crew are both attempting to mitigate the major vulnerability of the Decimator: It has no baseline agility, every hit does damage.

The “one trick” though is that the TIE/fo Fighters can make their K-turn and S-loop red moves with relative impunity, provided they stick in reasonably close but not too tight proximity and the Decimator supports them nearby. Its turret weapon makes that easier by obviating the large ship’s need to fly in perfect lockstep.

The trick works as follows. The Epsilon Squadron Pilots activate first, making red moves and thus taking stress and losing their actions. Kenkirk and Epsilon Leader are both pilot skill 6 so it’s your choice which order they activate; it doesn’t matter in general for this trick so it’s up to tactical contingencies like making ranges work or having a clear path. Say Epsilon Leader goes first and also makes a red move and thus takes a stress and loses its action. Now Kenkirk activates. The Decimator moves and then uses the Fleet Officer’s action to give two of the TIE/fo Fighters a focus token in return for taking a stress itself. Those focus tokens though will go a long way to negating the TIEs’ penalty for having made a red move and losing their own actions.

Then, at the start of combat, Epsilon Leader clears the stress of every nearby friendly ship. Note that this includes itself, as the card doesn’t restrict the effect to “other” ships at Range 1 (this is a well understood and FAQ’d card text convention). So, if each ship has stayed in reasonable proximity then all of the TIEs made a red maneuver, two of them still have focus tokens anyway, and nobody has stress that would limit their maneuvers next turn. Interactions among a couple cards have created a useful support buff for the whole squad that doesn’t require a ton of skill to apply, just flying in loose proximity and using Fleet Officer, enabling the attack ships to K-turn and S-loop back and forth strafing a hapless opponent. At least, so goes the theory!

A Decimator shields a VIP Shuttle from Rebel scum attackers.

A Decimator shields a VIP Shuttle from Rebel scum attackers.

Instead of the Decimator, a more traditional and nostalgic ship filling a similar large ship role would be the Slave-1/Firespray 31. That’s a valid option, but I think the Decimator is a better bet for beginners. The Firespray doesn’t have a primary turret, just front+rear arcs, so it takes a little more skill to bring to bear. More importantly though, the box set doesn’t include a way for it to buff other ships and thus fill a support role amplifying the entire squad like the Fleet Officer that comes in the Decimator box does (N.B. that cards aren’t limited to the ship they came with, so this is just a concern about efficient purchasing rather than an inability to put the F.O or other cards on the Slave-1 at all). Buffing several ships is usually a better bet than simple attacks in terms of efficiency in effect versus points.

Somewhat similarly, the Lambda Shuttle is a classic Star Wars ship, beautiful model, and there are many powerful squads built around it. But its very limited maneuver dial tends to require more skill to fly well, and most popular lists using it are built around other more exotic ships and cards, most notably Emperor Palpatine, who only comes in the Imperial Raider huge ship for “epic,” an official X-Wing variant for large battles.

Alternatively, and perhaps cheapest given that they’re often on sale, you could pick up a second Force Awakens core set and fly four TIE/fo Fighters with various pilots and upgrades. The big downside as a new pilot is that to be effective it would place even more emphasis on coordinated flying, and on utilizing several different special abilities. Not insurmountably complex, but more so than a “big ship turret” squad.

Another possibility would be to pick up another TIE/fo Fighter from either the blister or core set and then the new-ish Imperial Veterans box. You could then run a group of three or four TIE/fo Fighters supported by either a TIE Defender or TIE Bomber. Note that the Imperial Veterans box contains several cards for the latter ships that make them more powerful or efficient than those ships are in their individual blisters. If you kept the TIE/fo group fairly simple then this might still be a manageable level of complexity for a new pilot, with the “one trick” being the Defender’s maneuvering tricks or the Bomber’s munitions. I’m not convinced this would be a particularly durable list, but the Imperial Veterans set and especially the Defender pilots and titles therein are the basis of a number of competitive Imperial lists you could consider later on.

Analysis

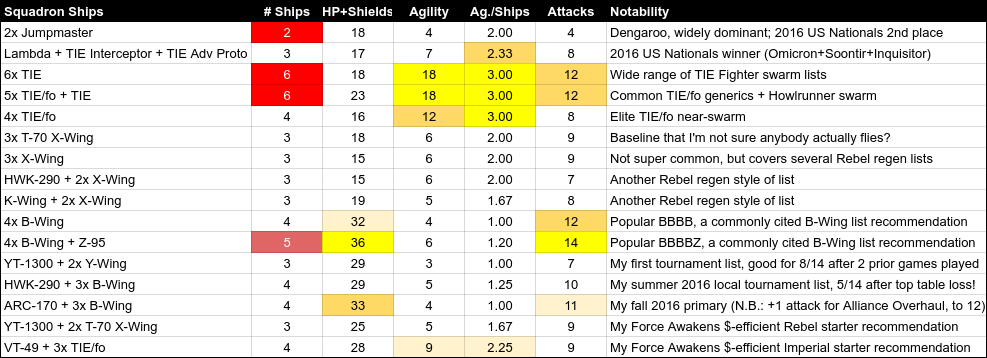
After writing all of the above, I started to think about simple concrete measures of durability and firepower to quantify those aspects of my rubric and make them more objective. Off the cuff, the measure and metric I settled on was that a combined total of 22 hull points and shields across a squad probably reflected a threshold for what I would consider “durable,” and 10 total attacks the threshold for high baseline firepower. Total agility is more complicated to factor into durability, but also worth keeping in mind in evaluating the expected basic longevity of a squadron.

So then I calculated the numbers for the lists here and a couple others:

screenshot_2016-12-04_09-57-47

This sampling lines up with and confirms my off-the-cuff threshold estimates: At 22 hull+shields a squad is about halfway between durable lists able to just absorb a lot of damage, and squads that rely on other techniques such as avoiding or regenerating damage. Meanwhile, 10 attacks is just above where many squads fall and thus could be considered the start of heavy baseline firepower.

At first glance the data also seems to yield a threshold number for high defense, which is a kind of durability, at 6 agility. That’s useful, however, as agility is about individual ships being attacked rather than how much damage the squad as a whole can absorb or put out, I think it’s important to normalize for the number of ships. That gives us a simple computed measure, agility divided by ship count, i.e., average agility. Those numbers are naturally much closer, but there’s a clear metric that confirms intuition: Having 3 agility per ship is good, 2 is average, and 1 is inferior for built-in defense.

Overall I think these are some very simple but useful quantitative measures and metrics to consider in evaluating potential lists. The table also supports the squad design rubric above as a guide to building a kind of list that I think is beginner friendly and should be credible, though not necessarily super powerful.

Net Lists

For example, these simple measures and metrics make it obvious that the widely dominant Dengaroo list variations (2x Jumpmasters) are not succeeding on their baseline stats: They’re at or near the bottom in each stat. Clearly the roughly dozen cards building common versions of that 2-ship squad and the emergent effects between them are what makes it powerful. Between the presumably more advanced flying required to execute those combos and synergies well, and the basic fact that the squad only has two ships, I’d be inclined to believe that it is not beginner friendly. Similar but less extreme goes for the Omicron+Soontir+Inquisitor setup that won this year’s US Nationals; simple baseline stats aren’t what carried the day there.

Next we see some quantification of why TIE swarms have traditionally been so strong, they’re at or near the top across all stats. Notably, with 6x ships they’re meeting or near my durability criteria on pure hull points, and then also have high agility. The number of baseline shots that could be theoretically applied is also very good. However, that’s the rub: With so many ships it’s difficult to bring them all to bear and in general to fly effectively, so these are not ideal first lists despite their innate strengths.

On the flip side, we see quantified evidence here of one reason why 3x X-Wings of either generation or of the closely similar E-Wing and Z-95 are not super popular: They’re lacking across the board on these baseline stats. So for the squad to work the pilots or upgrades must be pretty good, and that’s what we see on the tabletop. Comparatively few X-Wing pilots from the large pool of them see much serious play, and usually combined with other ship types, such as Biggs flying escort. Again, we’re focused here on beginner lists that are comparatively simple to design and fly effectively. So this is not to say that the several kinds of common Rebel regeneration lists are not strong. But their middling baseline stats, visible here as the white band across the table, indicates that they may be more challenging for less experienced pilots as they put more emphasis on special effects and flying skill.

Looking at a final pair of existing popular lists, it’s clear why the BBBB and BBBBZ squads work: They have great durability with very high hull point+shield counts, and they pack a wallop to match through very high native firepower. The big red flag from these stats though is that the BBBBZ list might be a bit unwieldy for less experienced players who might find it tough to use all five ships optimally and recoup their points. That said, both are fairly simple lists that use few (BBBB) or no (BBBBZ) special effects. They’re well in line with the durability, firepower, and simplicity rubric proposed here.
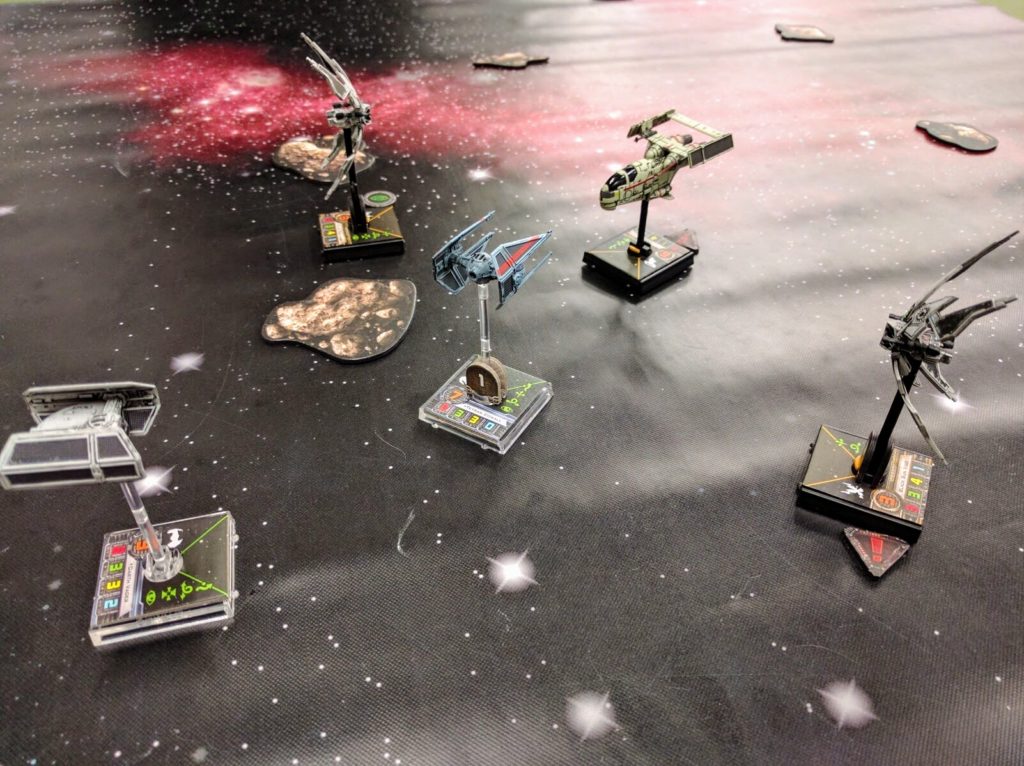
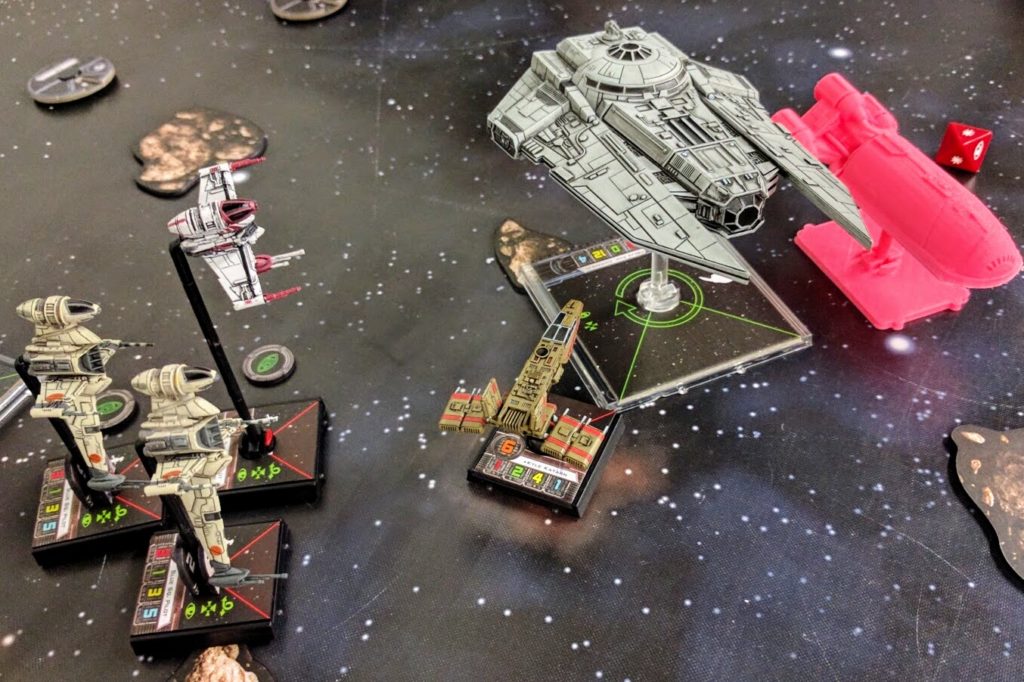
Darth Vader and one of his aces are ambushed by Scum pirates. These lists... do not meet any criteria whatsoever.

Darth Vader and one of his aces are ambushed by Scum pirates. These lists… do not meet any criteria whatsoever.

Evaluation

These simple measures and threshold metrics seem to match up well against this sampling of squads and intuitions about what makes them work. We can therefore use them to help evaluate in a simple but quantified way how well my personal lists and the initial beginner lists I recommend above meet my squad design rubric.

Chewie

As expected, my early YT-1300 + 2x Y-Wings list shows a strong focus on basic durability. Attacks are a bit low, but that belies the upgrades: Each Y-Wing has a Twin Laser Turret secondary, giving them reliably better expected damage than the baseline.

Bees

My later 3x B-Wings formation + HWK-290 support shows similar durability (and a hull upgrade is not included here) as well as solid raw firepower.

More recently I’ve swapped focus passing from the HWK-290 for shared target locks and stress removal from an ARC-170 flight leader in Bey’s Bees, my current main list:

That list is very durabile, 33 hull points & shields is a lot to chew through even though agility is inferior. Baseline firepower is also very good, especially once you factor in that the 0pt Alliance Overhaul title upgrades the ARC-170 to 3 attack dice in the front arc, raising the squadron to 12. Both measures are thus well above the target numbers.

In fact, those stats are very similar to or in some places better than the popular BBBB and BBBBZ lists, which are ubiquitously cited online as the go-to squads for effective B-Wings. That says the Bey’s Bees list is essentially a drop-in replacement in terms of basic durability and firepower. From there you get into a more complicated discussion. The Bey’s Beys formulation brings one pilot with 3 red dice at a much higher pilot skill, 2x target locks sharing, some squad stress removal, an extra hull point versus BBBB, an astromech shielding one ship from high damage, and some auxiliary rear arc protection and flexibility. Is that better than Fire Control Systems, Advanced Sensors, and variations of one 2pt upgrade in the BBBB setup? I think it’s at least comparable.

In comparing to BBBBZ the tradeoffs are more clear. The latter has a good bit more hull points+shields. But a primary limitation of the B-Wings is that they can make really good initial contact runs, but then their red 1-hards and Ks make it tough for them to leverage their high firepower and shoot effectively as a close fought dogfight continues. BBBBZ doesn’t have any mechanism mitigating that, whereas the supporting ARC-170 brings some measure of that plus similar firepower. The latter’s rear arc shooting also supplies some of the capabilities that extra Z-95 brings, somewhat protecting the rear of the formation as it maneuvers. Further, that extra Z-95 is a relatively easy giveaway in tournament settings where every point lost matters. Most importantly though, I think many players will have more trouble flying the five ships optimally, so packing similar capabilities into four ships is a good idea.

Long story short, I’m not saying that my Bey’s Bees list is definitely “better” than BBBB and BBBBZ. But there is a solid argument following the rubric and supported by the metrics presented here that it’s at least very comparable and might work better for many people. That’s an exciting outcome for a squad that started by just saying “I want to fly my favorite Star Wars ships, how can I make them work?” It also matches up with my local experience, where among a reasonable number of opponents it’s only been defeated by experienced players fielding triple Defenders and Manaroo HLC Scyk Mindlink. If you like B-Wings and ARC-170s, you should give it a try.

I am very, very excited about B-Wings, the HWK-290, and the ARC-170, my favorite Star Wars ships, and was very pumped when the latter was finally released.

I am very, very excited about B-Wings, the HWK-290, and the ARC-170, my favorite Star Wars ships, and was very pumped when the latter was finally released.

Beginners

Finally, we can use the metrics to look objectively at my two beginner recommendations. First of all, both are within the squad size band. Durability at 25 hull points and shields is good on the Rebel YT-1300 list, and very good on the Imperial Decimator list at 28. The latter as a bonus also has above average agility, and the YT-1300 list is also just a bit better than inferior on defense. Firepower on both at 9 dice is just below my heavy firepower target but not unreasonably so, especially when you account for a third of that shooting being from turrets.

Combined with having comparatively straightforward but useful special effects, these numbers support my suggestion that these lists meet my durability, firepower, and simplicity rubric and are credible squads for beginners to start off with. They’re not necessarily competitive, certainly not “net lists” with which to go auto-win a tournament. But they’re robust enough to keep you in the game against more experienced opponents and to put out some damage of your own. They’re dollars-efficient ways to field solid 100pt lists that will perform well in casual play, are fun to fly, and include several mechanics and game aspects that will be good to learn.

Conclusion

Beyond the particular list recommendations, I hope beginners take away from this discussion a specific, reasonable guide to constructing some initial lists for yourself. I also want to emphasize that thinking about such frameworks is itself a useful meta-strategy skill. Good squadrons aren’t just random collections of neat abilities. They work toward a specific purpose and implement particular strategic design goals. My goals are usually based around basic durability, firepower, and simplicity. There are innumerable other viable overarching approaches, but as you learn you should try to explicitly identify which ones interest you and seem powerful, and consciously work toward executing them. In addition, I hope other B-Wing fans give the Bey’s Bees squadron a try and let me know how it goes. Good luck to all!

Shara Bey guides a formation of B-Wings toward obliterating Fenn Rau.

Shara Bey guides a formation of B-Wings toward obliterating Fenn Rau.

Addendum

Update: Just saw a post about a squad that won the recent Austin regionals. It’s notable in this discussion because it’s like a Scum melding of Bey’s Bees, BBBB, and BBBBZ, and seems very powerful:

For those unfamiliar, the G-1A Starfighter (Mist Hunter) is essentially a Scum B-Wing. They have extremely similar stats and dials. So this squad is clocking in at 4 ships, 28 hull points + shields, 5 agility/1.2 average agility, 11 firepower. Stat-wise this is firmly in line with the kinds of lists I’ve been talking about here. The special effects are also similar to the B-Wing lists discussed. Of course the two Fire Control Systems is the core of BBBB, and the Z-95 echoes BBBBZ but although really only superficially.

The “one trick” though is generating and sharing focus and evade tokens, similar to my HWK-290 and ARC-170 supported lists. When any ship with Attanni Mindlink receives a focus or stress token, all the mindlinked ships also get a token if they don’t have one. Leeachos can steal focus and evade tokens from friendly ships. He does not himself have an evade action, but the G-1As do. So, e.g., the Findsmans can all evade and get those tokens for themselves while Leeachos focuses and through the Mindlink generates those tokens as well for all of the G-1As. If necessary he can then also steal an evade from one of them. Alternatively, one ship can generate focus for everybody with an action through the mindlink, and then they all also take focus actions and thus wind up with two focus tokens. Leeachos could even wind up with 3 focus tokens if he additionally stole one, though that seems only very situationally useful. Meanwhile the two G-1As with Fire Control Systems are also automatically maintaining target locks for free every time they make an attack. So this is a durable, high firepower squad with a fairly straightforward “trick” and couple simple buffs that wind up continually refreshing the squad with a slew of tokens to modify their shots and amplify that durability and firepower with a lot of reliable shooting and bolstered defense.

A little while ago I considered working on a Scum version of my B-Wing lists because I like the G-1A model, but I did not and this list has beaten me to the punch. Neat stuff!
40k: Stompin’ Time—Notes on Knights

This past weekend a good-sized crew from PAGE went out to the NOVA Open. I pretty much got my face punched in throughout the Trios and Narrative tracks (reports here & here), but I learned a lot and had a great time. Even in those but especially walking around the Invitational and GT you couldn’t help but notice the multitudes of Knights: Imperial Knights, Wraithknights, Rip-knights… Gorgeous models, under-costed points, for once GW figured out how to really sell something everyone will like, as long as it’s on their side of the table. The following are some lessons I’ve learned about fighting and using Imperial Knights.

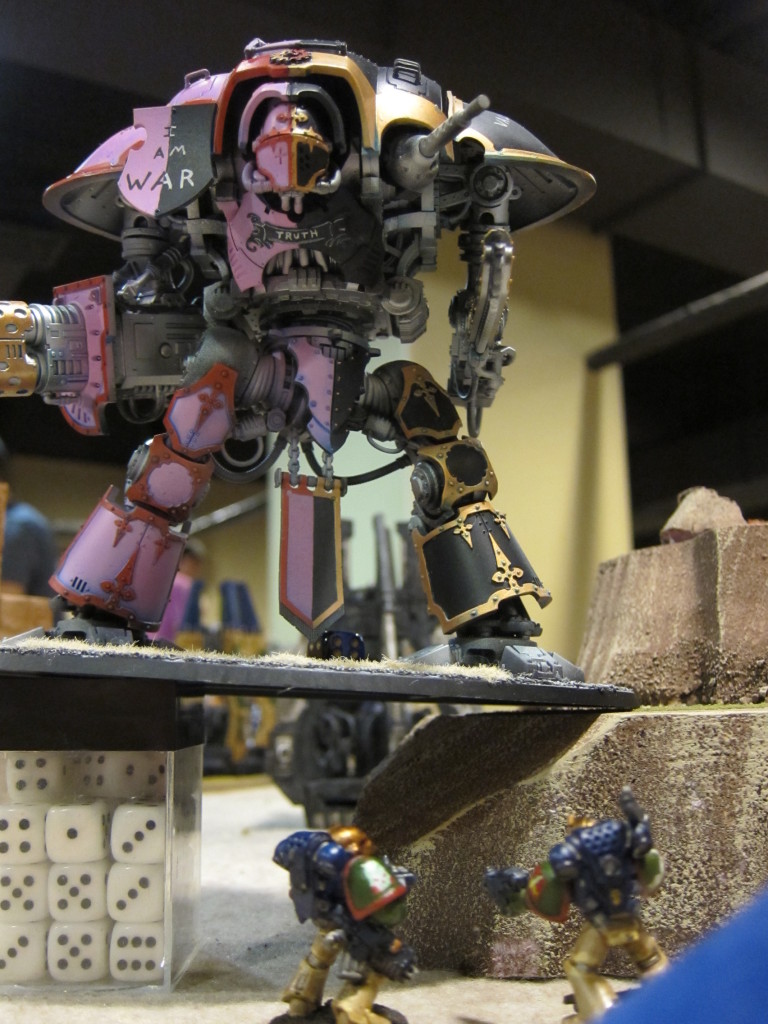
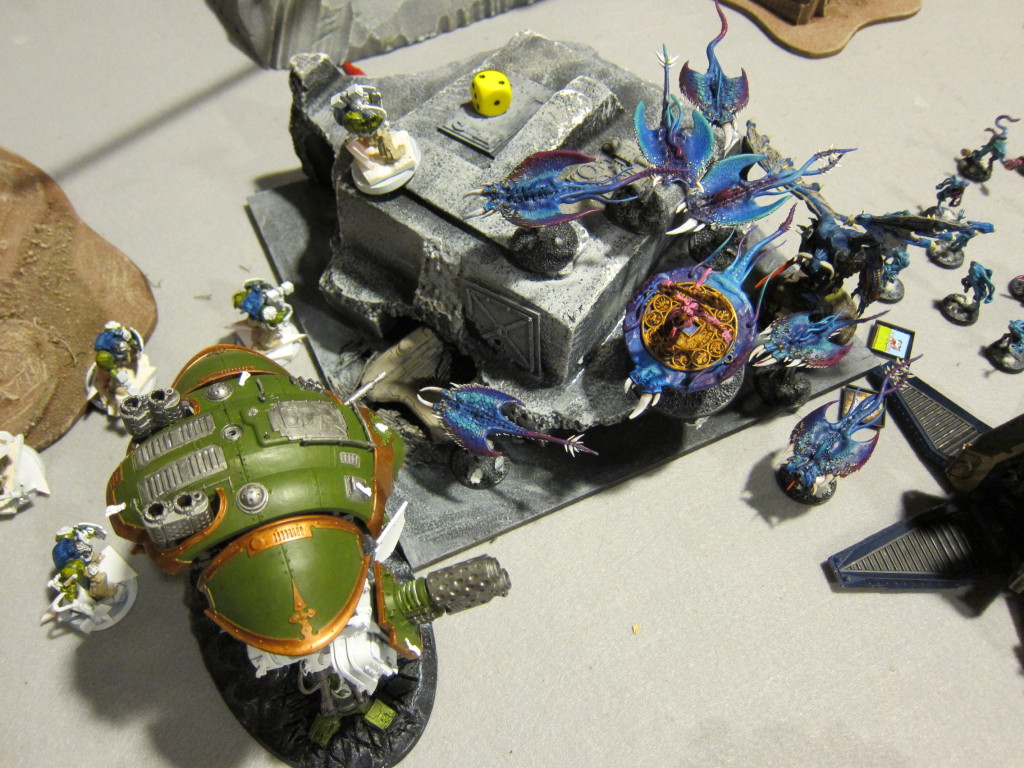
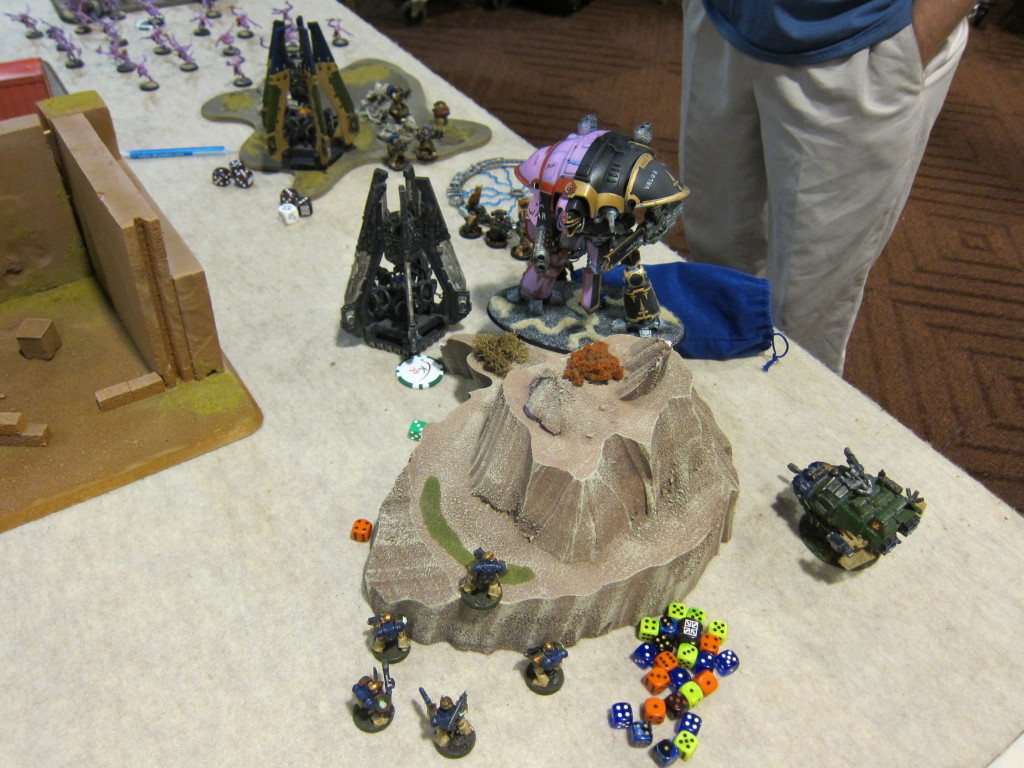
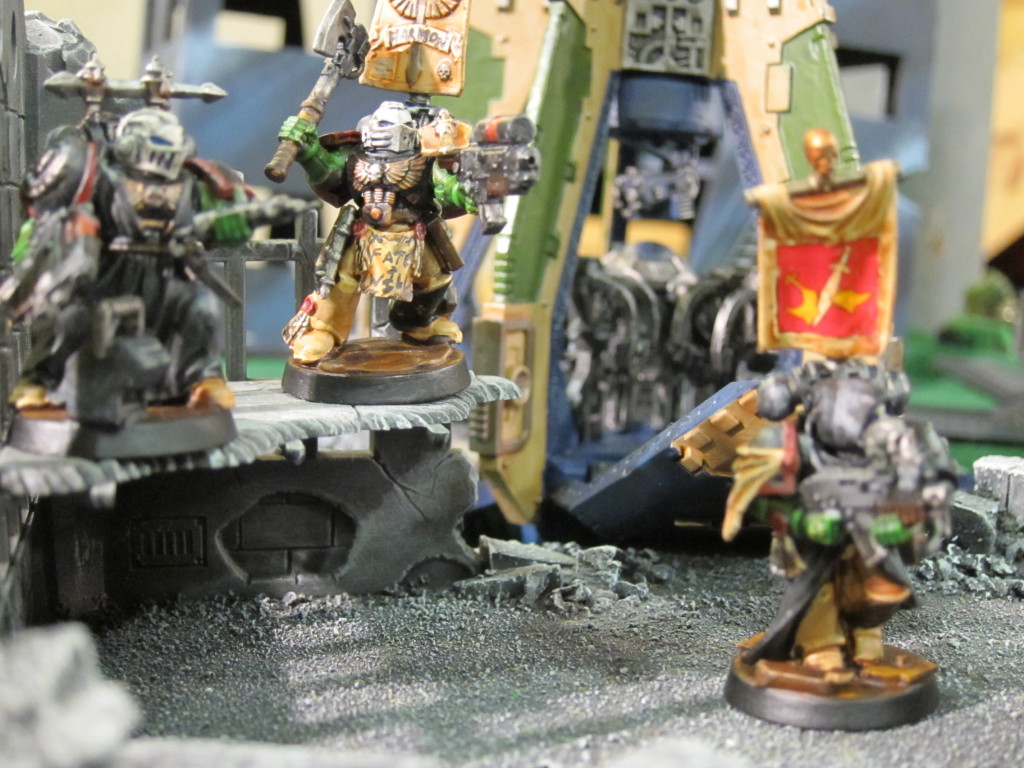
Your weapons are (all but) useless, puny fleshlings! Charles Craig's sweet Chaos-allied Knight picks a fight with Sgt Titus and his meltagunner friend.

Your weapons are (all but) useless, puny fleshlings! Charles Craig’s sweet Chaos-allied Knight picks a fight with Sgt Titus and his meltagunner friend.

War at Range

Knights have considerable effective shooting range: 36″ on their guns and 12″ movement over clear spaces. Gerantius the Forgotten Knight, a White Dwarf character that should have been in the damn codex (making for a whopping ~4 pages of rules), can additionally run and then shoot. That basically means if you want to shoot at one you’re going to need at least 36″ effective range, ideally 48″ if you want to hit it on turn one while it’s still in its backfield. For the most part that requires a vehicle, able to move and shoot, or missile launchers, which have enough range to sit & shoot. I have a multi-melta on one of my tacticals because I get a re-roll to hit (Vulkan) and it’s useful against Dreadnought Drop Pods coming down on my lines, of which there are still some in my club. The range isn’t enough though to help me fight Knights, which take far too long to walk into range, even assuming they don’t just hang back and blast away. So in the future that MM will be either swapped out for another missile launcher, or start riding down in a Drop Pod with its compadres for early melta snaps and hopeful midfield positioning.

Sir Stomps-A-Lot

Depending on which side of the machine god’s wrath you’re on, stomp attacks are either really useful or more salt in the wound. Of course they’re powerful just for clobbering whatever is currently in close combat with a Knight, particularly if it’s being tarpitted with a gaggle of weak infantry. But they also have a handy ability to reach out and touch enemies.

A stomp attack has you put down D3 blast markers. The first one goes in base-to-base with your Knight, but the others can be up to 3″ from a previously placed marker and don’t have to be placed over an enemy base. That allows you to chain the attack out and hit targets up to just under 15″ away. There are also no line of sight restrictions on placing the blasts, so even large terrain doesn’t provide protection. Nothing came of it, but in one game I was caught off guard when an opponent used that to hit a Landspeeder tucked behind terrain over a foot away, waiting for the combat to end so it could pop out and melta the Knight.

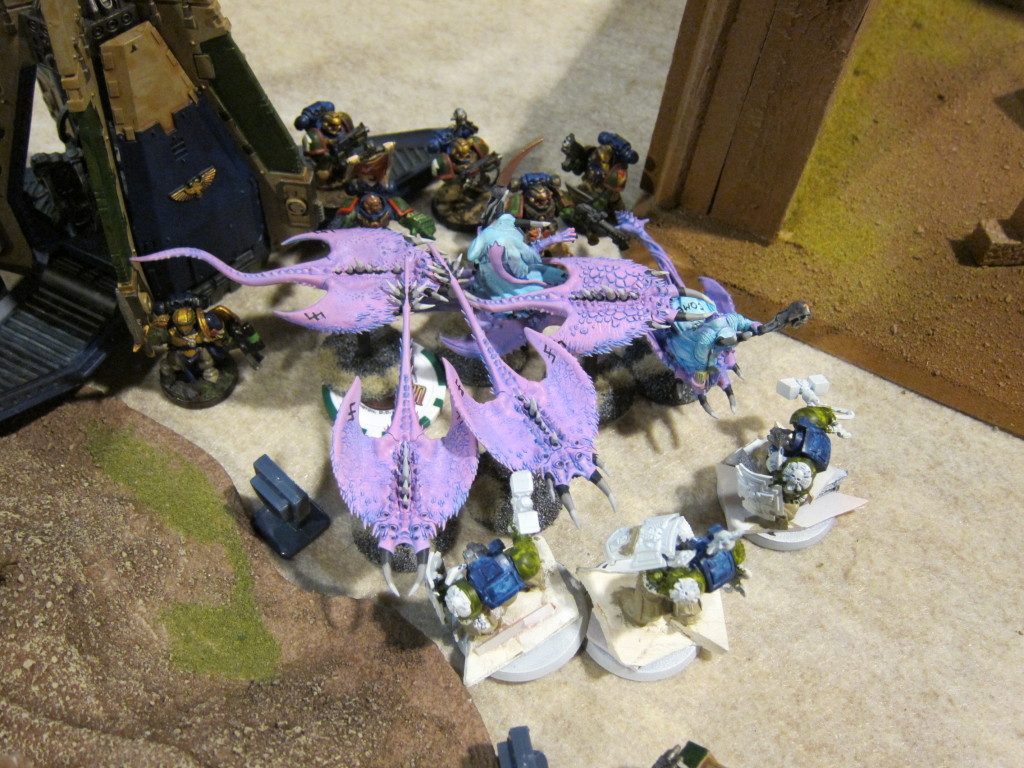
Stomps can also be useful to cause secondary casualties and force a positive combat result. In a different game I used a second and third stomp to pile wounds & then casualties onto a bunch of Blue Horrors nearby but not involved in the combat in any way. Since all unsaved wounds incurred by a side are counted in combat results, that drove the leadership way down for the Instability roll on the Daemon Prince my Knight was actually fighting. In that case it created a bunch more free wounds, but against other armies it’d be a good way to force a morale break on an otherwise stalwart unit.

So, as a Knight player, the stomps let you reach out a bit from combat for some neat tricks. Playing against a Knight, you have to be aware that units could be directly affected by the combat even at a significant distance away.

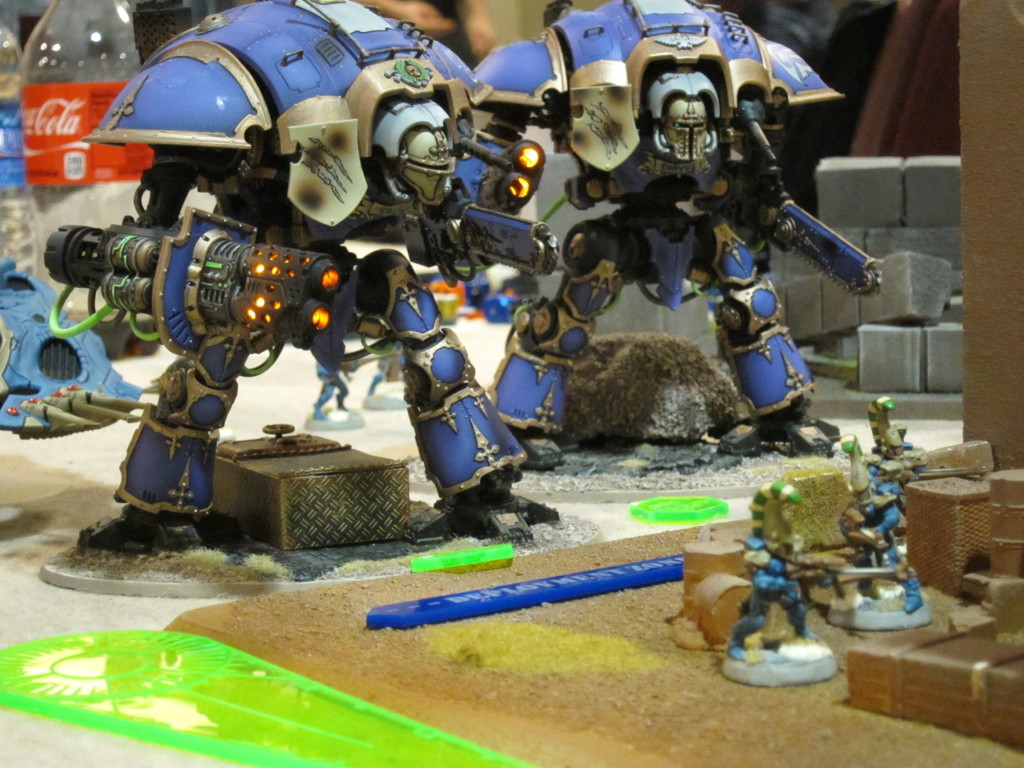
On the left, a Knight stomps its way through a warehouse and into a poor lonely Landspeeder. On the right, a Knight drives down the leadership of a Daemon Prince by stomping Horrors trying their best to avoid the combat.

On the left, a Knight stomps its way through a warehouse and into a poor lonely Landspeeder. On the right, a Knight drives down the leadership of a Daemon Prince by stomping Horrors trying their best to avoid the combat.

Huddle Up

The large blast, low AP shots rained down by a Knight are a huge problem. Getting models into cover is obviously good, but even better is not being targetable at all. Unfortunately getting and staying out of line of sight can be difficult given how tall the Knight is and how fast it moves over open terrain. However, another way to not get shot at is to huddle up close to enemy models. Blasts generally can’t be placed such that they’ll be over the shooting player’s own models. If it’s not possible to put the marker over your models without touching their own, your unit will be safe from being directly targeted.

Clearly that’s pretty situational, there’s a relatively limited set of circumstances in which you can or want to be that close to the enemy. However, one such situation that comes up fairly often is deep striking units to join an assault. The arriving unit is very exposed, typically having to stand around for a turn and get their bearings before joining the combat. When there’s the potential to be tagged by a Knight or other large blast in the interim, better than ducking into nearby cover is to use the combat itself as a shield. By getting up tight with the enemy models, those models won’t even be targetable by the blasts and will have a much better chance of living through the next round of shooting to make it into the fight.

Drop Podding Vulkan and a powerfist combat squad huddle up tight against a combat for blast protection before being able to assist their Terminator battle brothers.

Drop Podding Vulkan and a powerfist combat squad huddle up tight against a combat for blast protection before being able to assist their Terminator battle brothers.

Bubblewrap

In my local scene there’s a bunch of meltagun Drop Pods, with their 6″ armor penetration bonus, as well as Screamers of Tzeentch, which have armourbane on their bite attack, so bubblewrapping key vehicles is important. One thing to note is that unlike a normal vehicle, with any reasonable amount of terrain on the board it’s quite a bit easier to bubble wrap a Knight on the move without sacrificing its mobility since it moves as normal infantry—so slow!—through terrain and the base is so big it’s bound to hit some wherever it’s going.

To protect my Knight I’ve been vacillating between cheap Imperial Guard and expensive storm shield Terminators. There’s a clear tradeoff between the two: For ~100 points I can bring enough Guardsmen to wrap completely around the Knight and protect it from all angles, but in a purely sacrificial way. Something else, possibly the Knight itself, needs to step in to actually remove the threat, and quickly so before all the Guard are eaten through. On the other hand, for 225 points a squad of thunder-shields can clobber most assault threats, or at least tarpit on their own for quite some time. That handful of models though has a tough time maintaining an effective wall against mobile threats like Screamers that will just do an end run around it. Which approach is better in general is tough for me to say, but in many tournaments, as at NOVA, restrictions on detachments, allies, or sources may force your hand. Similarly, Come the Apocalypse allies won’t really be able to wrap at all against an alpha strike.

This bubblewrapping successfully protected my Knight against incoming dangerous assaults. Note that the opposing Knight is basically not shielded at all, because it had to deploy 12" from CtA allies.

This bubblewrapping successfully protected my Knight against incoming dangerous assaults. Note that the opposing Knight is not shielded at all, because it had to deploy 12″ from CtA allies.

It worked out ok in the end and the Knight lived on the rest of the game, but this bubblewrapping has failed completely and the Knight should die. Screamers have a ton of ability to just fly over and around low model count walls.

It worked out ok in the end and the Knight lived on the rest of the game, but this bubblewrapping has failed completely and the Knight should die. Screamers have a ton of ability to just fly over and around low model count walls.

Tarpits

Similarly but on the flip side, an important tactic fighting Knights is tarpitting. Every turn it spends stomping expendable troops is a turn it’s not dropping pie plate blasts or mega-chainsword swipes on critical units. In thinking about doing so, it’s easy to overestimate how killy a Knight is in close combat.

Like many big models, with the 7th edition Destroyer weapon table and the Knight’s basic statline, it’s more efficient and effective going after big targets than little ones. Successful D weapon hits put multiple wounds/hull points on models, not units, so they clobber vehicles and monsters but are way overkill and not more effective than a standard powerweapon or monstrous creature against typical infantry. In ongoing combat, a Knight is only going to kill 1.25 MEQs per round with its base attacks (3 attacks, 4s to hit, 2+ to wound at AP2). The effect of the stomp attacks is fairly situational because the hits are determined by blasts and thus dependent on precise positioning. But, if I’m doing my math right, each MEQ has a 65% chance of surviving each hit (2/3 chance of Ker-runch effect times 5/6 chance of wounding at S6 times 1/3 chance of dying on 3+ save plus a 1/6 chance of the Overrun effect is 35% chance of an unsaved wound per stomp blast over a MEQ). Each Marine thus has a 45% chance of surviving a stomp attack (1/3 for 1 blast times .65 plus 1/3 for 2 blasts times .65^2 plus 1/3 for 3 blasts times .65^3). So even if a full combat squad is bunched up to be wholly placed under a blast, it should expect to lose “only” 2.75 guys per round to stomps, and remember that the guy killed by the base attacks can’t be hit by the stomps.

All in all, that’s pretty good for the MEQs! Even a few lowly Tacticals can tarpit and hold up to one of the Martian C’Tan’s warmachines for a bit. They might even do some damage, because their krak grenades and melta bombs if they have them will strike simultaneously with the Knight’s base and stomp attacks respectively. In the photo at the top of the article, those two Tacticals tied up that Knight for several critical rounds of combat, leaving my other forces free to deal with other threats.

Don’t Get Shot!

Against longer range shooting attacks, bubblewrapping and protecting a Knight can be difficult. The model’s just so big that almost no models and only the biggest, purpose-built LOS blocking terrain will give it a cover save. Its ion shield of course will give it a save, but only against one facing. It’s therefore important to try to force incoming shooting into one arc, and to otherwise minimize the damage through range and any available LOS blocks as well as the board edges.

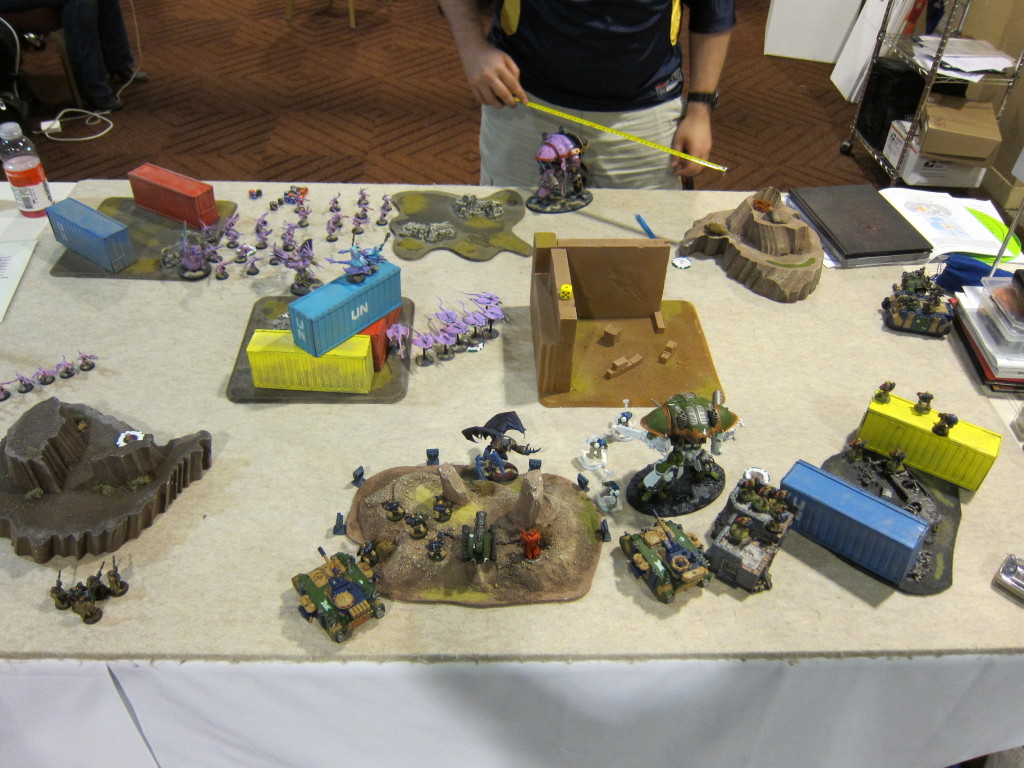
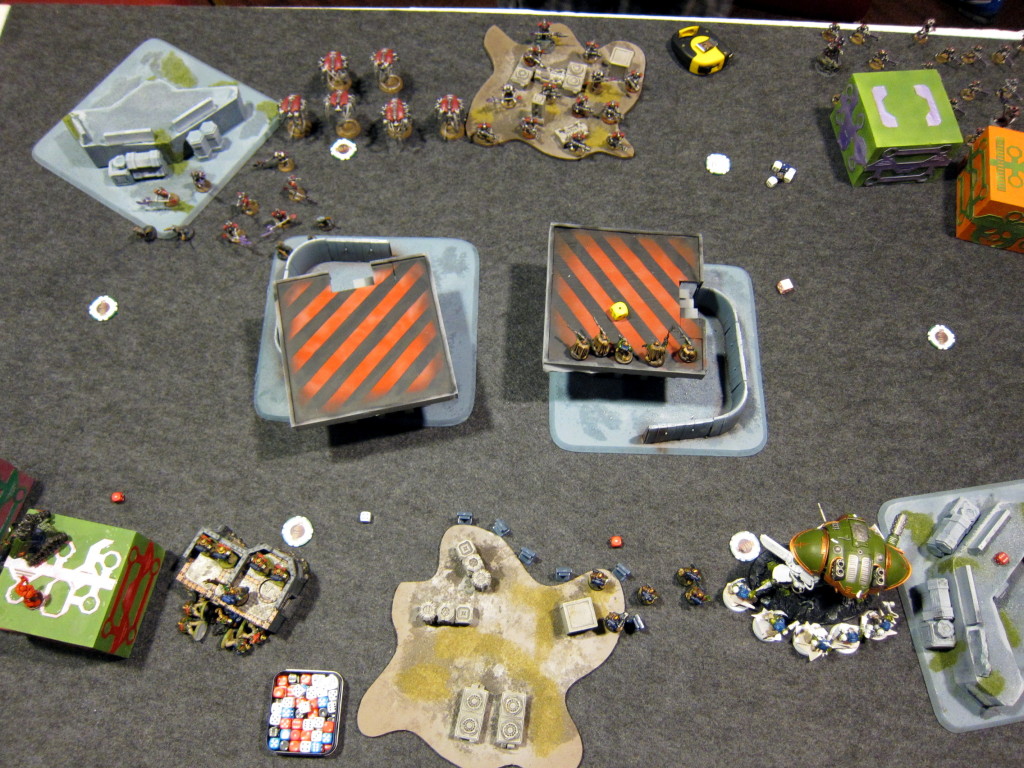
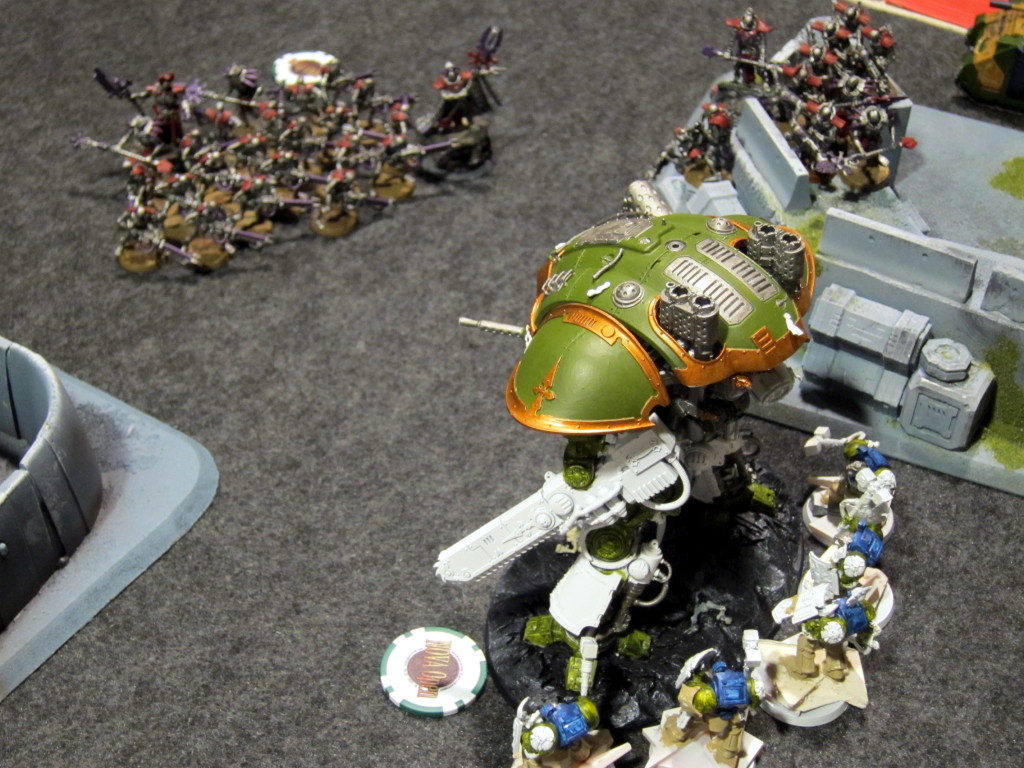
In a recent game against Necrons, I set up my Knight as in the picture below. Without Drop Podding melta or fast assaults to worry about, I placed my Knight aggressively in hopes of moving forward quickly and clearing the central LOS blockers for more shooting options. In actuality though this Knight was dead before my first turn: I got literally caught off guard by having the initiative seized, and then caught off guard again by a Cryptek and Vargard Obyron teleporting ~30 Necron Warriors on top of me in double tap range. The two blobs went into two separate arcs, rendering my ion shield applicable to just one. Either way though, no Knight’s going to stand up long against 60 gauss weapon shots and it promptly exploded.

The game begins, and I've already made horrible mistakes!

The game begins, and I’ve already made horrible mistakes!

Jeremy Chamblee's Necrons are about to take this Knight down, and how.

Jeremy Chamblee’s Necrons are about to take this Knight down, and how.

What I probably should have done is set the Knight hard into a corner with just its front facing exposed, enabling the ion shield to protect the whole exposed area. Further, I should have used various units to build a wider diameter bubblewrap around the Knight, leveraging the two board edges in the corner to minimize the models needed. I’m so used to protecting against melta Pods and assaults that I was thinking there was little I could do about longer range gauss shooting. In reality though, I could have forced them to teleport in beyond double tap range, literally halving the number of shots the Knight would have to survive.

Notable there is that with melta Pods I worry about bubblewrapping a 6″ radius with a tight cordon so dudes can’t work their way into bonus range on disembarking. Against double tapping gauss or other weapons the bubble has to be much wider, pushing them out beyond twelve inches. Making that easier though, the wrap doesn’t have to be as tight. Individual shots sneaking through aren’t as lethal as melta, and a large blob like these tens of Warriors will have a large deep strike mishap footprint that stands a good chance of hitting a loose curtain wall if they’re dropped aggressively or scatter badly.

Pincer Attack

Conversely from the defender wanting to force all shooting onto one ion shielded facing, I think the most important tactic in going after an Imperial Knight is being able to hit more than one facing at once. This seems to be overlooked by many/most tacticas and maybe overlooked by many people but is fairly easy to apply, at least in theory.

The Knight’s ion shield confers a 4+ save, 3+ if it’s a Seneschal or Gerantius, and a re-rollable one if deployed in the Adamantium Lance formation. It’s limited to one facing though, chosen at the start of shooting. The best way to leverage that limitation and mitigate a key part of the Knight’s defense is simply to hit multiple facings at once, ideally with a roughly equal spread of power, leaving it able to shield only a portion of the attacks. This is going to be more effective than a mere large number of shots alone.

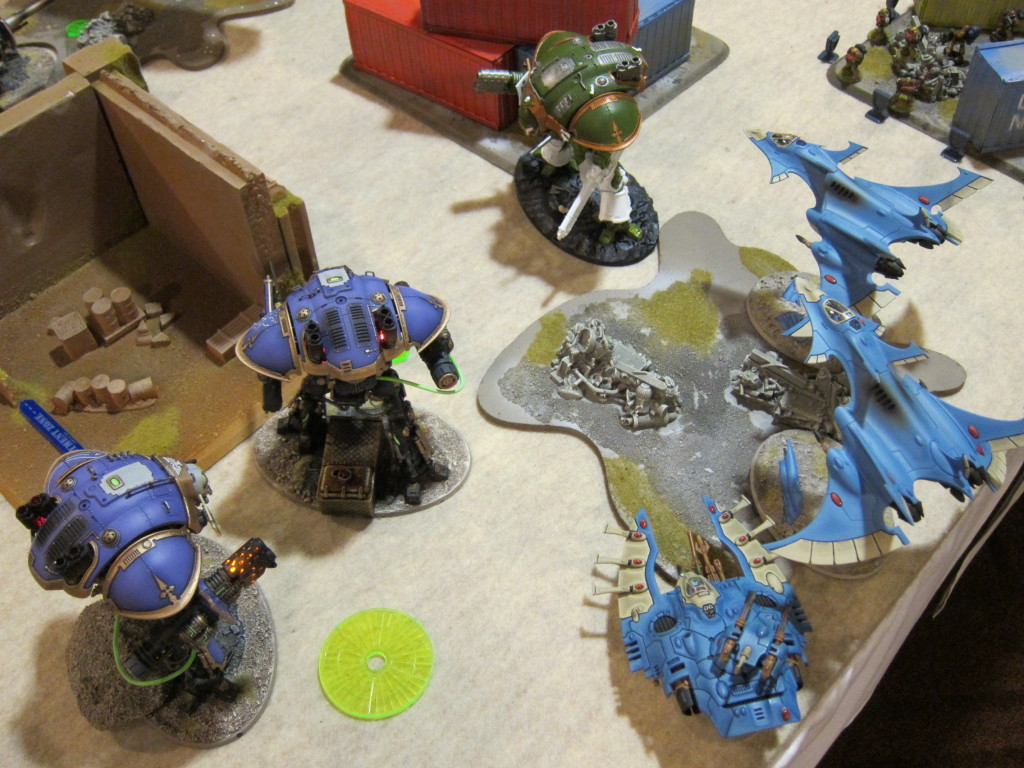
My lonely Knight is taken down yet again, this time by Joe Johnson's gorgeous army of Knights+Eldar buddies.

My lonely Knight is taken down yet again, this time by Joe Johnson’s gorgeous army of Knights+Eldar buddies.

To do so, the attackers need multiple units capable of hurting the Knight, and the mobility to get them into multiple arcs. Flyers and skimmers are a good option for this as they can’t be blocked as easily from getting into position by terrain and other units. To me, Crimson Hunters seem particularly ideal as the Knight can’t shoot back at them effectively at all, mitigating their AV10 weakness, and their Vector Dancer USR enables them to loiter around a battlefield longer and deliver shots on target much better than most flyers.

For the ground pounding Drop Pod set, hitting multiple arcs realistically means either multiple Pods or two combat squads coming out of a single Pod bearing roughly equal amounts of vehicle killing power, presumably melta. The combat squads are cheaper in points, take up less FOC slots, and in many cases are easier to deliver onto target. Multiple Pods though give flexibility if there for once isn’t a Knight or other single major target to pile up on, as well as potentially being able to constrain future movement of the target and create some cover for your own guys. Either way, the key thing is moving those guys into more than one arc on the drop.

Kingbreakers Marines attacking from all angles.

Kingbreakers Marines attacking from all angles.

Facing

Finally, to that note, facing is not a completely straightforward issue. The Imperial Knight has a fairly complex model & shape, and many get posed with the base, legs, and torso all at different angles, all of which can lead to different interpretations and intuitive takes on what is actually part of the hull, what is not, and how to determine facing angles.

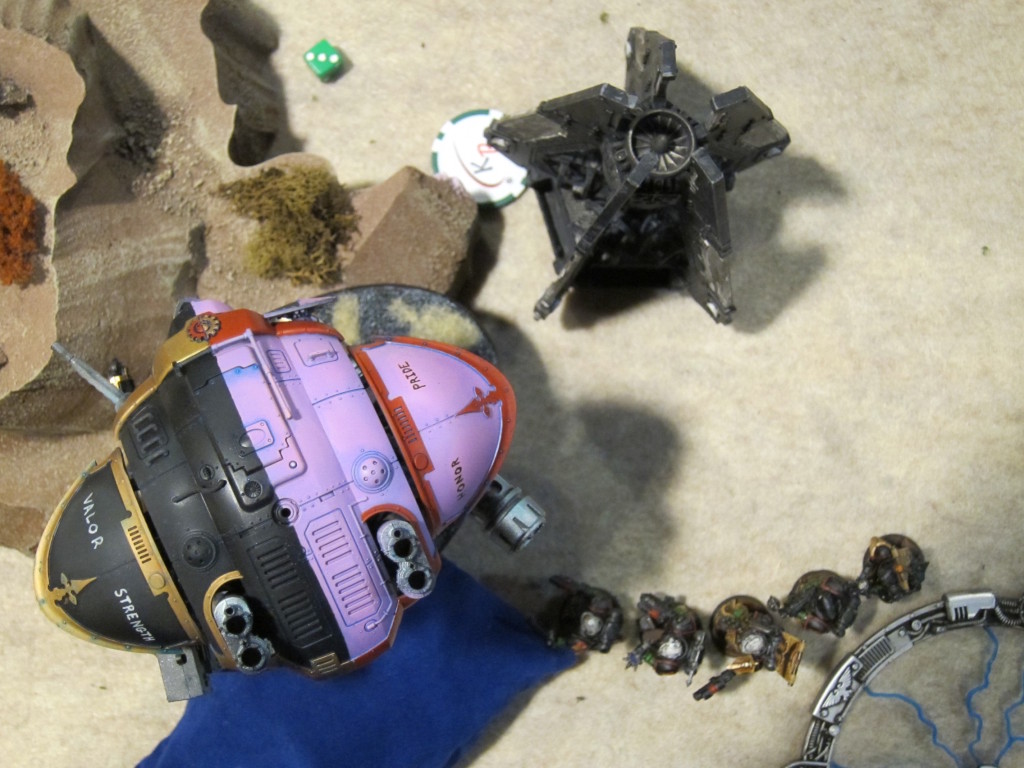
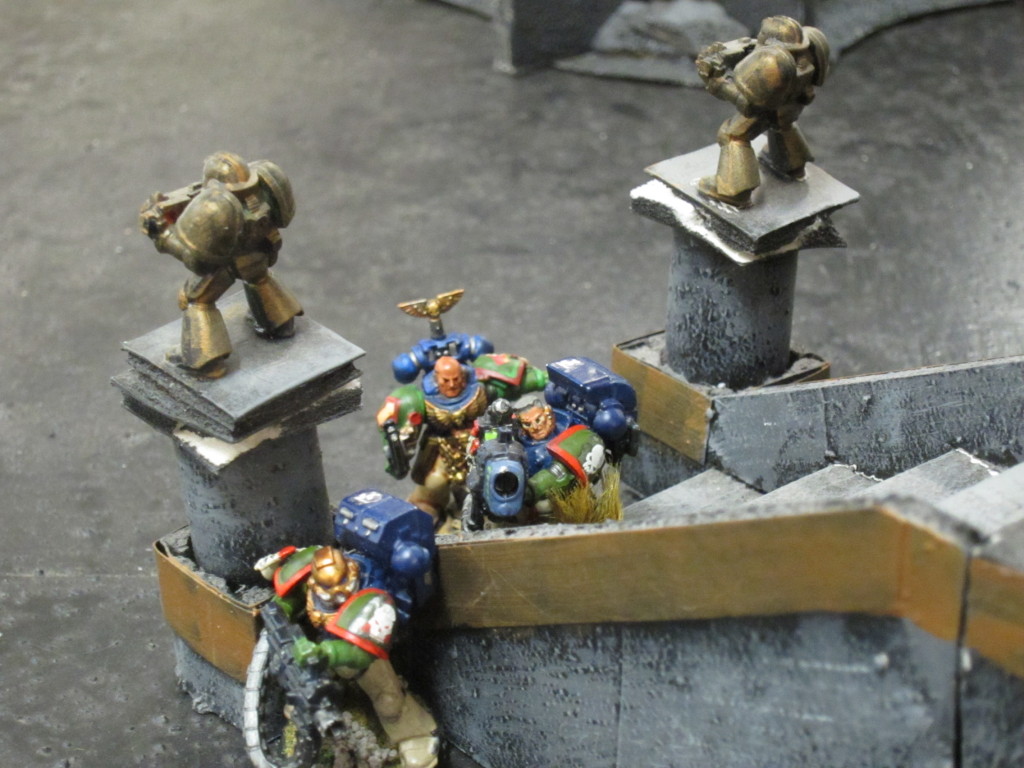
In the picture below, Sternguard with a couple combi-meltas have dropped from the skies to destroy the traitor Knight. They’ve disembarked as far as they can. I looked at that quickly and my intuitive read was that they were in the Knight’s rear facing. My opponent just as quickly thought they were on the side armor but wasn’t completely confident. It was kind of a big deal, I had two other melta shots coming in from the right side out of picture so I really wanted these guys on the rear armor and there was a good chance to do a lot of damage (Vulkan giving me re-rolls on to-hits for meltas). It wasn’t worth a big thing though and we could each see the other’s view so we just rolled for the couple on which he was in doubt to decide their quadrant; they wound up on the side armor and both units got ion shielded.

Combi-melta Sternguard disembark as hard as they can toward the rear armor of their target.

Combi-melta Sternguard disembark as hard as they can toward the rear armor of their target.

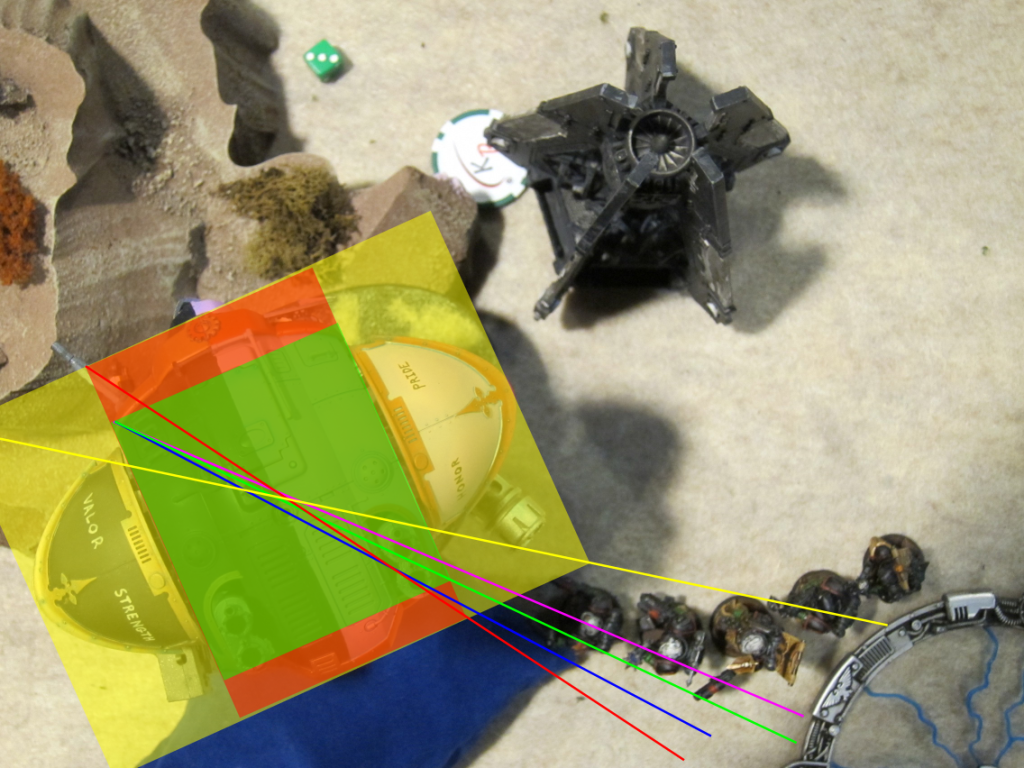
Looking at it more closely from that photo, I’d also now lean toward side armor but there’s definitely some gray area. In the annotated picture below, yellow is the hull bounding box and associated facing line if you include the Knight’s shoulders. Previously this was roughly my intuitive approximate take on facing for Knights. The pink line is the facing divider from the leftmost to the rightmost corners of just the main body. The green line goes from the leftmost corner of the main body to the angled corner of the main body behind the smoke stacks. I didn’t have time to ask, but assume my opponent’s interpretation was something like those two. The blue line goes from the leftmost to the bottommost point in that corner of the main body. Finally, the red is the bounding box and associated divider of the main body. There’s quite a difference among all those slight variations!

Various hull bounding boxes & extremal points and the dividing lines they entail for facing.

Various hull bounding boxes & extremal points and the dividing lines they entail for facing.

So, there’s a couple questions here: Do you use the bounding box for vehicle facing, or a specific point on the hull body? My impression is that almost everyone uses some sort of intuitive bounding box for rounded vehicles like Wave Serpents. With the boxy but not quite regular shape of the Knight’s main body though, a lot of people might be using a specific point on there. The follow-up is then, of course, are the shoulders considered part of the hull? What if someone has assembled their model without the shoulder covers? I was pretty close to doing that with mine just to get a different, more mechanical look. There’s probably a variety of opinions on including the shoulders. From my end, I’ll only say that everyone is more than happy to tag the sponson wings on my Predators as part of the hull when shooting at them, and ditto the shoulders of my Knight. I would guess though many Knight owners getting shot at would not consider the shoulder covers as part of the hull, and/or aren’t including them in determining facing, making the front and rear arcs much more narrow than they otherwise would be.

I don’t (yet) have a strongly held take on what should be the correct arc lines. More important though than the actual “correct” answers to those questions is nailing down with your opponent the answers that will be in play for a given match before beginning a game and finding yourselves with different interpretations at a clutch moment. From now on I’m definitely going to include them in my ever-growing list of topics I try to remember to discuss with new opponents before matches.

Conclusion

All in all, the Imperial Knight’s an interesting model/unit. It’s almost certainly under-costed in points but I can’t quite decide what point value I think it should be. In particular, it’s very robust but you can’t just throw it out there willy-nilly either. A large variety of units and attacks can make it pop quite quickly. Similarly, it can do a ton of damage in both shooting and assault, but is also prone to being tarpitted or held up in terrain and not actually delivering much. One thing’s for sure though, there’s bound to be a ton of them on tabletops for the foreseeable future, so please share your attack and defense ideas in the comments!

Nothing can stop us! No, seriously, nothing.

Nothing can stop us! No, seriously, nothing.

40k: 7th Shooting—The Bane of Vulkan

40k-7th-coverAs most have no doubt heard already even if they haven’t yet gotten their own rulebook or given it a play, shooting in 7th edition 40k has been updated. The changes aren’t earth shattering, especially in casual play, but they are worth taking note. For example, Focus Fire is gone, so you can no longer specifically target just models outside of cover and pile more wounds onto them. Although that was useful and a good tactic, I don’t see its removal as a terrible loss. I doubt most players, particularly outside competitive play, had ever even used it much.

What I want to discuss briefly is the change to the order in which weapons fire. It also is neither a huge change nor one I consider negative, but it does have consequences on how you shoot, and depending on how you look at it either reduces the effectiveness or changes the tactics for some weapons loadouts.

If you spot any needed corrections to my understanding or have thoughts on the handful of open questions, please share them in the comments below!

Sixth Edition

Previously, all weapons fired simultaneously. All rolls to hit and wound for pistols, flamers, boltguns, etc., were conceptually all done at the same time. This could lead to some funny effects that weren’t game breaking, particularly as they generally only came up infrequently, but definitely weird if you even noticed it.

For example, suppose I have a couple Ultramarine Tacticals with a meltagun staring down some Chaos Marines and their buddy Abaddon, as in the figure below. All of the Ultramarines are within 12″ of one Chaos Marine. Another traitor and Abaddon are not. Clearly, the two boltgunners can double tap for 2 shots on the first guy, and the meltagunner is also in range to shoot. Somewhat weirdly though not obviously so, by the 6th edition’s “Out of Range” rules (pg 16), I could apply all of those boltgun shots to all the enemy models even though I got 2 extra shots for the one guy alone being in half range (12″). Really weirdly if you stop to think about it, by those rules I could also use the boltgun shots to take out the two Chaos Marines and then apply the meltagun shot to Abaddon, much better for me, even though he is completely out of range for that weapon.

Abaddon takes an impossible melta shot to the face.

Abaddon takes an impossible melta shot to the face.

Similarly, suppose I have two Tacticals with boltguns and one with a flamer facing off against Hormagaunts coming out of some ruins as below. I’d like to apply the flamer wounds to the guys in the back to negate their cover save. By those same “Out of Range” rules in 6th edition, I could do that even though the template doesn’t reach them. Everything shoots at once, and say everything hits and wounds (quite conceivable). I allocate the bolter wounds first and the front three Hormies are dead, maybe one guy in the back makes his cover save on the remaining bolter shot. I then apply the flamer wounds and the back guys are denied cover and die.

A gout of flame magically leaps into the nearest ruin.

A gout of flame magically leaps into the nearest ruin.

Seventh Edition

Relatively minor as they were in the overall scheme of 40k weirdness, seventh edition eliminates those oddities. Now, you activate a unit to shoot with and nominate a particular weapon class, e.g., boltgun or flamer, further defined below. All of the weapons of that class in the unit may fire, and all of the hits, wounds, and casualty removal for those shots is resolved simultaneously before nominating and resolving another weapon class. Players can still elect to not shoot with particular models for any given weapon class, but cannot go back to that weapon class to shoot with them later in the order. Models still of course cannot fire more than one weapon in a shooting phase unless they’re specifically permitted to do so, e.g., vehicles, Techmarines with a Servo-Harness, some characters.

Most importantly: It’s implied by the new ordered shooting, but the revised “Out of Range” rules (page 35) then make very clear that enemy models cannot be removed if they’re not in range of the models and weapon class currently firing. In the above examples, that means I need to nominate the meltagun and flamer before the boltguns or risk wasting the special weapons. Firing the boltguns first might remove potential casualties within the special weapons’ lesser range, while the boltguns could have shot models in the rear even with those in front removed.

Apply with care!

Apply with care!

Notably, weapon class is determined by the combination of name, ammo, and mode. So, bolt pistols and boltguns are different weapons even though they both fire bolter shells with the same damage stats. Ammunition is also clear; Sternguard firing their Dragonfire bolts (24″ range, ignores cover) shoot at a different order step than Sternguard firing Vengeance rounds (18″ range, AP3, Gets Hot).

Unfortunately, I don’t believe a formal definition of weapon mode is given in the rules. Perhaps not totally obviously, it all but certainly means differentiating between rapid fire weapons double tapping at half range versus shooting single shots at full range. Salvo weapons firing stationary versus moving are a more intuitive example of different modes. Importantly, the rules explicitly state that the maximum range for a weapon is applied regardless of the mode used. In the topmost example above, if the boltguns fire first, rapid fire due to an enemy being in 12″, and produce four wounds, all four would be applied even if that single model within half range to double tap is removed. The rules justify this as the shots flying on and getting lucky. Sounds reasonable to me, and makes sense in terms of a small practical convenience and not diminishing those weapons.

Similarly to not defining weapon modes, I don’t believe the rules explicitly state whether mastercrafted and twin-linked weapons fire at different times from the regular weapon. Given the focus on ordering weapons by “different names,” they all but certainly do when purchased as entries with those adjectives in the army list. More tricky is whether or not they count as different names when purchased the same but upgraded through some other mechanism. For example, is a Salamanders Sergeant’s boltgun that has been mastercrafted via their chapter traits different from the other boltguns in his squad? I would have to assume so given that you would have to roll different dice for those weapons anyway.

Fortunately, the rules do make clear that combi-weapons fire at the same time as whichever component you are choosing to fire, e.g., boltgun or meltagun.

Flame Away!

Given those rules, there are a few new tactical considerations, the most obvious ones revolving around range, templates, and blasts.

For example, units with different classes of flamers now need to be maneuvered with more care and in different fashion than before. The figure below shows one of my favorite setups and tactics: Vulkan and some Tactical buddies leap out of a Drop Pod to double flame a blob of baddies in a column. Unfortunately for me, either Vulkan or the flamer now has to resolve shooting first. In the arrangement below, that’s going to completely remove all the enemies in template range, wasting the other flamer. Previously the Salamanders here would almost certainly eliminate the entire blob (16 Hormagaunts versus 14 definite flamer kills and 9 remaining bolt shots: 2/9 hits+wounds needed to eliminate). Now they’ll severely cripple but almost certainly not completely remove the Tyranids (16 Hormagaunts versus 7 definite flamer kills and 9 remaining bolt shots: 9/9 hits+wounds needed to eliminate).

Fire does not mix with fire!

Fire does not mix with fire!

At first I was thinking this made mixed-flamer teams inefficient, and it does in some precise configurations like this one. But really I’ll just have to think more about how I deploy and move them. For example, looking at that blob, I need to put higher priority than before on landing and moving to the right, top, or bottom of it, so that both flamers will have at least some targets even after casualty removal. This consideration applies for some other units as well. Presumably Vulkan’s Gauntlet is not a heavy flamer in terms of having different names for shooting ordering, even though his entry says “The Gauntlet … is a heavy flamer.” So I have this same issue even if he comes down with heavy flamer toting Sternguard. Somewhat more difficult to accommodate given the practicalities of Drop Pods, movement, and terrain would be a Sternguard squad wielding a mix of heavy flamers and combi-flamers. In my experience the heavies would frequently render the combi-flamers useless. Another unit with the same new challenge is a Blood Angels Dreadnought equipped with a heavy flamer and twin linked heavy flamer.

Tactics

Generalizing from that, these changes to shooting aren’t huge but do require additional care. Right now I’m working on developing my rules of thumb for ordering shots in common situations. At the top level it’s pretty clear that should generally follow increasing range with exceptions to maximize templates, blasts, and rapid fire/single shot flexibility, something like:

  1. ~9″ Templates
  2. 8″ Grenades
  3. 12″ Pistols
  4. 12″ Rapid Fire
  5. 24″
  6. 36″
  7. 48″

For my Marines the details of those rules of thumb, largely for Tacticals, so far are:

  1. Heavy flamers
  2. Flamers
  3. Combi-flamers (save for last of flamers in case they’d be useless to pop)
  4. Frag grenade (after the flamers as the former are generally more likely to wound, particularly for Salamanders) or krak grenade (not actually sure if it doesn’t make sense to put this first, before flamers, given the limited range)
  5. Meltaguns
  6. Plasma pistols (after meltaguns to avoid gets hot if not needed)
  7. Bolt pistols (after meltaguns and plasma pistols if potentially assaulting to delay decisions (see below); otherwise, before plasma pistols)
  8. Frag missiles (fired here to maximize models under the blast, moved after rapid firing if there’s a bunch of enemies outside 12″ range, and again to after single-shots if there are clusters beyond 24″ range)
  9. Plasma cannons (fired here to maximize models under the blast, moved after rapid firing if there’s a bunch of enemies outside 12″ range, and again to after single-shots if there are clusters beyond 24″ range)
  10. Rapid-firing boltguns
  11. Rapid-firing plasmaguns (after boltguns to avoid gets hot if not needed)
  12. Storm bolters (moved before bolt pistols if potentially assaulting)
  13. Multi-meltas
  14. Single-shot boltguns
  15. Single-shot plasmaguns (after boltguns to avoid gets hot if not needed)
  16. Heavy bolters
  17. Krak missiles
  18. Lascannons
weapons

I don’t care who shoots first, just shoot, shoot!

Obviously actual circumstances would dictate changes to the ordering, e.g., moving meltaguns up or down depending on where the toughest armor is in the opposing unit. Some orderings also don’t matter, like multi-meltas versus single-shot boltguns or krak missiles versus lascannons. But that’s the kind of general priorities I’m trying to get into my head.

One interesting note is that the order isn’t declared in advance. That’s helpful if you’re looking at potentially assaulting a unit. Again thinking mostly about Marines, if you have some flamers, a special pistol on your sergeant, meltaguns, and/or use a grenade, you could shoot at a unit a bit before making a decision about whether or not to use bolt pistols with the bulk of your squad so you can assault, or use rapid firing boltguns to try and finish it off in shooting instead if it’s been severely diminished. Similarly, the ordered shooting allows you to have a bit more information before you have to decide whether or not to shoot with every model or weapon in cases where that might risk putting the target out of realistic assault range.

Conclusion

Other than probably needing some tweaks to army construction and potentially but not necessarily a few of the psychic powers, I’m pretty optimistic about seventh edition. I don’t think there are many new things that will slow down the game more once people are used to them, including this new shooting algorithm as well as the psychic phase. Several of the changes, like the vehicles updates, have actually brought more balance to the game, while others like this revised shooting have fixed some oddities. My early thoughts are it should be a really good era of 40k once tournaments figure out what they need to tweak.

Bring it.

Bring it.