RocketHaxe 2.0 Update: Components & Signals

After long hiatus, work proceeds in dribs and drabs on RocketHaxe 2.0.  Most of the widgets and core algorithms in RocketHaxe 1.0 were solid, but I wanted to streamline the entities and overall screen management/game flow.  The latter turned out to be not so bad on second look, but has been cleaned up a bit.

The former I’ve been thinking about a lot.  On the one hand, I want to keep the library well scoped, and focused on small, relatively simple games.  It’s not supposed to be the foundation of a decades-long franchise production effort.  It’s also got to work in Flash on low-end machines, as well as limited Android mobile devices.  That said, I strongly prefer more declarative approaches and am a big fan of component based architectures.  So with the redesign I’ve been trying to walk a line between the two: Enough component style design to simplify the object hierarchy; not so much to be overwhelming or hurt performance.

It’s still in flux as I think about the design a bit, but the basics are in place for things to be once again moving around and such:


(the demo display is wider than this blog, so the ball goes off to the right a bit)

Code for that demo is fairly straightforward; excluding the imports declarations, this is all it takes to setup and launch the ball:

class Main
  extends com.rocketshipgames.haxe.Game
{

  private function new():Void
  {
    super();
    trace("Balls Demo");

    var game = new com.rocketshipgames.haxe.ArcadeScreen();

    //-- Create a ball!
    var ball = new Entity();

    var kinematics = new Kinematics2DComponent({ xvel: 200, yvel: 200});
    ball.addComponent(kinematics);

    var bounds = new Bounds2DComponent();
    bounds.setBounds(BOUNDS_DETECT,
                     25, 25,
                     Display.width-25, Display.height-25);
    bounds.offBoundsLeft = bounds.bounceLeft;
    bounds.offBoundsRight = bounds.bounceRight;
    bounds.offBoundsTop = bounds.bounceTop;
    bounds.offBoundsBottom = bounds.bounceBottom;
    ball.addComponent(bounds);

    ball.addComponent(new BallShape(game));
    game.world.entities.addComponent(ball);

    //-- Start the game
    flash.Lib.current.addChild(game);

    // end new
  }

  // end Main
}

The BallShape component is just a holder for some Flash DisplayList geometry:

private class BallShape
  extends flash.display.Shape
  implements com.rocketshipgames.haxe.component.Component
{

  private var position:Position2D;

  public function new(parent:flash.display.Sprite):Void
  {
    super();

    graphics.beginFill(0xFF0000);
    graphics.drawCircle(0, 0, 25);
    graphics.endFill();

    parent.addChild(this);
  }

  public function attach(containerHandle:ComponentHandle):Void
  {
    position = cast(containerHandle.findCapability("position-2d"),
                    Position2D);
    update(0);
    // and attach
  }

  public function detach():Void { }

  //------------------------------------------------------------------
  public function update(elapsed:Int):Void
  {
    x = position.x;
    y = position.y;
  }

  // end BallShape
}

One of the big things in there is that I’m trying to avoid having to send/receive signals for every little thing, like a position update. It just feels like a lot of overhead to incur for constantly occurring tasks. So components are able to fetch each other, and it’s expected they’ll hold on to pointers and interact directly to some extent, particularly the core in-library capabilities like kinematics and collisions.

However, the mechanisms are there to code that way if you wish, which could make sense for higher level game events like taking damage. Just like in RocketHaxe 1.0, the overall game world provides for signals, states (properties), and scheduled events. But that’s been repackaged and reused such that each entity actually instantiates those mechanisms internally as well if any component wishes to use them. So you can do things like have your collision response throw a damage signal that any number of other components in that entity then process.

Where this all gets tricky is with collision physics and graphics, because they’re both intertwined with other mechanisms outside of the entity itself, with some precise execution ordering requirements. So I expect this to change a bit more, but it’s not half bad the way it is now.

Haxe 3, OpenFL, Arch, Android

haxeTom and I went through and installed Haxe 3 and OpenFL on our machines today.  OpenFL is the updated Haxe 3 version of NME.  These are a few notes, updating from my Haxe 2 comments, some of which are still applicable. All in all, the process seems smoother than it was for Haxe 2/NME on Arch… I’m excited!
Haxe

First install Neko out of the AUR:

sudo packer -S neko

Then Haxe 3:

sudo packer -S haxe

Note that you can do those two steps at once. If you receive an error about an incorrect Neko package version, it’s because the Haxe package doesn’t denote the version dependency. Running them separately as above will force Neko to be updated first, and then Haxe.

At this point you should setup haxelib:

haxelib setup

Tom sets the haxelib location to be in his home directory, which is most proper. I leave it in the default /usr/lib/haxe, for no good reason. In that case you need to modify the install directory to be owned by your user:

cd /usr/lib/haxe
sudo chown -R joe .

OpenFL

Next, install OpenFL following their instructions:

haxelib install openfl && haxelib run openfl setup

When it asks for sudo permission, it’s installing a simple script aliasing haxelib run openfl to just openfl, so you can skip it if you wish.

Now set HAXE_STD_PATH:

export HAXE_STD_PATH=/opt/haxe/std

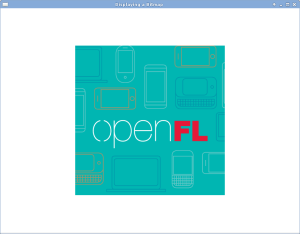
After that you should be able to create and run a demo:

openfl create DisplayingABitmap
cd DisplayingABitmap
openfl test linux
openfl test flash
Success!

Success!

Android

Next, try to set up OpenFL’s Android support:

openfl setup android

That script will pull down the Android NDK, SDK, Apache Ant, and Java, but if you already have all that installed simply say no to each download request and enter the path manually.  You can then try to build a sample:

openfl create DisplayingABitmap
cd DisplayingABitmap
openfl test android

If you’re using a recent 64 bit android NDK, that will fail with a root cause of not finding g++:

sh: arm-linux-androideabi-g++: command not found

To begin with, in your haxelib directory, edit build-tool/BuildTool.hx. Specifically, the Linux parameter by line 1355 in the Android block should be altered from just the value linux-x86 to the following:

m64 ? "linux-x86_64" : "linux-x86"

The block will then look like:

      else if (defines.exists("android"))
      {
         defines.set("toolchain","android");
         defines.set("android","android");
         defines.set("BINDIR","Android");
         if (!defines.exists("ANDROID_HOST"))
         {
            if ( (new EReg("mac","i")).match(os) )
               defines.set("ANDROID_HOST","darwin-x86");
            else if ( (new EReg("window","i")).match(os) )
               defines.set("ANDROID_HOST","windows");
            else if ( (new EReg("linux","i")).match(os) )
              defines.set("ANDROID_HOST",
                          m64 ? "linux-x86_64" : "linux-x86");
            else
               throw "Unknown android host:" + os;
         }
      }

That last ANDROID_HOST setting is what matters; as shipped, it does not point to the 64 bit toolchain correctly.

Then in build-tool/android-toolchain.xml, edit the toolchain version to 4.6. Edit line 7 setting TOOLCHAIN_VERSION as follows:

<set name="TOOLCHAIN_VERSION" value="4.6" unless="TOOLCHAIN_VERSION" />

In build-tool/ then run:

haxe Compile.hxml

OpenFL, specifically openfl-tools, defaults to Android API 8. If you have that installed, you should then be able to build the OpenFL samples for Android. You will though need to stipulate 64 bit hxcpp:

openfl test -DHXCPP_M64 android

To change the target Android API, in your haxelib directory edit openfl-native/1,0,6/templates/android/template/build.xml and change the target property on line 7, e.g., from:

  <property name="target" value="android-::ANDROID_TARGET_SDK_VERSION::"/>

To:

  <property name="target" value="android-16"/>

OpenFL should then build, push, and run the target on your phone using this API version, stipulating the 64 bit toolchain as above. Hooray!

Success on my S3!

Success on my S3!